Learn the steps to install KVM – Kernel-based virtual machine on Ubuntu 22.04 Jammy JellyFish or Ubuntu 20.04 Focal Fossa using the command terminal. KVM or kernel-based virtual machine is one of the most popular technologies used for VPS virtualization today. Up to 94 percent of server managers use KVM in their virtualization.
Most of the time when we need to run a virtual machine on our existing PC or computer, we go for either VirtualBox or Vmware Player. However, both are Type- 2 hypervisors without direct access to hardware. However, KVM runs at almost native speed like any other host operating system with direct hardware access because it is a virtualization technique integrated into the Kernel of Linux systems.
That’s the reason we don’t have KVM on Windows machines. With the Linux server kernel, KVM can have better performance and capacity upgrade capabilities (scalability). When there is a traffic spike, the server can remain stable. Well, this is nothing more than a normal Linux such as Ubuntu, etc. on which the hypervisor is installed. For this reason, some believe that KVM belongs to type 2, however, we still can argue about this.
Hence, in short- KVM/QEMU is a Linux-based open-source hypervisor for virtualizing Linux/Windows and other operating systems. The kernel-based virtual machine is implemented as a loadable kernel module that turns the Linux kernel into a bare-metal hypervisor.
Steps to install KVM on Ubuntu 22.04 | 20.04 LTS
For the installation of KVM, we only need a Linux – here in this article we have Ubuntu in the server version – and a processor with intel-v/VT-x or AMD-v support. All new processors have this instruction set extension. Only the small, like the Atom from Intel, or very old processors can lack the feature. Hence, if you are using Linux Mint, Debian, POP OS, Elementary OS, or any other similar Linux, you can follow this tutorial for them as well.
1. Requirements
• Ubuntu Linux
• Virtualization support in CPU
• A non-root user with sudo rights
• Active Internet Connection
2. Apt Update Command
Use Apt package manager to initiate the system update command that will refresh the repository cache and update the already installed packages of our Ubuntu system.
sudo apt update && sudo apt upgrade
3. Check Virtualization support
Before going further for the installation of KVM, let’s first check whether the CPU virtualization feature is enabled in the system BIOS or not.
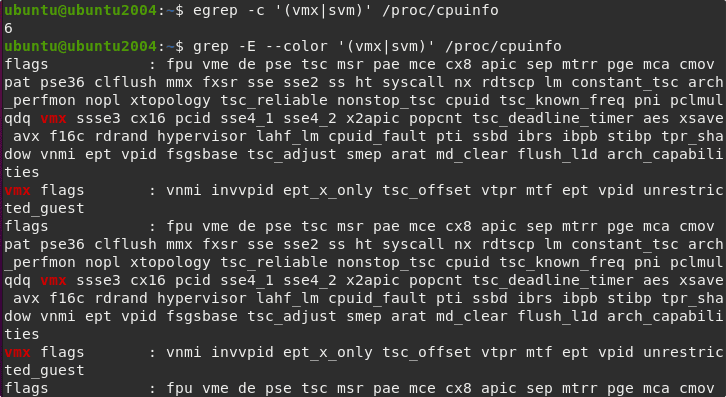
egrep -c '(vmx|svm)' /proc/cpuinfo
grep -E --color '(vmx|svm)' /proc/cpuinfo
As you run the above commands to confirm whether virtualization is enabled or not, the output will be more than zero. And if not then first you have to reboot your system and enter system BIOS. Enable the virtualization and then boot to OS where again the run the above command to confirm the same.
The first command output will be greater than zero, this means it could be 1, 2, 6, or 8. Hence, the system supports virtualization.
Using the second command you will get information about your CPU- whether it is Intel or AMD. If the red color output text is VMX then it is Intel whereas SVM means AMD.
4. Install QEMU / KVM & Libvirt on Ubuntu 22.04 | 20.04
Well, once you have confirmed that the server or PC supports virtualization we can use the APT package manager to install KVM, easily. The best thing we don’t need to add any third-party repository to our Linux. Being an inbuilt feature of Linux, we can easily install it.
sudo apt install qemu-kvm libvirt-clients libvirt-daemon-system bridge-utils virtinst libvirt-daemon
Start & Enable KVM service:
sudo systemctl enable --now libvirtd
That’s it KVM is on your Ubuntu 22.04 or 20.04 servers…
5. Install Virt-Manager GUI for KVM
If you are using Graphical Ubuntu Desktop then we can use a tool called Virt-Manager developed by RedHat to easily create, manage and run virtual machines using KVM but graphically.
sudo apt install virt-manager -y
6. Run KVM Virt-Manager on Ubuntu 22.04 | 20.04
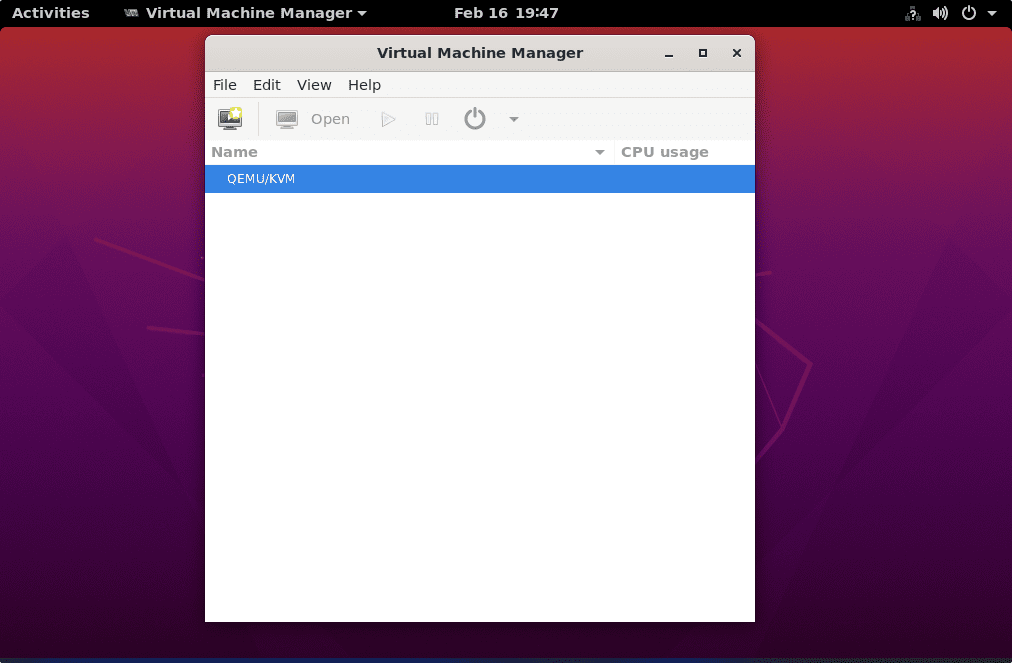
Go to the Application launcher and search for “Virtual machine manager” (VVM) and run it. Before it opens, the system will ask to provide the root password. This will allow it to create and manage virtual machines.
7. Create Virtual Machines:
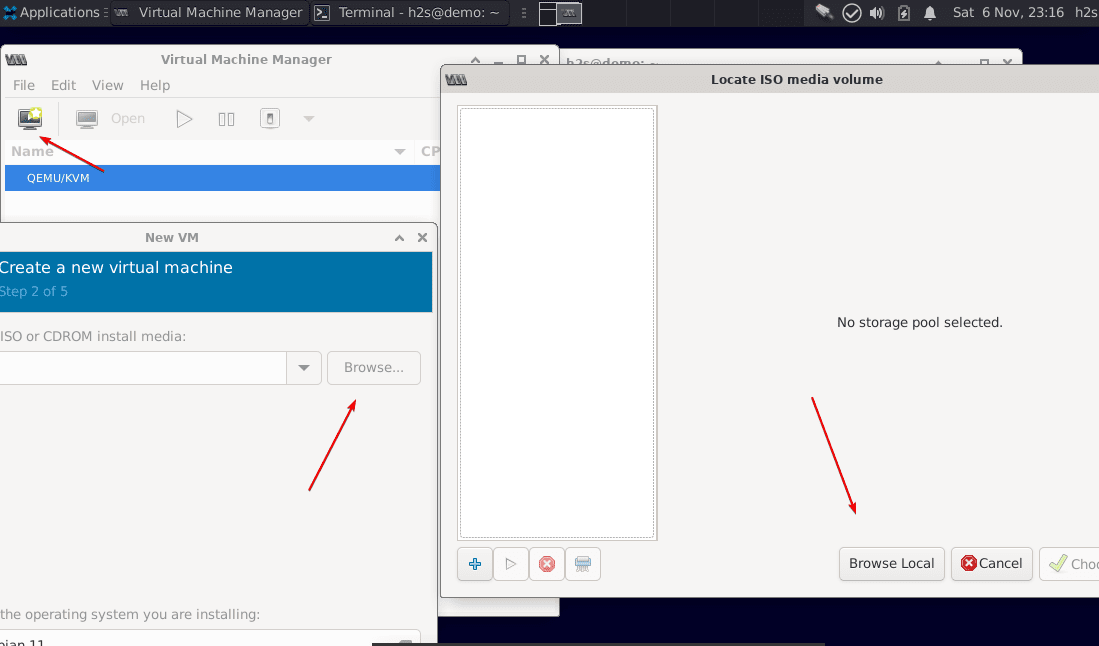
Click on the PC icon to create a new virtual machine on Virt-Manager using KVM.
8. Locate ISO Media Volume
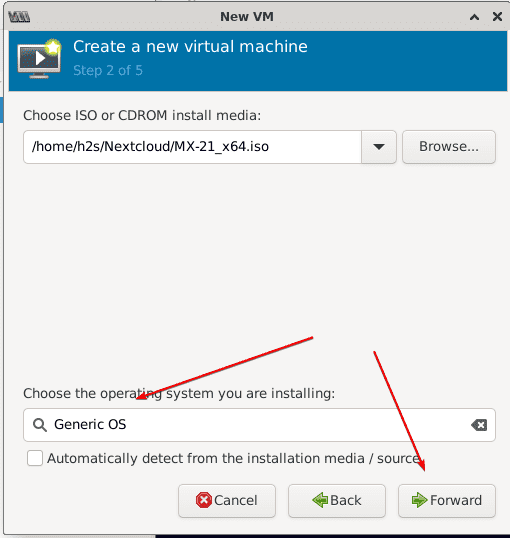
Click on the Browse button and then locate the ISO file you want to use for installing an operating system on your virtual machine as a guest OS.
After that uncheck the box given for “Automatically detect from the installation media/source” and then click on the Forward button.
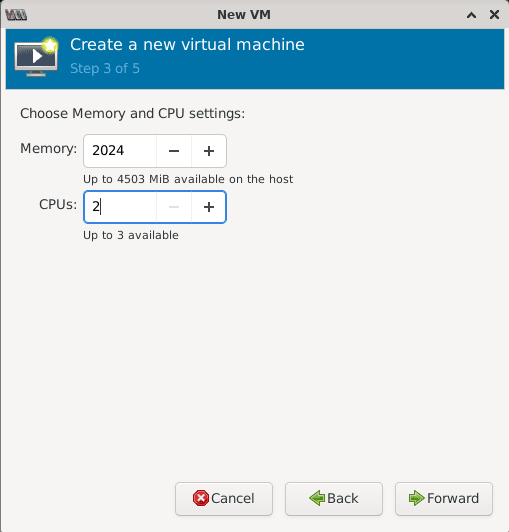
9. Choose Memory and CPU Settings
Set the amount of virtual memory you want to assign to the VM and then the number of CPU cores.
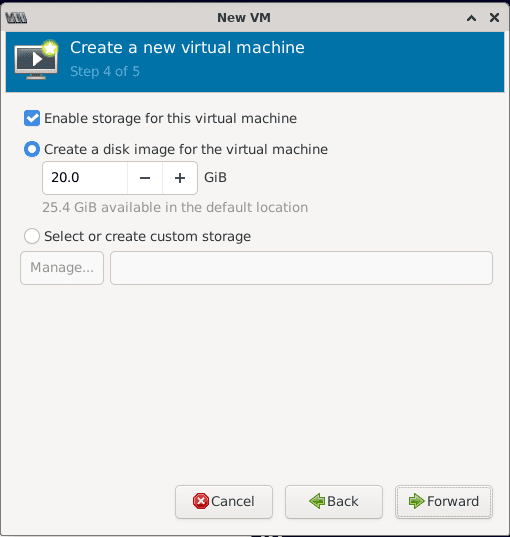
10. Create Qemu Virtual Disk Image
To install VM guest OS, we need some storage space and for that, we have to create a disk image file. Just enter the amount of hard disk space you want to assign and move forward.
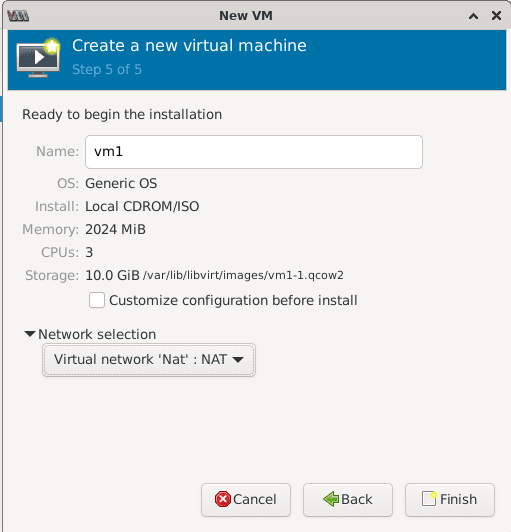
11. Network- KVM Ubuntu 22.04 | 20.04
Name your Virtual machine, here. Also, by default, the Virt-manager will use the NAT, however, you can select the Bridge interface either the default one i.e vibr0, or the one you have created. If you don’t know about these settings let the default NAT be selected.
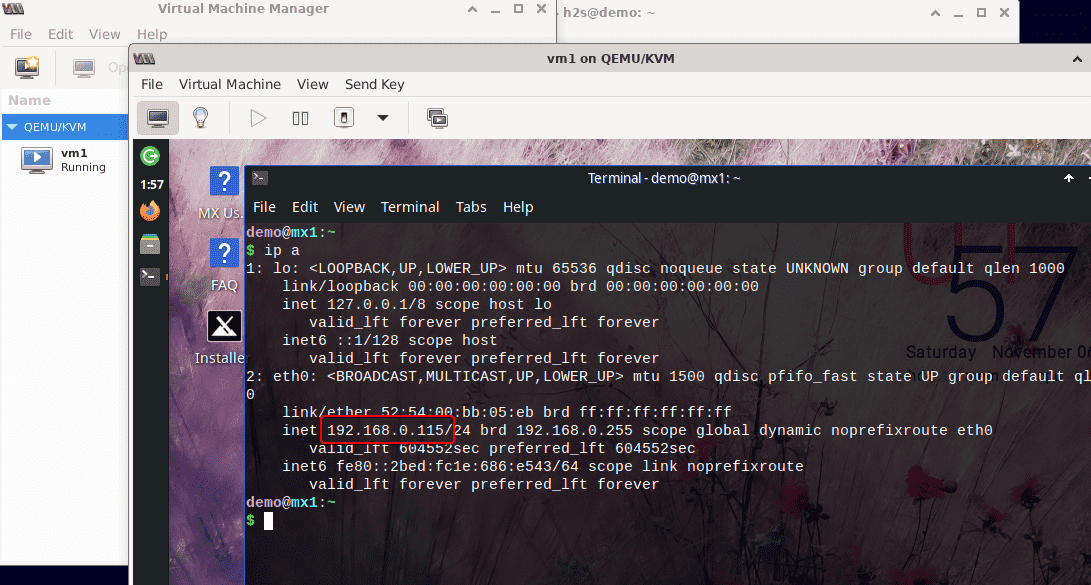
12. Qemu KVM Virtual Machine on Ubuntu 22.04 | 20.04
Finally, you will have a booted virtual machine that can be controlled just like any physical computer using a keyboard and mouse.
Other Articles:
• How to install and use Virt-Manager on Windows 10
• Install KVM and Virt-Manager on Rocky Linux 8
• Try out GUI Linux distro on a free online virtual machine


sudo apt update && sudo apt update
is it possible to build a sufficiently reliable cluster based on qemu/kvm?..
…yes and thank you for your business advice…