MySQL doesn’t need any introduction, it has been around for years and widely used open-source Database management system. Here we learn how to install MySQL server and client on Debian 11 Bullseye.
Well, just like Debian 10 Buster, the 11 Bullseye also got the MariaDB as the default MySQL variant to install. Yes, you won’t be able to install Oracle MySQL using the default repository of Debian 11. Well, being a fork of MySQL, MariaDB is also a stable database that works similarly. And compatible with all applications that require MYSQL.
Nevertheless, still, those who want Oracle’s MySQL and only its features can add its repository manually using this tutorial to get it.
Steps to install Oracle MySQL on Debian 11 Bullsyeye
The given steps in this tutorial can be used for Debian 10 Buster as well as other similar Linux systems.
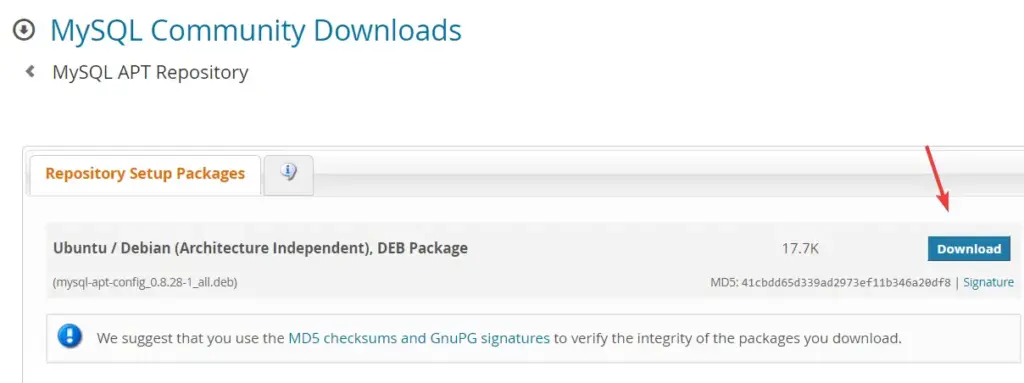
1. Download MySQL repository Debian package
Configuration of MySQL repository on Debian and its based systems is very easy. Just go to its official community download page and there you will get the latest Apt repository in the deb binary form to download.
Alternatively, you can also use the given commands instead.
sudo apt install wget -y
wget https://dev.mysql.com/get/mysql-apt-config_0.8.28-1_all.deb

2. Add MySQL APT repository
Once you have the MySQL repo on your Debian 11 system in the form of a binary package, let’s install the same using the APT package manager.
sudo dpkg -i mysql-apt-config_*_all.deb
You will get an option to select what you want to add via the repository. Use the Arrow key, select MySQL Server & Cluster, then press the TAB button to select OK and hit the Enter key.

Select the available version of MySQL Server, here in our case, it was MySQL-8.0. After that use the TAB to select OK and hit the Enter key.

Again Select OK and then use the TAB to move to OK and hit the Enter key.

This will automatically configure the latest Debian repository of the Database on your Debian 11 server.
—————————————- Use only if you get a GPG key error-—————————————
Extra info: In the future, if you want to add any additional tools using its repository or want to reconfigure it run:
sudo dpkg-reconfigure mysql-apt-config
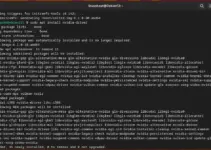
If you see the following error:
Setting up mysql-apt-config (0.8.24-1) ...
Warning: apt-key should not be used in scripts (called from postinst maintainerscript of the package mysql-apt-config)
Warning: apt-key is deprecated. Manage keyring files in trusted.gpg.d instead (see apt-key(8)).
OK
Then import the GPG key manually, here is the way.
nano mysql_pubkey.ascCopy and Add the following lines:
-----BEGIN PGP PUBLIC KEY BLOCK-----
Version: SKS 1.1.6
Comment: Hostname: pgp.mit.edu
mQINBGG4urcBEACrbsRa7tSSyxSfFkB+KXSbNM9rxYqoB78u107skReefq4/+Y72TpDvlDZL
mdv/lK0IpLa3bnvsM9IE1trNLrfi+JES62kaQ6hePPgn2RqxyIirt2seSi3Z3n3jlEg+mSdh
AvW+b+hFnqxo+TY0U+RBwDi4oO0YzHefkYPSmNPdlxRPQBMv4GPTNfxERx6XvVSPcL1+jQ4R
2cQFBryNhidBFIkoCOszjWhm+WnbURsLheBp757lqEyrpCufz77zlq2gEi+wtPHItfqsx3rz
xSRqatztMGYZpNUHNBJkr13npZtGW+kdN/xu980QLZxN+bZ88pNoOuzD6dKcpMJ0LkdUmTx5
z9ewiFiFbUDzZ7PECOm2g3veJrwr79CXDLE1+39Hr8rDM2kDhSr9tAlPTnHVDcaYIGgSNIBc
YfLmt91133klHQHBIdWCNVtWJjq5YcLQJ9TxG9GQzgABPrm6NDd1t9j7w1L7uwBvMB1wgpir
RTPVfnUSCd+025PEF+wTcBhfnzLtFj5xD7mNsmDmeHkF/sDfNOfAzTE1v2wq0ndYU60xbL6/
yl/Nipyr7WiQjCG0m3WfkjjVDTfs7/DXUqHFDOu4WMF9v+oqwpJXmAeGhQTWZC/QhWtrjrNJ
AgwKpp263gDSdW70ekhRzsok1HJwX1SfxHJYCMFs2aH6ppzNsQARAQABtDZNeVNRTCBSZWxl
YXNlIEVuZ2luZWVyaW5nIDxteXNxbC1idWlsZEBvc3Mub3JhY2xlLmNvbT6JAlQEEwEIAD4W
IQSFm+jXxYb1OEMLGcJGe5QtOnm9KQUCYbi6twIbAwUJA8JnAAULCQgHAgYVCgkICwIEFgID
AQIeAQIXgAAKCRBGe5QtOnm9KUewD/992sS31WLGoUQ6NoL7qOB4CErkqXtMzpJAKKg2jtBG
G3rKE1/0VAg1D8AwEK4LcCO407wohnH0hNiUbeDck5x20pgS5SplQpuXX1K9vPzHeL/WNTb9
8S3H2Mzj4o9obED6Ey52tTupttMF8pC9TJ93LxbJlCHIKKwCA1cXud3GycRN72eqSqZfJGds
aeWLmFmHf6oee27d8XLoNjbyAxna/4jdWoTqmp8oT3bgv/TBco23NzqUSVPi+7ljS1hHvcJu
oJYqaztGrAEf/lWIGdfl/kLEh8IYx8OBNUojh9mzCDlwbs83CBqoUdlzLNDdwmzu34Aw7xK1
4RAVinGFCpo/7EWoX6weyB/zqevUIIE89UABTeFoGih/hx2jdQV/NQNthWTW0jH0hmPnajBV
AJPYwAuO82rx2pnZCxDATMn0elOkTue3PCmzHBF/GT6c65aQC4aojj0+Veh787QllQ9FrWbw
nTz+4fNzU/MBZtyLZ4JnsiWUs9eJ2V1g/A+RiIKu357Qgy1ytLqlgYiWfzHFlYjdtbPYKjDa
ScnvtY8VO2Rktm7XiV4zKFKiaWp+vuVYpR0/7Adgnlj5Jt9lQQGOr+Z2VYx8SvBcC+by3XAt
YkRHtX5u4MLlVS3gcoWfDiWwCpvqdK21EsXjQJxRr3dbSn0HaVj4FJZX0QQ7WZm6WLkCDQRh
uLq3ARAA6RYjqfC0YcLGKvHhoBnsX29vy9Wn1y2JYpEnPUIB8X0VOyz5/ALv4Hqtl4THkH+m
mMuhtndoq2BkCCk508jWBvKS1S+Bd2esB45BDDmIhuX3ozu9Xza4i1FsPnLkQ0uMZJv30ls2
pXFmskhYyzmo6aOmH2536LdtPSlXtywfNV1HEr69V/AHbrEzfoQkJ/qvPzELBOjfjwtDPDeP
iVgW9LhktzVzn/BjO7XlJxw4PGcxJG6VApsXmM3t2fPN9eIHDUq8ocbHdJ4en8/bJDXZd9eb
QoILUuCg46hE3p6nTXfnPwSRnIRnsgCzeAz4rxDR4/Gv1Xpzv5wqpL21XQi3nvZKlcv7J1IR
VdphK66De9GpVQVTqC102gqJUErdjGmxmyCA1OOORqEPfKTrXz5YUGsWwpH+4xCuNQP0qmre
Rw3ghrH8potIr0iOVXFic5vJfBTgtcuEB6E6ulAN+3jqBGTaBML0jxgj3Z5VC5HKVbpg2DbB
/wMrLwFHNAbzV5hj2Os5Zmva0ySP1YHB26pAW8dwB38GBaQvfZq3ezM4cRAo/iJ/GsVE98dZ
EBO+Ml+0KYj+ZG+vyxzo20sweun7ZKT+9qZM90f6cQ3zqX6IfXZHHmQJBNv73mcZWNhDQOHs
4wBoq+FGQWNqLU9xaZxdXw80r1viDAwOy13EUtcVbTkAEQEAAYkCPAQYAQgAJhYhBIWb6NfF
hvU4QwsZwkZ7lC06eb0pBQJhuLq3AhsMBQkDwmcAAAoJEEZ7lC06eb0pSi8P/iy+dNnxrtiE
Nn9vkkA7AmZ8RsvPXYVeDCDSsL7UfhbS77r2L1qTa2aB3gAZUDIOXln51lSxMeeLtOequLME
V2Xi5km70rdtnja5SmWfc9fyExunXnsOhg6UG872At5CGEZU0c2Nt/hlGtOR3xbt3O/Uwl+d
ErQPA4BUbW5K1T7OC6oPvtlKfF4bGZFloHgt2yE9YSNWZsTPe6XJSapemHZLPOxJLnhs3VBi
rWE31QS0bRl5AzlO/fg7ia65vQGMOCOTLpgChTbcZHtozeFqva4IeEgE4xN+6r8WtgSYeGGD
RmeMEVjPM9dzQObf+SvGd58u2z9f2agPK1H32c69RLoA0mHRe7Wkv4izeJUc5tumUY0e8Ojd
enZZjT3hjLh6tM+mrp2oWnQIoed4LxUw1dhMOj0rYXv6laLGJ1FsW5eSke7ohBLcfBBTKnMC
BohROHy2E63Wggfsdn3UYzfqZ8cfbXetkXuLS/OM3MXbiNjg+ElYzjgWrkayu7yLakZx+mx6
sHPIJYm2hzkniMG29d5mGl7ZT9emP9b+CfqGUxoXJkjs0gnDl44bwGJ0dmIBu3ajVAaHODXy
Y/zdDMGjskfEYbNXCAY2FRZSE58tgTvPKD++Kd2KGplMU2EIFT7JYfKhHAB5DGMkx92HUMid
sTSKHe+QnnnoFmu4gnmDU31i
=Xqbo
-----END PGP PUBLIC KEY BLOCK-----
Save the file by using Ctrl+X, type Y, and then hit the Enter key.
Now import the key:
gpg --dearmor mysql_pubkey.ascsudo cp mysql_pubkey.asc.gpg /etc/apt/trusted.gpg.d/sudo apt update———————————————— use only if you get error—————————————-
3. Refresh the Debian 11 Repository cache
Once you have added the repo, run the system update command to rebuild the cache. So that the system can recognize the packages available on your newly added repo.
sudo apt update
4. Command to install MySQL on Debian 11 Bullseye
Next, like for any regular package to install using the APT package manager install the MYSQL Database server as well.
sudo apt install mysql-server
Note: If you already have MariaDB on your system then first remove the same to avoid conflicts.

Enter the password that you want to use with the MySQL server and then select the Strong authentication method:

5. Start and Enable Database server service
Once the installation is completed, let’s start and enable the service of Oracle MySQL on Debian 11, so that it could start automatically with the system boot.
sudo systemctl enable --now mysql
To check its status:
systemctl status mysql

6. Secure your Database server
This is the extra step to make sure we take all necessary steps to make sure our database is secure enough to dodge any malicious attempt to access it by someone.
sudo mysql_secure_installation
Follow the text-based wizard to set a root password (if required), remove the demo database, disallow remote root login, and remove anonymous users.

That’s it, you are done!! To know further how to manage Database tables and users using a web interface, refer to our other tutorial- Install phpMyAdmin on Debian 11 Bullseye


Really good tutorial with good practices.
Improvements possibilities:
1) You should write the comment to remove MariaDB for those who already having it and
are stuck at this step (this was my case but i decided to keep it up instead of Mysql )
This make me on the way to understand WHY i get and error !
And so i decided to leave a comment to thank you ^^
2) You should put a copy option on the command line to increase comfort.
Thanks again for your work
gpg –dearmor mysql_pubkey.asc results in:
gpg: invalid armor header: mQINBGG4urcBEACrbsRa7tSSyxSfFkB+KXSbNM9rxYqoB78u107skReefq4/+Y72TpDvlDZL\n
use – wget https://dev.mysql.com/get/mysql-apt-config_0.8.28-1_all.deb
WT Well it seems that Debian is not a quality distro as ubuntu does this from the box. It is shameful that Debian that as old and common as Mysql is, it should just install out of the box. Without having to add a repo.