Learn the steps to install the Monit Monitoring system on Ubuntu 22.04 LTS Jammy JellyFish to monitor a server or desktop using its GUI web interface.
Monit is an open-source tool to quickly set up a monitoring system on Linux OS. The process of setting it up is easy and can provide information about server services along with basics like CPU usage, disk usage, and more. If the monitoring server service fails, it can be restarted automatically. In the event of problems, one or more recipients will be informed by email.
Originally intended for a single server, M / Monit also offers a commercial version that can monitor several servers at the same time (under one interface).
What can we monitor using Monit?
We can monitor multiple things using Monit such as Processes, resources such as overall CPU usage, Memory, and Load Average; server or machine uptime, various server applications, network connections to various network services; hard disk or a filesystem; monitor files for changes such as md5 or sha1 checksum of files, timestamp, size change, and more including folder changes.
Installing M/Monit monitoring on Ubuntu 22.04 Linux
1. Update Ubuntu 22.04
Let’s run the system update command on our Ubuntu 22.04 system to install the latest updates. This will also rebuild the APT package manager cache.
sudo apt update && sudo apt upgrade2 Install Monit on Ubuntu 22.04
After running the system update command, let’s install Monit Monitoring on Ubuntu 22.04 because it is available to install through the default system repository. Hence, no need to look for some third-party repository for future updates.
sudo apt-get install monit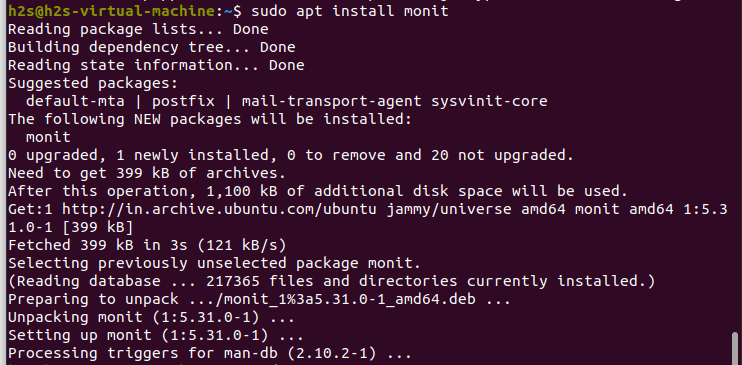
3. Check service Status & Verison of Monit
Once the installation is completed, let’s first check whether its service is running without any error in the background.
sudo systemctl status monit --no-pager -l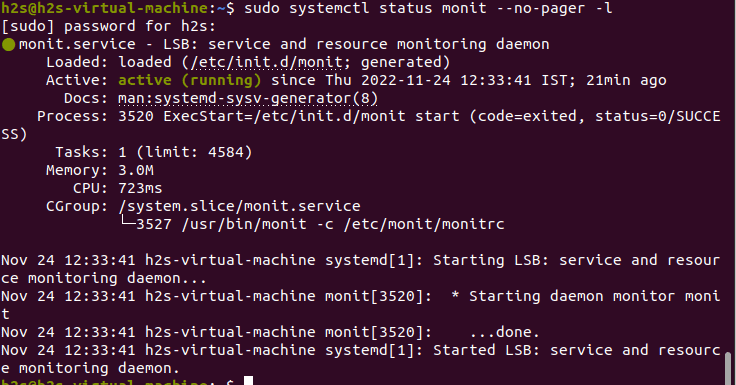
If it is not running, start it using:
sudo systemctl start monitTo check the version:
sudo monit --version4. Configuration File
The Monit program can be configured using the /etc/monit/monitrc file. There are numerous sample settings, some of which are commented out, which are self-explanatory, or whose comments contain help texts. We recommend that you do not make your own settings directly in this file. It is better to create a new one – sudo nano /etc/monit/conf.d/ for the desired settings.
5. Enable m/Monit httpd port on Ubuntu
By default, port 2812 to communicate Monit will be disabled and has to be enabled by editing its configuration file.
sudo nano /etc/monit/monitrcFind the line: set httpd port 2812
There remove the # tag for the following lines. Also, replace the allow and use address value from localhost to 0.0.0.0 if you want to access the Monit web interface remotely as shown in the screenshot.
You can also change the default password for the admin that is monit.
set httpd port 2812 and
use address 0.0.0.0 # only accept connection from localhost (drop if you use M/M>
allow 0.0.0.0/0 # allow localhost to connect to the server and
allow admin:monit # require user 'admin' with password 'monit'
Save the file by pressing Ctrl+X and then type – Y and hit the Enter key.

6. Check and load
To check configuration files are without any errors use the following command:
sudo monit -t

# If there are no errors, you will receive the following feedback:

# Control file syntax OK
7. Enable Monit service on Linux
By default it would not be enabled, thus to do that, run the command to enable the Monit service to get started automatically with the system boot.
sudo /lib/systemd/systemd-sysv-install enable monitRestart it once
sudo systemctl restart monit8. Check Status
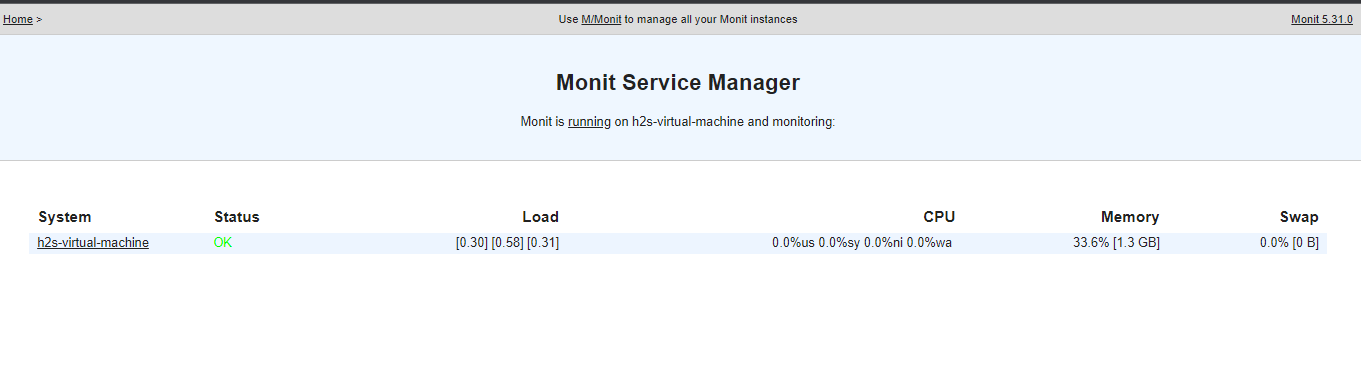
To know everything is working fine run-
sudo monit status
9. Allow Monit port in Ubuntu 22.04 firewall
To access the Monit web interface outside your local host, allow its port or service in the firewall to access the public network.
sudo ufw allow 281210. Access Web Interface
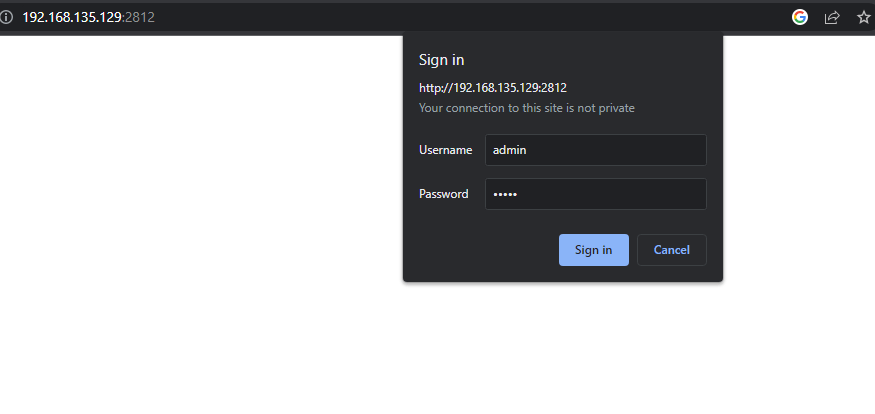
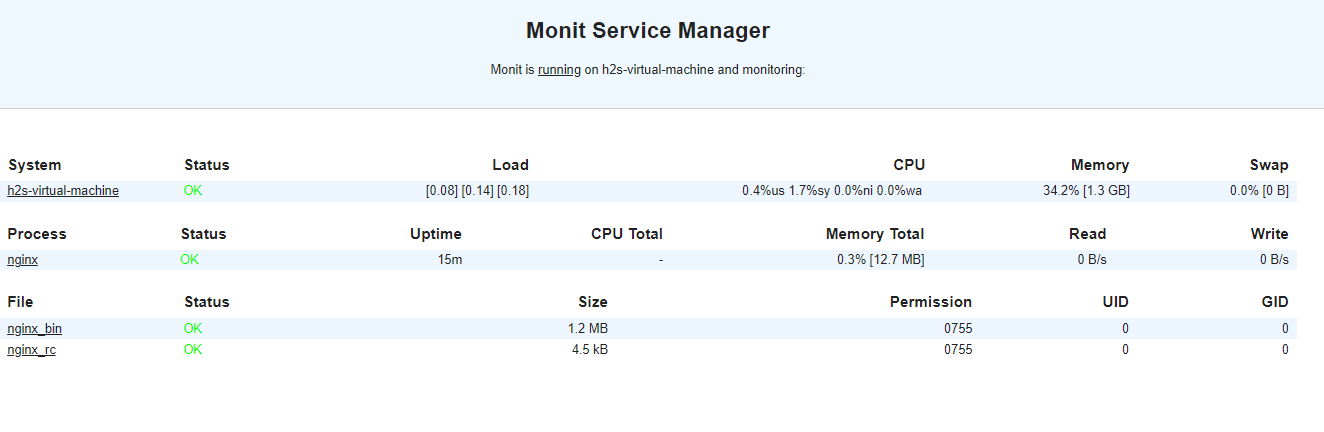
Open a browser on the local or remote system that can access the Ip-address of the server/pc where the Monit Monitor system has been installed. And point it to http://your-server-ip-address:2812
Enter username and password.
11. Add services to Monitor in Monit
You can either create a service file for an application to get monitored or can use the pre-configured ones available in the M/Monit folder.
In the /etc/monit/conf-available/ there are several ready-made files for various common server services such as:
acpid, at, mdadm, mysql, openntpd, pdns-recursor, rsyslog, snmpd,
apache2, cron, memcached, nginx, openssh-server, postfix and smartmontools.
In order for Monit to take over the settings for the desired service, a soft link to the service file must be created and activated in the /etc/monit/conf-enabled/.
For example:
We want to monitor Nginx using its pre-configured file. Thus for that-
Syntax:
sudo ln -s /etc/monit/conf-available/service-file /etc/monit/conf-enabled/example for Nginx:
sudo ln -s /etc/monit/conf-available/nginx /etc/monit/conf-enabled/To make the changes effective Monit daemon needs to be reloaded.
sudo monit reloadIn the same way, we can enable other services.
Manually Add Service
Now, if you want to add some service manually, then you have to create a file for the same. For example, you want to detect all information about your system hardware using sensors.
sudo apt install lm-sensors sudo nano /etc/monit/conf-available/sensorsAdd:
check program sensors with path /usr/bin/sensors
if status != 0 then alert
Save the file: Ctrl+X, Y, and hit the Enter Key.
Enable it:
sudo ln -s /etc/monit/conf-available/sensors /etc/monit/conf-enabled/Reload Monit:
sudo monit reloadConclusion:
In this way, we can monitor our system using the lightweight M/Monit tool on Ubuntu 22.04 Linux. To know more about it see the official documentation.
Other Articles:
⇒ 7 Best Gnome system monitor alternative Linux applications
⇒ 5 Best Htop alternatives to monitor Linux systems
⇒ 4 Ways to Check MySQL or MariaDB version on Linux
⇒ How to install Conky System Monitor on Ubuntu


if status != 0:
then alert
this error:
Traceback (most recent call last):
File “”, line 2
then alert
^^^^^
SyntaxError: invalid syntax