Learn the steps to install KVM on Ubuntu 20.04 LTS Server Focal Fossa to easily create a virtual machine using a command line or graphical user interface called Virt-manager.
KVM, Kernel-based Virtual Machine is a virtualization technique for Linux on x86 hardware. It was presented to the public in October 2006. Since version 2.6.20 of the Linux kernel, the kernel module of KVM is already included in Linux. KVM is developed by the Israeli company Qumranet. The company was acquired by the American Linux distributor Red Hat in September 2008. Since Ubuntu 8.04, KVM has been Ubuntu’s officially supported (and preferred in the server space) virtualization solution.
Kernel Virtual Machine (KVM) is a default virtualization system for Linux. It is mainly used for server virtualization, i.e. whenever several Linux server distributions have to be run on a single physical computer.
KVM finds its biggest supporter in Red Hat. Its distribution Red Hat Enterprise Linux has relied fully on KVM for virtualization since version 6, which replaces Xen. In addition, Red Hat also offers special virtualization systems and thus competes directly with VMware with KVM. But it doesn’t have to be Red Hat Enterprise Linux: Almost every popular Linux distribution is suitable for trying out and getting to know KVM including Ubuntu.
Steps to install KVM on Ubuntu 20.04 LTS Server
Estimated reading time: 13 minutes
Install KVM on Ubuntu 20.04 Server to use it remotely using the GUI interface of Virt-Manager – VMM (Virtual machine manager).
Although we have performed the steps of this tutorial on the Ubuntu 20.04 LTS server, it will be the same for Ubuntu Desktops and other Linux distributions based on it such as Linux Mint, POP OS, and others.
1. Update Ubuntu 20.04 Server
The first step we have to follow is running of system update command that will ensure all the packages on Ubuntu 20.04 are up to date so that we wouldn’t have any compatibility issues while installing programs on the server.
sudo apt update && sudo apt upgrade2. Check intel-v/VT-x or AMD-v support
Before going further for the installation of KVM, let’s first check whether the CPU virtualization feature is enabled in the system BIOS or not.
egrep -c '(vmx|svm)' /proc/cpuinfo
As you run the above commands to confirm whether virtualization is enabled or not, the output will be more than zero. And if not then first you have to reboot your system and enter system BIOS. Enable the virtualization and then boot to OS where again the run the above command to confirm the same.
The first command output will be greater than zero, this means it could be 1, 2, 6, or 8. Hence, the system supports virtualization.
Using this second command you will get information about your CPU- whether it is Intel or AMD. If the red color output text is VMX then it is Intel whereas SVM means AMD.
grep -E --color '(vmx|svm)' /proc/cpuinfo

3. Install KVM on Ubuntu 20.04 LTS
After following the above steps and confirming that your current Ubuntu 20.04 LTS Server system supports Virtualization, run the given command to install KVM. The packages to set this virtualization platform are available using the official repository and APT package manager.
sudo apt install qemu-system-x86 qemu-system libvirt-clients libvirt-daemon-system uml-utilities screen bridge-utils virtinst libvirt-daemon openssh-server4. Check libvirtd service status
Once the installation is completed to confirm, the KVM is running in the background as a service, we can use the given command:
sudo systemctl status libvirtdIf the service is not active then use:
sudo systemctl enable --now libvirtd5. Install Virt- Manager on a local Linux desktop
After confirming the service of Libvirt is running successfully, we have two ways to create a virtual machine on Ubuntu 20.04 Server. One is using the command line and the other with the help of a GUI app called Virt-Manager on some remote Linux system.
Let’s say you have a Linux GUI Desktop system that you want to use to create and access the KVM virtual machine running on Ubuntu 20.04 command line server. So, first for that on your local system install the Virt-Manager.
If you are using Ubuntu or Debian then run:
sudo apt install virt-manager
Whereas RedHat-based systems such as Oracle Linux, Fedora Rocky, CentOS, and Almalinux can use:
sudo yum install virt-manager
6. Create a Public key
For using the Virt-manager to connect a remote Ubuntu 20.04 Server running with KVM over SSH, we need to generate a public and private key that we can use to authenticate and let our remote KVM server knows that the local system is trustable.
On your local Linux desktop run:
ssh-keygen
When it asks for “Enter file in which to save the key” simply press the Enter key on your keyboard. Whereas for “Enter passphrase” you can set some password if you want to add an extra layer of security while logging the remote KVM Ubuntu 20.04 server over SSH.

Once the public key is generated, the next step is to copy it to the Ubuntu 20.04 Server where we have our KVM. For that use any of the given commands:
ssh-copy-id username@remote_host
or
cat ~/.ssh/id_rsa.pub | ssh username@remote_host "mkdir -p ~/.ssh && touch ~/.ssh/authorized_keys && chmod -R go= ~/.ssh && cat >> ~/.ssh/authorized_keys"
Note: Replace the username with the user of your Ubuntu 20.04 Server and remote_host with the Ip-address of it.
For example:
ssh-copy-id [email protected]

7. Connect Remote Ubuntu 20.04 KVM server
Once you have successfully copied the public to your remote or local Ubuntu 20.04 server where the KVM is running, let’s create a Virtual machine using Virt-Manager.
Run your Virt-Manager and click on the File Menu option.
From the drop-down select Add Connection.

Check the “Connect to a remote host over SSH“
Enter your remote Ubuntu 20.04 KVM server username and ip-address. And click on the Connect button.

8. Create a Virtual machine using GUI -Remotely
Once you are connected to your Ubuntu 20.04 KVM server, it’s time to create a Virtual machine. Click on the computer icon and select the way you want to install the operating system. Here we are selecting the default Local Install Media.

Click on the Browse button to select the ISO files of an operating system that you want to install on your Virtual Machine running on the Ubuntu 20.04 KVM server.

Well, all the ISO files will list here reside under /var/lib/libvirt/images. Hence, make sure you have saved the ISO file on your Ubuntu server under this directory. We have saved an ISO of Slax Linux under – /var/lib/libvirt/images, hence that is showing. We are selecting the same and then clicking the Choose Volume button.

After selecting the ISO file, tell the KVM or Virt manager what type of Operating system you are about to install. Just type the name of the OS in the box given under “Choose the operating system you are installing“. If your Linux is not on the list, you can use the “Generic Linux 2020” option.

Choose Memory and CPU Settings
Set the amount of virtual memory you want to assign to the VM and then the number of CPU cores.

Create Qemu Virtual Disk Image
To install VM guest OS, we need some storage space and for that, we have to create a disk image file. Just enter the amount of hard disk space you want to assign and move forward.

Network- KVM Ubuntu
Name your Virtual machine, here. By default, the Virt-manager will use the NAT, however, you can select the Bridge interface, if you have created one. However, if you don’t know about these settings let the default NAT be selected.

Finally, you will have a booted virtual machine that can be controlled just like any physical computer using a keyboard and mouse.

9. Display of Remote VM Ubuntu 20.04
Eventually, you will have an easy-to-control display for your installed Virtual machine that is running on your remote Ubuntu 20.04 KVM LTS Server.

10. Virt-Install command to create VM
Those who want to use the command line interface of Ubuntu 20.04 where they have configured the KVM can use the below-given command format to create a new virtual machine:
For example:
sudo virt-install --name ubuntu-guest --os-variant ubuntu20.04 --vcpus 2 --ram 2048 --location /var/lib/libvirt/images/slax.iso --network bridge=virbr0,model=virtio --graphics none --extra-args='console=ttyS0,115200n8 serial'The virtual hard disk should be located in the /var/lib/libvirt/images folder. For this folder, there is an exception rule in the rules of the pre-installed AppArmor protection software, found in the file /etc/apparmor.d/usr.lib.libvirt.virt-aa-helper. Other folders always fail with.Permission denied
| Some basic options of virt-install | |
| Option | Explanation |
| -h, –help | Shows the help messages |
| -n NAME, –name=NAME | Guest instance name or virt-install domain name |
| -r MEMORY, –ram=MEMORY | Work spreicher |
| –vcpus=VCPUS | Number of virtual CPUs for the VM |
| -f DISKFILE, –file=DISKFILE | File name and path to use as a disk image |
| -s DISKSIZE, –file-size=DISKSIZE | Disk size (if not already created) in gigabytes |
| –import | does not recreate the disk image (record existing VM’s or backups) |
| -w NETWORK, –network=NETWORK | connects the guest to a virtual network, forwards to a physical AC adapter with NAT |
| –vnc | Use VNC as the graphical interface provider of the VM |
| –vncport=VNCPORT | defines the port for VNC |
11. Working with Running Virtual Machines
virsh is a tool for managing virtual machines on Xen, QEMU, KVM, LXC, Test, OpenVZ, VirtualBox, OpenNebula, or VMware ESX. You can create, delete, start, stop and manage a machine from the command line. Virsh is of interest to the advanced Linux administrator to realize simple script automatisms for virtualization.
Once you have a VM running, you can manage it in different ways with virsh, as long as you are connected to the hypervisor.
Starting the VM
virsh start your-vm-nameRestart the VM
virsh reboot your-vm-nameSwitching off the VM
virsh shutdown your-vm-namePause or freeze the VM
virsh suspend your-vm-nameUnpause a VM
virsh resume your-vm-nameList VM’s
virsh list --allDelete a VM
In order to delete a VM, you first have to destroy it in order to be able to unwrite it in libvirt.
virsh destroy your-vm-namevirsh undefine your-vm-name
FAQ
Yes, KVM is present in Ubuntu Linux, it has been supported by this Linux since its Ubuntu 8.04 version.
To know KVM – Kernel virtual machine is installed on your Ubuntu or not, open your terminal and either check the version or get complete package details:kvm --version
orsudo apt show qemu-system-x86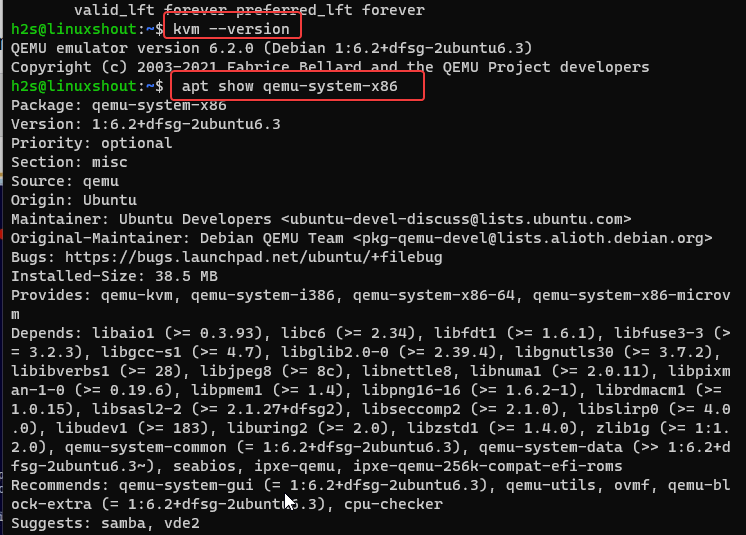
KVM is a type 1 hypervisor whereas VirtualBox is Type-2. Hence in terms of speed KVM is better than VirtualBox because it has been integrated into the Linux kernel as modules that can be enabled or disabled. This is the reason KVM is lightweight, however, when it comes to user-friendliness VirtualBox is the first choice over KVM by both beginners and advanced users.
Yes, there are multiple open source GUI platforms available to provide a Graphical user interface to manage KVM VMs, one of the best, is Virt-Manager.
Run the given command in your Ubuntu terminal:egrep -c '(vmx|svm)' /proc/cpuinfo
As you run the above commands to confirm whether virtualization is enabled or not, the output will be more than zero. And if not then first you have to reboot your system and enter system BIOS. Enable the virtualization and then boot to OS where again the run the above command to confirm the same.
In short, the output will be greater than zero, this means it could be 1, 2, 6, or 8. Hence, the system supports virtualization.
KVM – Kernel Virtual Machines is a Type – 1 Hypervisor. It is an open-source technology that turns the Linux kernel into a bare metal hypervisor.
Other Articles:
⇒ How to install KVM and Virt-Manager on Rocky Linux 8
⇒ Install QEMU/KVM on Ubuntu 22.04 or 20.04 Desktop
⇒ How to Install and Configure KVM on Debian 11 Bullseye Linux
⇒ How to install and use Virt-Manager on Windows 10


