Here we’ll see the commands to install Jenkins on RPM-based AlmaLinux and Rocky Linux for building and testing of applications.
What is Jenkins?
Jenkins ( fork of the Hudson) is a web-based open source continuous integration server system. It is written in Java and is platform-independent. The Jenkins base supports numerous tools including SVN, Ant, Maven, and JUnit. The community can add additional functions with the help of plugins. This means that Jenkins can be customized for each project. Also for projects with other languages / technologies such as B. PHP, Ruby or .NET Jenkins is suitable. Test tools can be integrated via plugins via the intuitive user interface.
It is a web application as well as administration, and the testing of the projects takes place entirely via the browser.
- Minimum hardware requirements:
- 256 MB of RAM
- 1 GB of drive space (10 GB is recommended to run Jenkins as a Docker container)
- Recommended hardware configuration:
- 4 GB+ of RAM
- 50 GB+ of drive space
Jenkins installation on AlmaLinux 8 or Rocky Linux
The steps given here are also applicable for other RPM-based Linux operating systems such as CentOS & RHEL 8.
Step 1: Install OpenJDK – JAVA
As Jenkins is written in Java, thus we need a Java development kit installed on our AlmaLinux or Rocky. Here will install the OpenJDK version that is available in the official repo of our Linux. You can go for an older version as well if you want.
Choose & install the one as per your choice:
For JAVA 11
sudo dnf install java-11-openjdk -y
And for older JAVA 8 use this command
sudo dnf install java-1.8.0-openjdk -y
Step 2: Add Jenkins RPM repo on AlmaLinux/Rocky
The next, thing is to add the source from where we will receive the Jenkins packages and updates to install. For that, we need to add the official RPM repo of Jenkins on our Linux using the below commands:
First, import and add the GPG key:
sudo rpm --import https://pkg.jenkins.io/redhat/jenkins.io.key
Next, add create the repository.
sudo tee /etc/yum.repos.d/jenkins.repo<<EOF

[jenkins]
name=Jenkins-stable
baseurl=http://pkg.jenkins.io/redhat-stable
gpgcheck=1

EOF
Press Enter key and provide your user password and the repo will be created.
Step 3: Refresh system repos
To integrate the newly added repository into the system refresh the repository cache.
sudo dnf makecache
Step 4: Command to install Jenkins on Almalinux or Rocky Linux
Finally, run the command that will install and set up the Jenkins server on our Redhat-based Linux operating systems.
sudo dnf install jenkins
Additional info: If you don’t want to use repo, then download the RPM package directly from Github.
To install the RPM package switch to the directory where you have downloaded the file and run the below command
sudo dnf install ./jenkins-*.noarch.rpm
Step 5: Start & enable Jenkins Service
To start the Jenkins service on Almalinux or Rocky and also enabling the same so that it could start automatically with system boot, follow the given command-
sudo systemctl enable --now jenkins
Step 6: Allow Jenkins port 8080 to access from a remote system
Although after installing and running this automation server services, we can access its web interface from a locally installed browser, however, if you are using a CLI server then we have to use a remote system browser to access it. For that, the ports must be opened in the AlmaLinux firewall.
sudo firewall-cmd --permanent --zone=public --add-port=8080/tcp
sudo firewall-cmd --reload
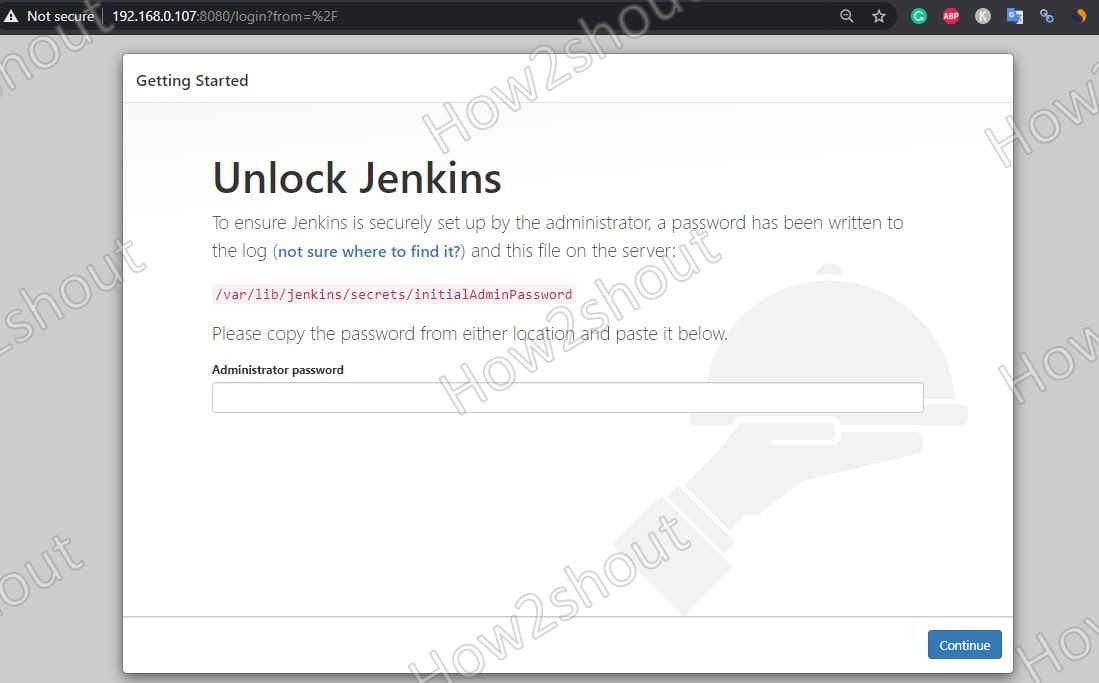
Step 7: Note Admin password
With the installation, Jenkins will create a password for the Admin user, to find that runt the below command and then copy the same.
sudo cat /var/lib/jenkins/secrets/initialAdminPassword
A password will be displayed, just copy and save it somewhere…
Step 7: Access Jenkins web interface
Now, open a browser either on your local system or on any other system that can access the IP address of the system where the Jenkins server has been installed.
In the browser URL address bar type- http://server-ip-address:8080
Enter the password and Continue.
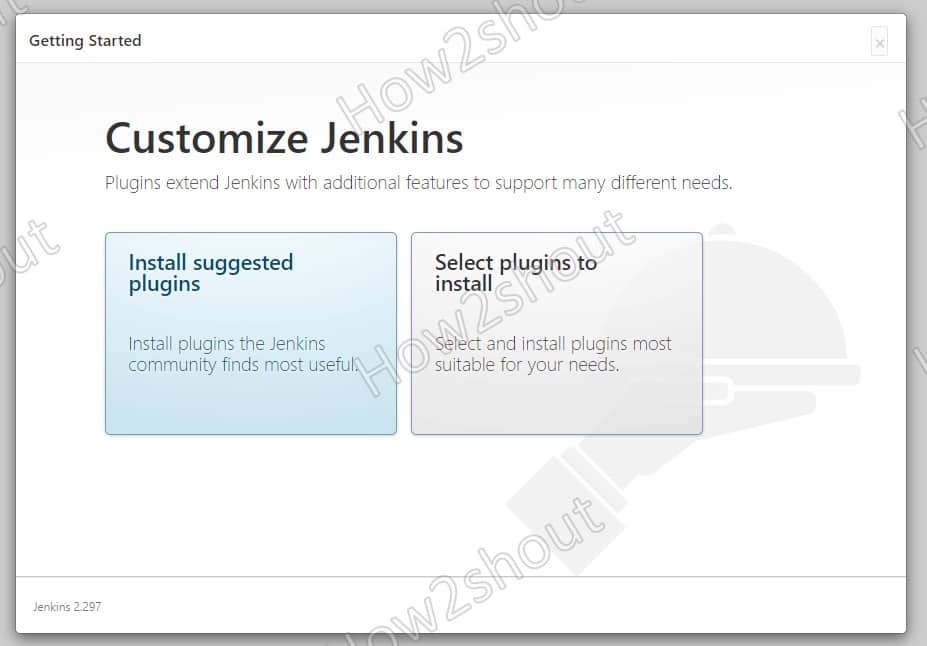
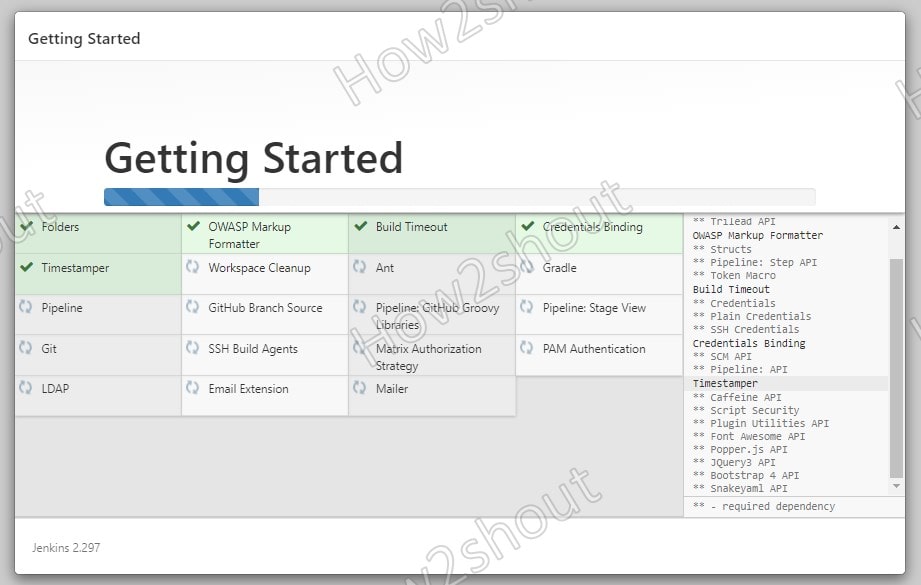
Step 8: Install Plugins
You will have two options to install Jenkins plugins to extend its features. It is recommended to go for the “Install Suggested Plugins” option, however, if you are already familiar with this open-source continuous integration server system then go for “Select Plugin to install“. Nevertheless, this is not a one-way route, you can even install or remove extensions later from the Jenkins web interface.
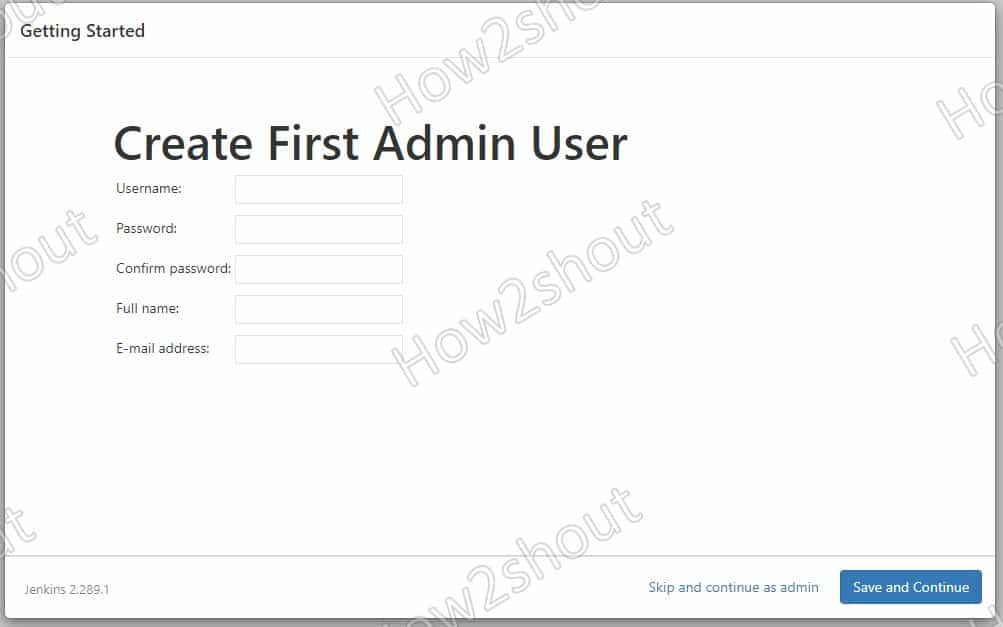
Step 9: Create First Admin User
Once you have configured the Plugins, create an Admin user account that will be used to login to Jenkins web interface later.
After that, the setup will provide a page for Instance Confgiratuon, where it will show the current URL to access the Jenkins. Just save and continue.
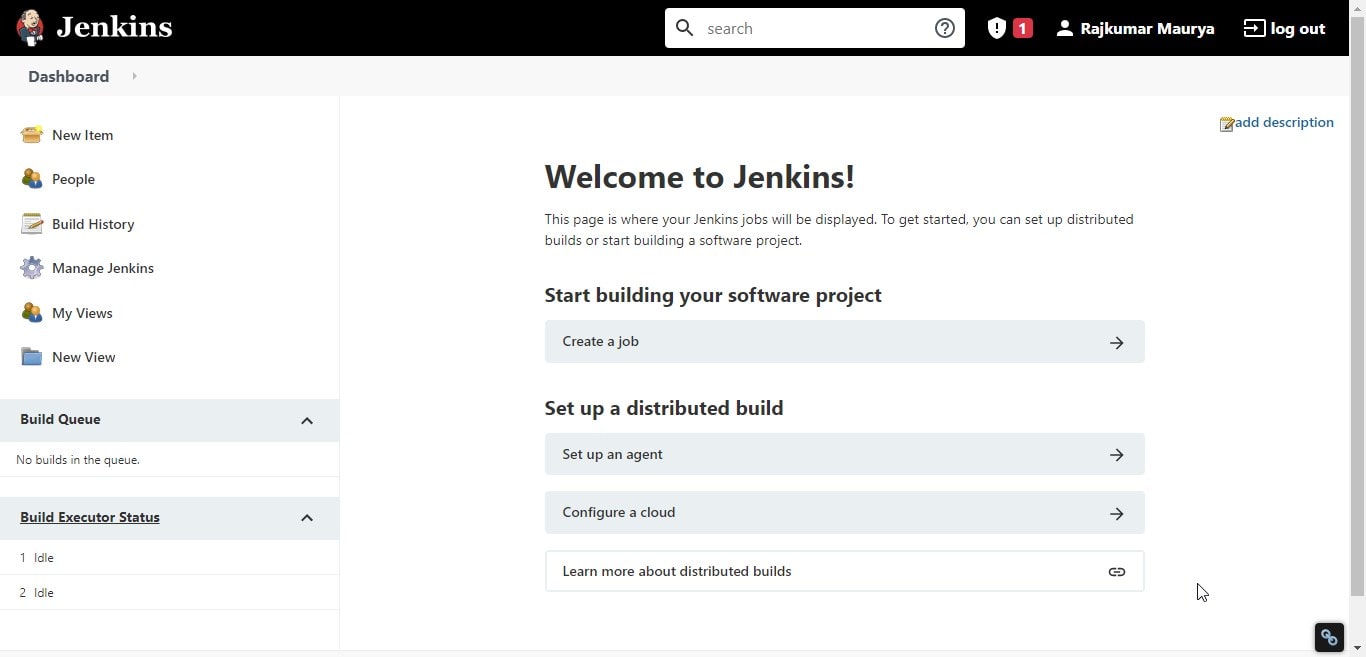
Step 10: Jenkins dashboard
Finally, you have run and configured Jenkins successfully on AlmaLinux or Rocky, now you can Create new Jobs to start testing applications.
Ending note:
So, this was a quick tutorial on installing and setting up Jenkins on AlmaLinux or Rocky 8. If you have faced any problem while following the above-given steps let’s know…
