When it comes to creating your own Medis server, the first name would be Kodi or Plex, however, these are not only out there. Jellyfin is another popular open-source project that lets us create quickly a modern media server with an interactive web user interface to manage videos, images, and music from any device.
We can browser media content using Jellyfin on various devices such as computers, apps on your Roku, Android, iOS (including AirPlay), Android TV, or Fire TV device, or via your Chromecast or existing Kodi. Whereas when it comes to installing the Jellyfin server platform it doesn’t limit to Linux only, we can set it up on machines running Microsoft Windows, macOS, or in a Docker container.
10 Best Free & Open source Home Media Server OS Software 2021
Jellyfin installation and setup on Ubuntu 20.04 LTS Linux
Here we will show the steps to not only installing the Jellyyfin media server on Ubuntu 21.04/20.04/19.04/18.04/16.04 but also how to configure it to access media content. The process will be the same for other similar Linux distros such as Linux Mint, Debian, Elementary, MX Linux, and more…
Step 1: Add Jellyfin GPG Key
Before adding the Jellyfin repository add its GPG key that will confirm the packages we are getting to install on our system are from the authentic source.
To get packages via a secure protocol, first enable its support using the below command:
sudo apt install apt-transport-https
Add key:
wget -O - https://repo.jellyfin.org/jellyfin_team.gpg.key | sudo apt-key add -
Step 2: Add Repository
Now, let’s add the Jellyfin repository as per the Debian or Ubuntu-based Linux system you are suing. This is a single command, thus you have to copy and paste it whole.
echo "deb [arch=$( dpkg --print-architecture )] https://repo.jellyfin.org/$( awk -F'=' '/^ID=/{ print $NF }' /etc/os-release ) $( awk -F'=' '/^VERSION_CODENAME=/{ print $NF }' /etc/os-release ) main" | sudo tee /etc/apt/sources.list.d/jellyfin.list
Step 3: Run system update
Rebuild the system’s repo cache, so that it could recognize the added repo and its corresponding packages to install on our system to set up the Jellyfin media server.
sudo apt update
Step 4: Command to install Jellyfin on Ubuntu 20.04/18.04
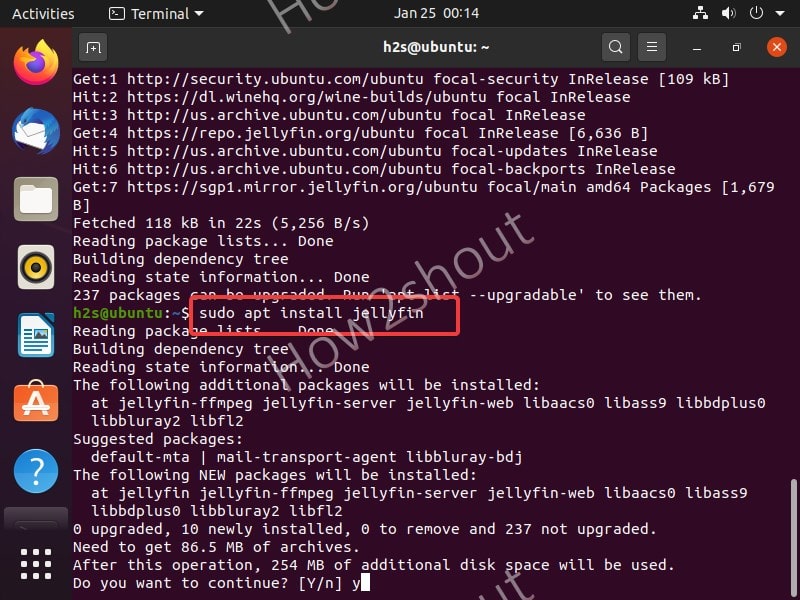
Finally, run the below command to automatically install Jellyfin on your Debian or Ubuntu-based Linux operating system you are using,
sudo apt install jellyfin
Step 5: Enable and Start Jellyfin Server
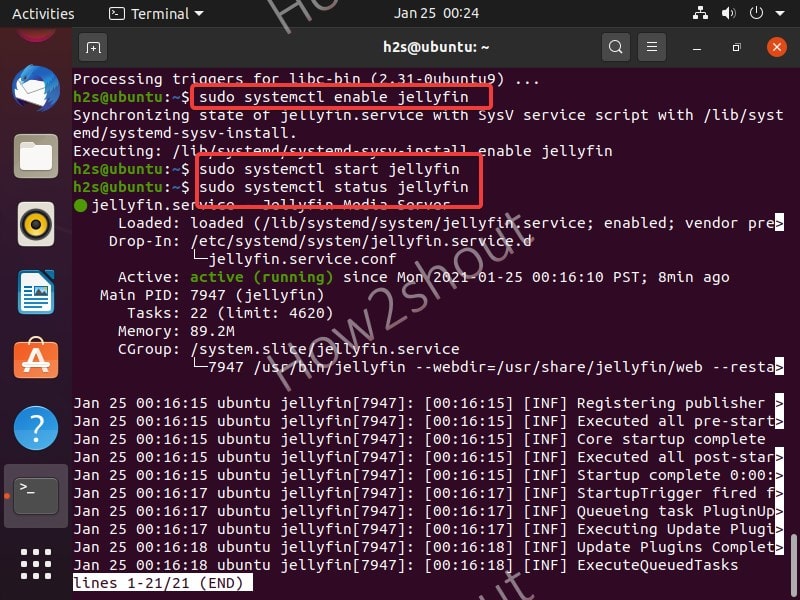
Once the installation is completed, let’s start the Jellyfin Media server service on Ubuntu or Debian and enable the same, so that it could automatically get started with system boot.
sudo systemctl enable jellyfin

sudo systemctl start jellyfin
You cal also check whether everything is running properly or not by using :
sudo systemctl status jellyfin
To exit simply press Ctrl + C.
Step 6: Setup and configure the Jellyfin media server
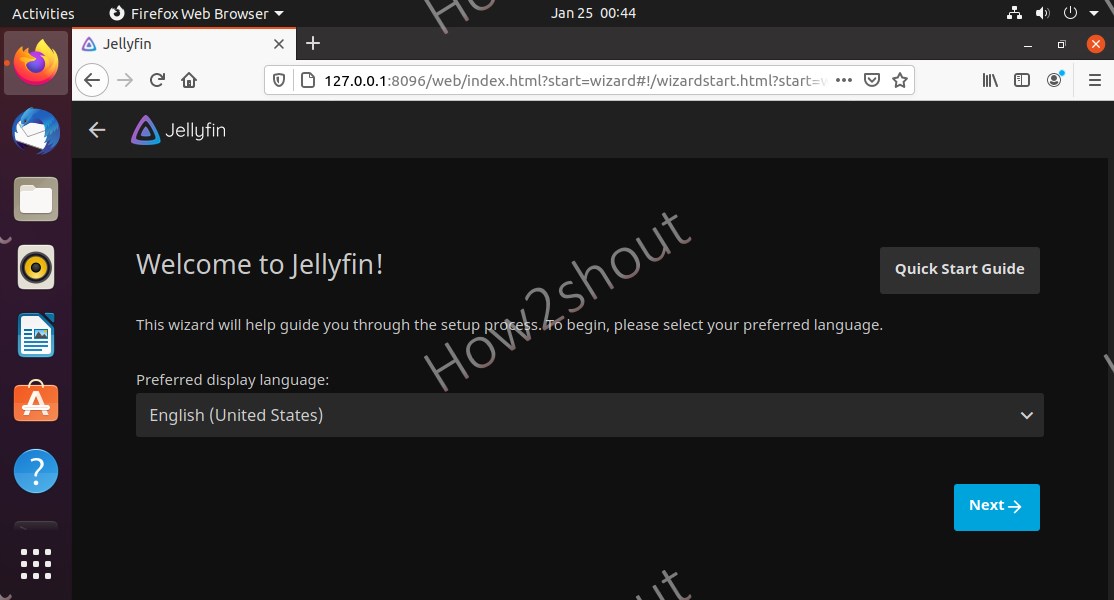
As everything is in position, our open-source media server is up and running, thus it is time to let’s access the Jellyfin web interface using the browser. If you are using a command-line server to set it up, then use some other local machine available to access the remote server where you have installed the Jellyfin.
In the browser, type the IP address of the server where Jellyfin has been installed along with port number 8096. Whereas if you are using the Jellyfin installed server in GUI with browser access then we can use localhost or 127.0.0.1.
Example:
127.0.0.1:8096
0r
ip-address:8096
Note: Replace the IP address with your server address.
You will get the welcome screen to set up Jellyfin further.
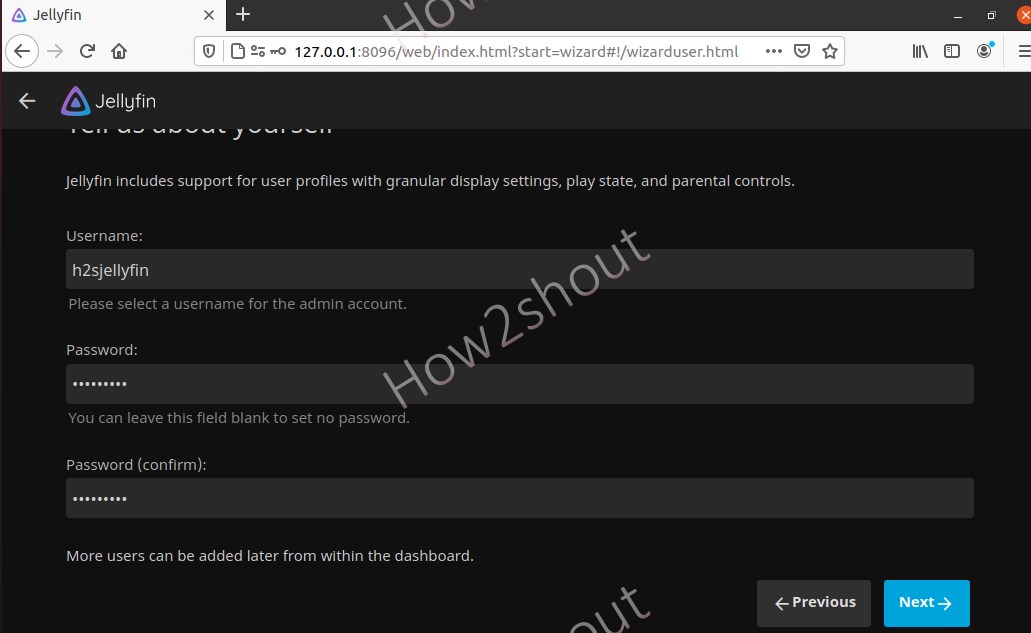
Step 7: Set Username and Password
Click on the Next button to start the Jellyfin media server setup. The next screen will appear for setting up the username and password for Admin that will have all the access to add/remove content and other settings.
Step 8: Add Library
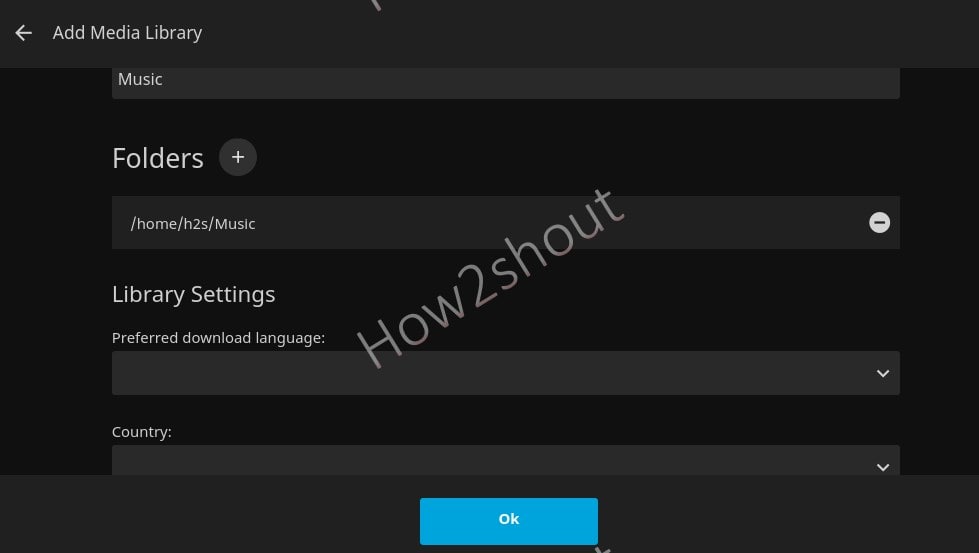
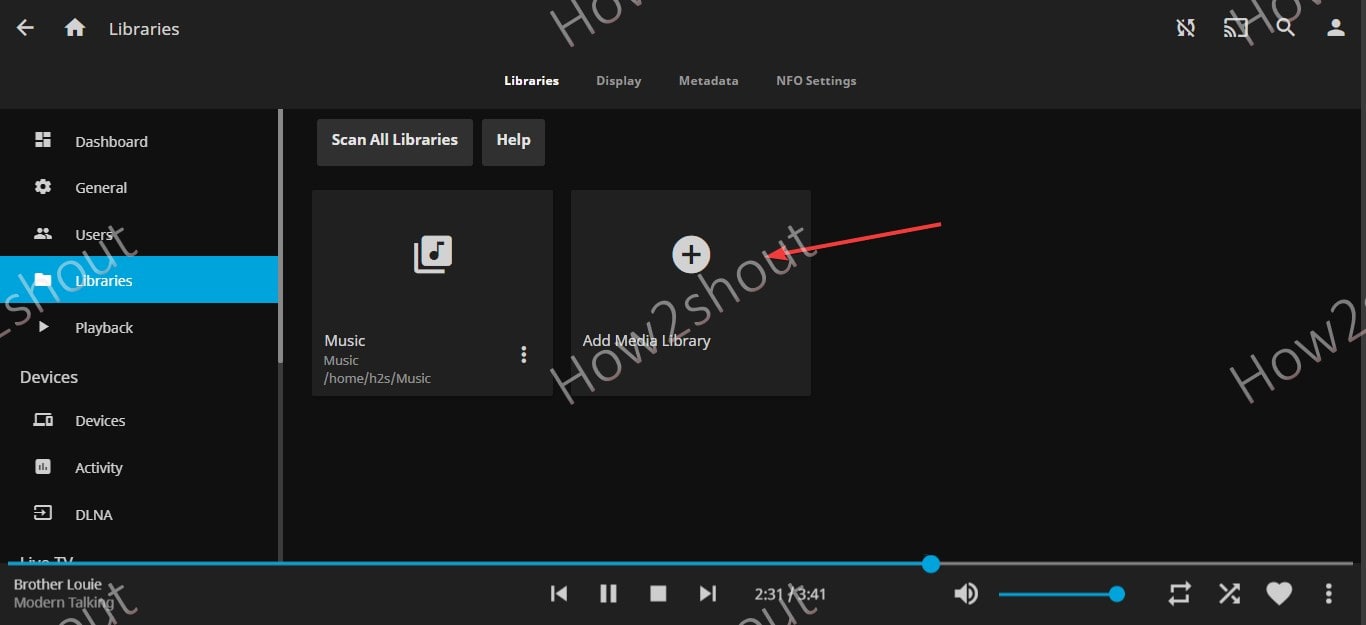
Click on the + button, first select the category type, for media content files such as music, videos, and images and then type the path of the folder where you have to save the media you want to play on Jellyfin. For example, I have selected the Music category and then entered the path of the folder where I have saved my music files.
You can add multiple folders to your library right here or after whenever you want.
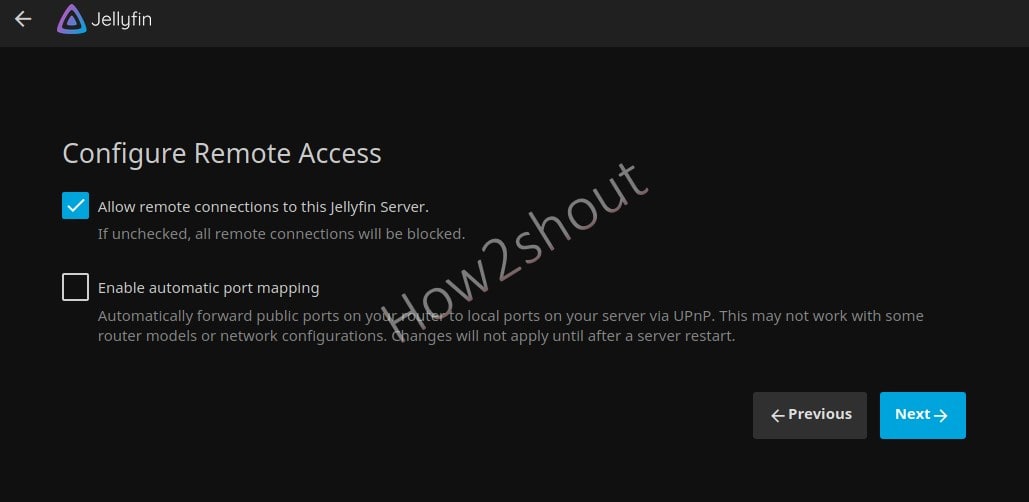
In case you want to use a smartphone and other devices to remotely connect Jellyfin using the internet then enable the “Allow remote connections to this Jellyfin Server” option. However, to access the server residing behind a local router and using a local IP address, to access it via the internet, the user has to forward its Jellyfin port manually.
Step 9: Login Jellyfin Server
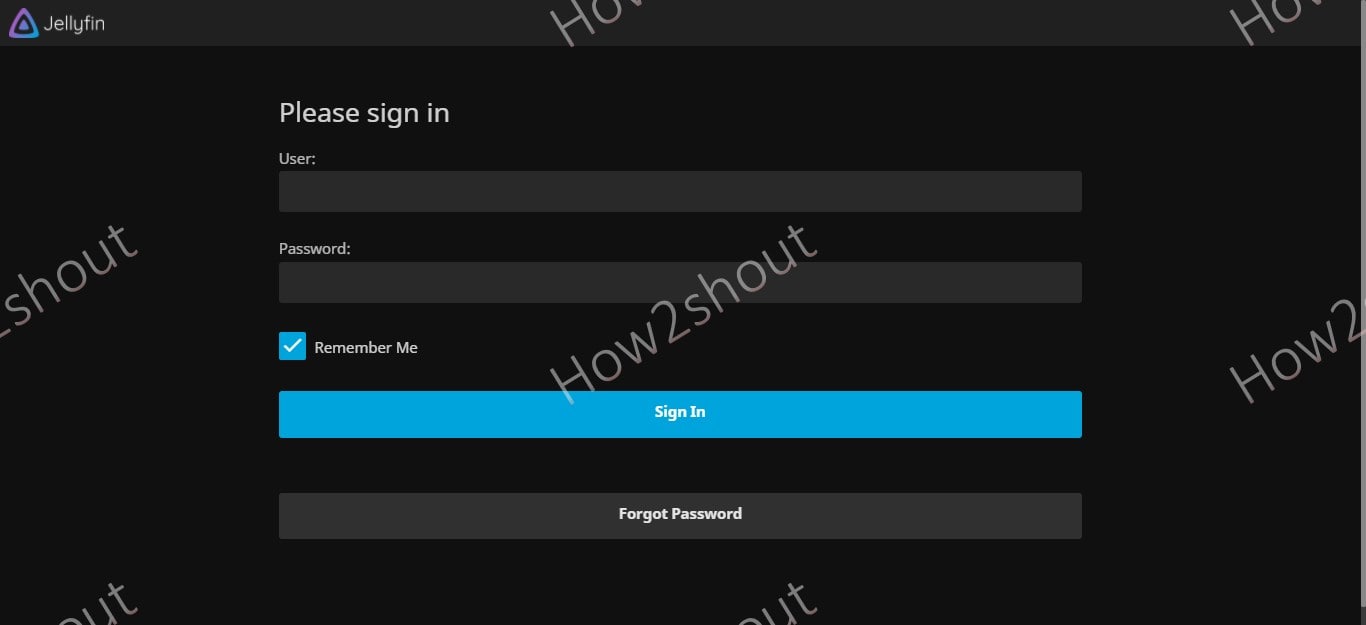
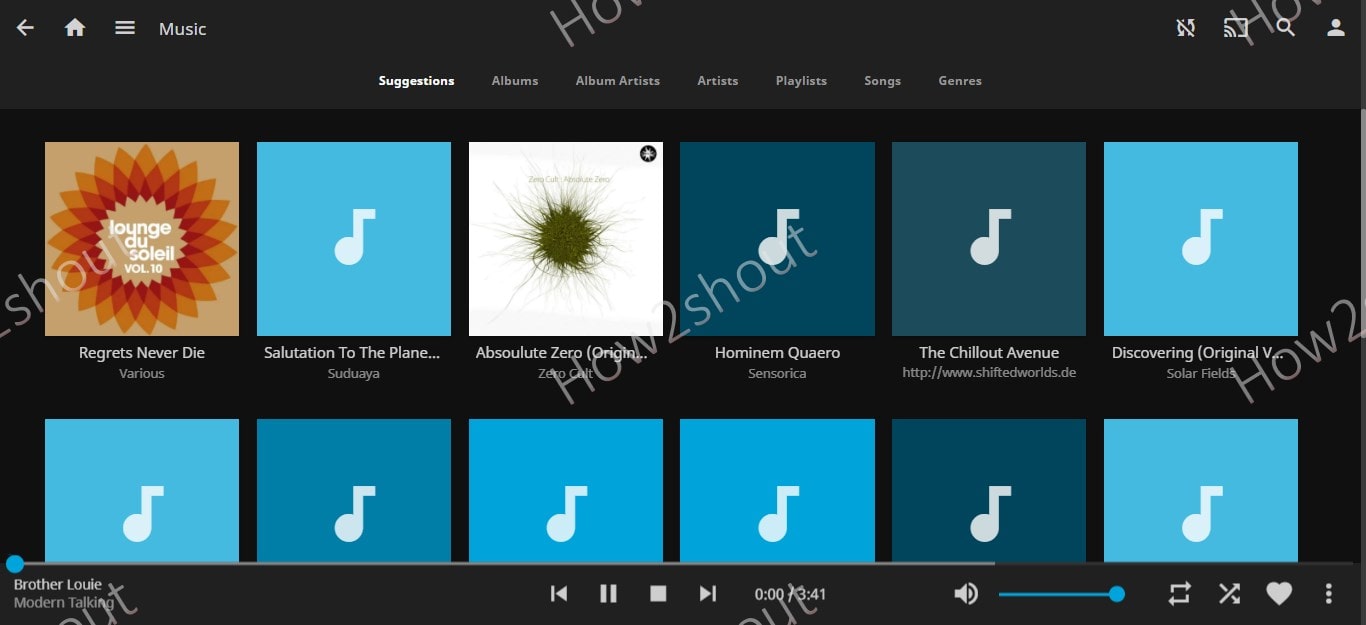
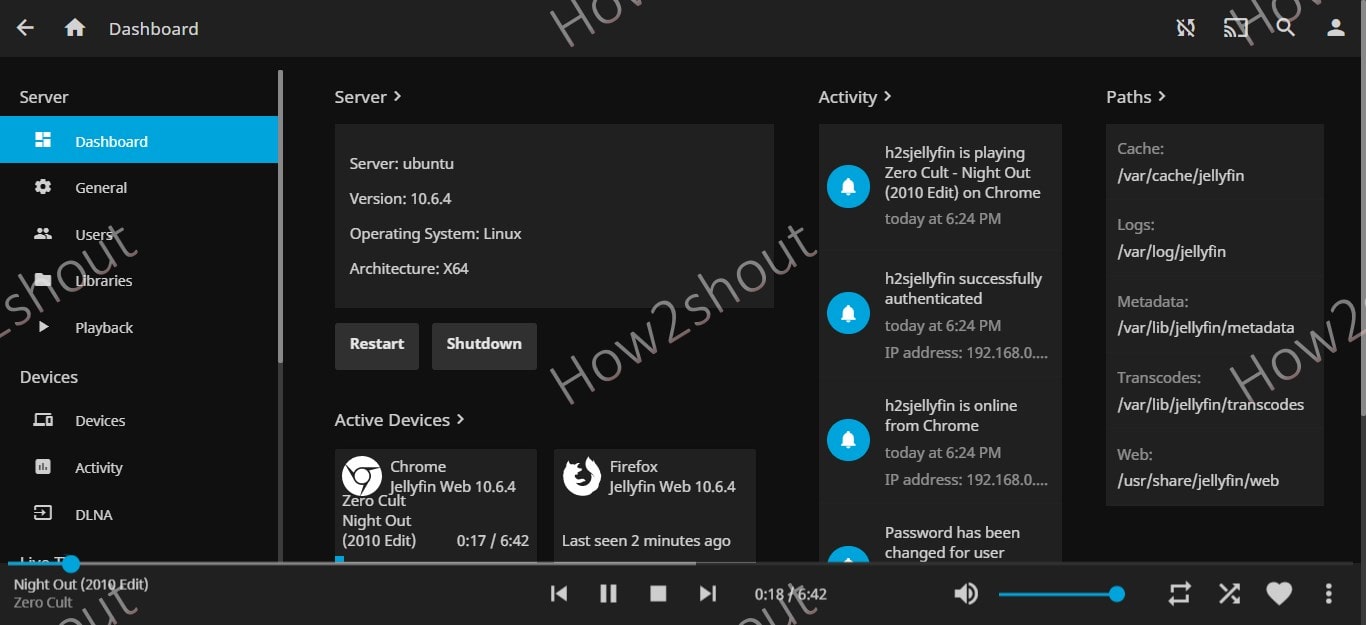
Enter the username and password to log in, and then you will have the Interface of Jellyfin in your browser to access the music, videos, and other media files.
In case you want to add some more Library or media folders in Jellyfin, then go to Dashboard, select libraries, and then “Add Media library”.
Options to restart and shut down the server are also present under Dashboard.
JellyFin Clients
This open-source media server supports multiple client applications to stream music and videos from the server. Thus, for the same, we can download Jellyfin Client as per our devices such as Firestick, Android TV, iPhone, Kodi, Roku, and more…
Other Articles:
- Install Subsonic free music server on Ubuntu 20.04 Linux
- 3 Best free video players to download for Linux Distros
