Git is an essential version control system and tool when it comes to managing code in software development and maintain different versions of a code. Even GitHub is powered by Git. If you’re a Debian 12 user then can easily install Git on your system using the default system repository with just a few simple commands. In this article, we’ll explain how to do so.
1: Updating and Installing Dependencies
To install Git there is the involvement of APT package manager, so before using it to install any software, let’s run the system update command. It not only installs the latest updates and dependencies but rebuilds the APT package index cache as well. To do so, simply open up a terminal window and enter the following command:
sudo apt-get update && sudo apt-get upgrade -y2: Install Git on Debian 12
Once the previous step is completed, just use the APT again to run a Git installation command on Debian 12. This is quite straightforward because we don’t need to add any third-party repository.
sudo apt install git3: Testing Your Installation
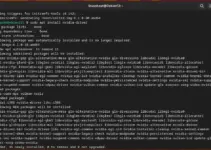
To make sure that everything went according to plan and that Git has successfully been installed, use the following command to check its version details:
git --versionIf all is well, you should see a message confirming the version of Git installed on your system at the bottom of the terminal window.
5: Configuring Git with Your Name and Email Address
Now that we have git installed on our machine, we still need to add some configurations. There are a lot of options available to you, but we’ll only do the two most important configurations here. First, we set our username and email.
git config --global user.name h2sgit config --global user.email [email protected]Note: Replace the user – h2s, and email – [email protected] items with what you you want to set in the above commands. Any action we do in Git will now have a stamp of the name and email address we just provided. This way other users always know who did what and when. This brings order to the chaos, especially in large projects with many developers working on them.
6. Create a new repository – git init
As we mentioned earlier, git stores its files and history directly as folders in your project. To set up a new repository, we need to open our project directory and run git init. This will enable Git for that specific folder and create a hidden .git directory to store the repository’s history and configuration. If you don’t have any project already and want to start from scratch then first create the one with the name you want to give to your project. Create a directory
mkdir mygitGet into the created directory
cd mygitNow, initialize the git local repository
git init
You can see the content
ls -a .git7. Checking the status of the repository – git status
To have the git status, the command is:
git statusTo list all git commands and sub-commands
git help -aGet help for some particular command
git help <command>8. Connect remote git repository
If you want to upload something to a remote repo, we need to connect to it,first. For example, to link the one you have on GitHub, BitBucket, or another service, we run the following line in the terminal:
git remote add origin remote-repository-linkFor example, you have your own repository on GitHub and want to pull or push the changes into that. The first switch to your Project directory where you have initialized the Git. After that connect the remote directory using the above-given command.
cd mygitgit remote add origin https://github.com/h2smedia/HowTo.gitTo pull the repository files:
git pull origin masterTo push the changes made to files:
git push origin masterNote: Pushing requires a password, however, if you are using GitHub- password-based authentication is no longer usable in it. The user has to go for a token-based instead. Know more about it at the official blog of GitHub.
9. Remove or Uninstall
If you don’t need Git on Debian 12, then we can remove it using the similar command we have used to install the same but with a different option.
sudo apt remove git -yFor more information refer to the Git documentation.
Other Articles: