FileZilla Server is a software to create an FTP server quickly using the graphical user interface. It helps in testing various projects that require an FTP server feature. Although the earlier FileZilla FTP server was only available for Windows & macOS, now we can also install FileZilla server on Linux such as Ubuntu 24.04.
It is open-source software that allows users to host files on the server and let local or remote users access them using File Transfer Protocol over the network. It also supports FTPS (FTP over SSL/TLS) protocol to provide secure file transfer capabilities.
Typical Use of FTP Server is for sharing, uploading, and managing files on Web hosting platforms and remote access of files from anywhere using the Internet.
Key Features of FileZilla Server
- Available to install on Windows, macOS, and Linux
- Supports FTP over SSL/TLS (FTPS) to provide a secure and encrypted file transfer.
- Offers the option to use multiple user accounts with individual permissions to access files and directories.
- Capable of handling high traffic volumes efficiently.
- Users can customize the server behavior, including IP filtering, speed limits, and connection limits.
Prerequisites
- We need Ubuntu 24.04 to perform this tutorial, however, users of Ubuntu 18.04, 20.04, and 22.04, can also follow the given steps.
- An active internet connection to perform the system update.
- A user with sudo privileges
Installing FileZilla Server on Ubuntu 24.04
Step 1: Update the Package Index
Although, here we are not going to install anything using the system repository, however, it is a good idea to run the system update command before moving further. This will ensure our system is up to date and all the installed packages have the latest version, if available.
sudo apt update && sudo apt upgrade -yStep 2: Downloading FileZilla Server Debian package
Unlike FileZilla’s client package, the Server package is not available to install through the default system repository of Ubuntu 24.04. Therefore, we need to download it manually. Open your Ubuntu browser, visit the official website, and click on the Download FileZilla Server button for Linux.

Step 3: Installing Filezilla Server on Ubuntu 24.04
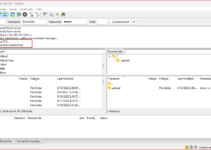
After downloading the FileZilla Server Debian package, first switch to the Downloads directory because the browser downloaded files saved in this directory automatically.
cd DownloadsNow, check the file you have downloaded is present there by typing:
lsIf it is there, then run the given command to install the FileZilla Server on Ubuntu 24.04.
sudo dpkg -i FileZilla_Server_*_x86_64-linux-gnu.debStep 4: Run FileZilla Linux Server
Once the installation is completed, start this FTP server, for that go to the Application menu and search for its shortcut entry.

Step 5: Start the Server
As we open the FileZilla Server, a button saying “Connect to Server” will appear. Click that to start the server.

You can leave the default port and host settings as it is, however, if you have set some password while installing the FileZilla server then enter that otherwise leave the password space blank and just hit the OK button.

Step 6: Configure FTP server
Well, although the default settings are enough to connect the FileZilla server using any FTP client, however, if you want to configure it as per some specific requirement then open Configuration.
Click on the Server and from the drop-down menu select Configure… The shortcut can be used for it i.e. Ctrl+F.

For example: If you want to add a custom mount point for any FTP user then that can be done from here.

Step 7: Connect to FileZilla FTP server
Now, to check whether your FileZilla Server is working fine or not, install some FTP client on your local or remote system, here we are using FileZilla FTP client on Windows but you can install it on any Ubuntu system as well. Follow this guide for that – 2 ways to install FileZilla Client on Ubuntu 24.04 LTS Noble Linux.
So, open the Client, and enter the IP address of the Ubuntu 24.04 system where you have installed the FileZilla server, after that enter the username and password of a user available on your Ubuntu system along with port number 22 or 21; once done click on the Quick Connect button. Soon, the list of files allowed to be accessed by the user you used to log in the FTP server will appear.

Other Articles: