Learn the steps to install Dropbox headless on CentOS 8 Linux server using a command-line interface for syncing files between server and cloud storage.
Dropbox is a popular cloud service that offers its client application for Windows, Linux, macOS, Android, and iOS to sync files between cloud and local devices. However, if you are on a command-line server that doesn’t have a graphical user interface, still we can have the benefits of Dropbox cloud storage to sync files between server and cloud. Here in this tutorial, we will show how to do that in CentOS 8/7 server without GUI and using only the CLI interface.
Install DropBox headless on CentOS 8 Server command line
Start SSH server
By default the OpenSSH server will already be there on your CentOS 8 Linux, thus no need to install it. However, in case it is not then use the command to get it: sudo dnf install openssh-server
To start the SSH server, if not, the command is sudo systemctl start sshd
We are using the SSH because while installing Dropbox, it will give a link to the login account you have with this cloud service and that needs a browser. Therefore, from CentOS 8 CLI Server, it would not be easy to copy and use that in other system’s browser. Therefore, it will be a great idea to start the command terminal in GUI Linux Desktop or Command Prompt in Windows to access the CLI server using SSH. Here, we are using MobaXterm on Windows to access the CLI server via SSH.
If you are using any other Linux or Window system then simply open the Command terminal and use the following syntax:
ssh username@server-ip
For example, if my CentOS 8 server IP is 192.168.0.105 and username is root then the to access the SSH the command will be:
Update system
Once you got the Server access, update its existing packages to make sure everything is up to date.
sudo dnf update
or if you do not want to update, then simply rebuild the repo cache using the command:
sudo dnf makecache
Install Wget
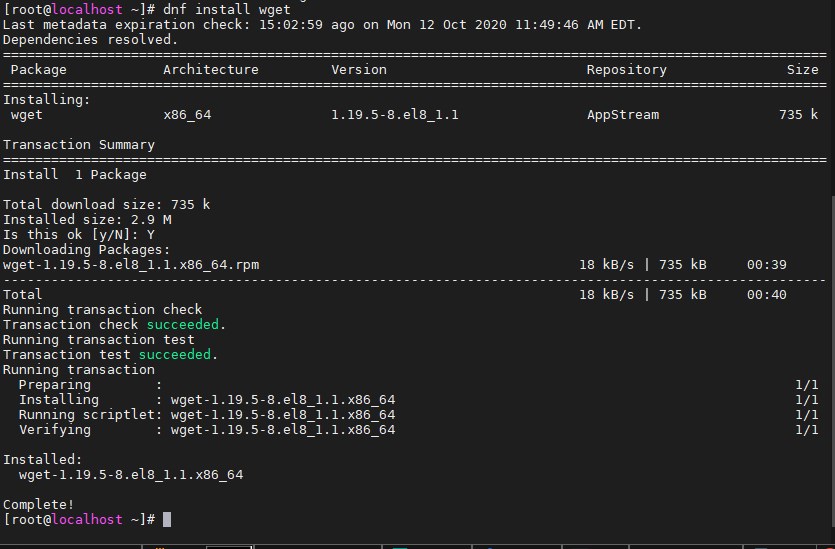
Before moving further to install the Headless Dropbox on Centos 8 or 7, lets; first the get Wget tool to download packages using the command line.
sudo dnf install wget
Download and extract Headless Dropbox daemon
Now, copy-paste the below command that will not only download the Dropbox daemon’s archived folder on the server but also extract it to a folder “dropbox-dist” (hidden folder) in the server’s home directory.
cd ~ && wget -O - "https://www.dropbox.com/download?plat=lnx.x86_64" | tar xzf -
Run Dropbox Daemon
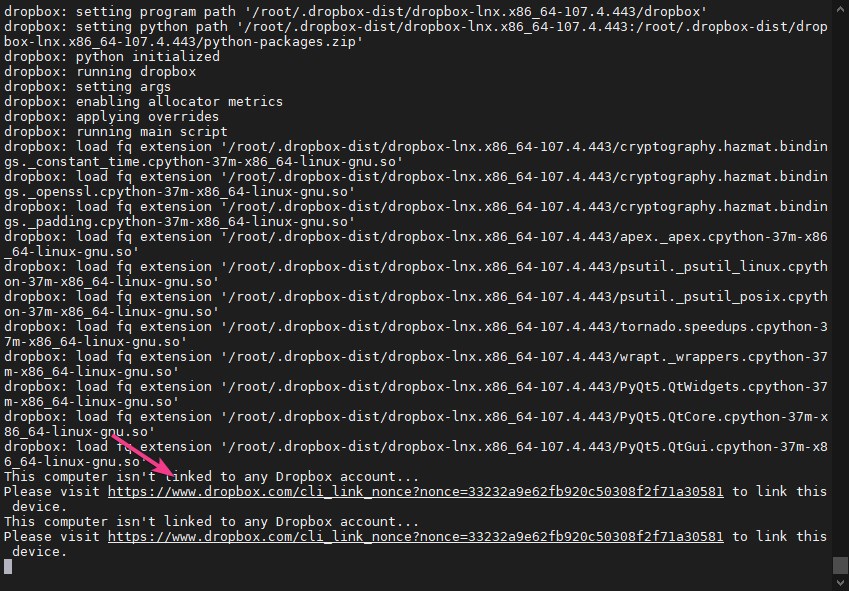
After downloading it, run the Daemon to start the headless Dropbox service which will not only create a folder in the home directory to sync files but also give a link that we need to paste in the browser to login into the account.
~/.dropbox-dist/dropboxd
Note: If you get some error like:
ImportError: libXxf86vm.so.1: cannot open shared object file: No such file or directory
!! dropbox: fatal python exception:
['Traceback (most recent call last):\n', ' File "dropbox/client/main.pyc",
 line 264, in <module>\n', ' File "dropbox/foundation/navigation_service/factory.pyc",
 line 22, in <module>\n', ' File "dropbox/foundation/navigation_service/navigation_service_impl.pyc",
 line 57, in <module>\n', ' File "dropbox/foundation/html_views/electron/manager_factory.pyc",
 line 14, in <module>\n', ' File "dropbox/foundation/html_views/local/common/manager.pyc",
line 33, in <module>\n', ' File "dropbox/client/features/model_registry.pyc", line 13, in <module>\n',
' File "dropbox/client/features/generated_models.pyc", line 308, in <module>\n',
' File "dropbox/client/features/previews/view_anchor.pyc", line 106, in <module>\n',
' File "<_bootstrap_overrides>", line 153, in load_module\n', '
ImportError: libXxf86vm.so.1: cannot open shared object file: No such file or directory\n'] (error 3)
Then don’t be worried. Just copy the library name which wasn’t found by the server and install it. You may get such error multiple times with a different library name, copy them every time and install untile the error get resolved. For example, in the above error, I got a library called libXxf86vm which is not available on the system. Thus, to install it simply copy its name and use with dnf install <libraryname> command, therefore it will be like this-
dnf install libXxf86vm
Copy the Account connect link
When we run the daemon it will provide us a link, copy that. In case the command will get stopped, then after copying the link again run it by using ~/.dropbox-dist/dropboxd
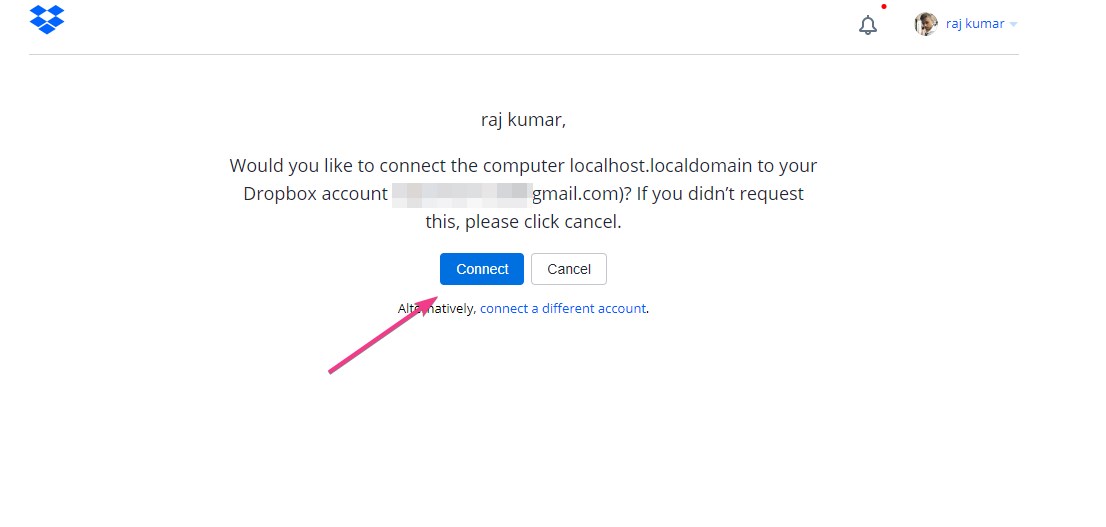
Open the browser and paste this link, the dropbox will ask for your credentials and then permission to link the Server or PC with it. Do that.
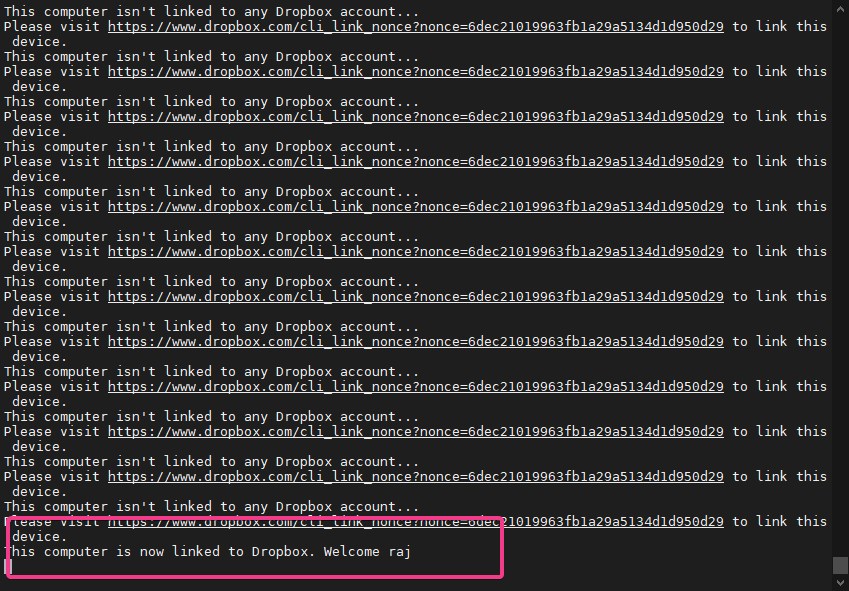
Once done, the same will flash on the command line interface where you are operating the CentOS 8 or 7 server via SSH.
Create a Dropbox system service
By default, this headless cloud client will not run with system boot and its service will live until the daemon runs by the user, manually. Thus, we need to create a system service that will keep active in the background for Dropbox daemon. For that, we will use a Systemd service file that is already available on GitHub.
The content of this file is:
[Unit]
Description=Dropbox as a system service
After=local-fs.target network.target

[Service]
Type=simple
ExecStart=/usr/bin/env "/home/%i/.dropbox-dist/dropboxd"
Restart=on-failure
RestartSec=1
User=%i

[Install]
WantedBy=multi-user.target
To download and save it in the Systemd directory run the below-given command:
sudo wget -O /etc/systemd/system/[email protected]
https://raw.githubusercontent.com/joeroback/dropbox/master/dropbox%40.service
Now enable and start DropBox headless system service
The command to enable service at boot level is:
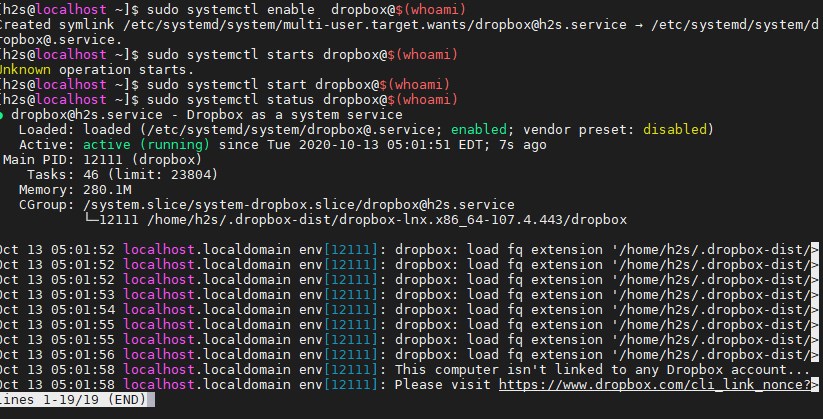
sudo systemctl enable dropbox@$(whoami)
To start the same
sudo systemctl start dropbox@$(whoami)
Check the status:
sudo systemctl status dropbox@$(whoami)
Access Syncing folder
Now whatever files and folder created under inside the folder Dropbox will automatically get synced to cloud or vice versa.
To access this folder which is created under yopru home directory, type:
cd ~/Dropbox
If you are using Ubuntu and want to perform the above tutorial in that, see: How to Install Dropbox GUI or Headless on Ubuntu 20.04 LTS
