Tutorial to download and install Cockpit Docker package, Container Image and customize its Settings from Cockpit’s Web GUI Dashboard on Ubuntu 20.04/18.04 LTS Linux Server.
The Cockpit is an easy solution to manage server resources remotely using the graphical web interface. It is not only light in weight but also present to install in most of the Linux repositories such as in popular Ubuntu, RedHat, Fedora, and CentOS to install with just a single command.
Well, if we talk about Docker container management in Cockpit, then this really helpful to easily manage virtual machines or containers graphically. Yes, we can install and delete containers using a few mouse clicks. No need to go through the command line to manage them. However, in Ubuntu 20.04 the Docker package for Cockpit is not available to install but we can do that manually by directly installing its Deb file. Here, we let you know how to do that in this tutorial.
How to Install Cockpit on Ubuntu 20.04
Although, if you are following this tutorial then you would already have Cockpit installed on your Ubuntu server. However, if not then here is the command to that.
First, update your system packages-
sudo apt update
Now, run the command to install Cockpit
sudo apt install cockpit
How to install Docker on Ubuntu 20.04 Server
The second thing is, we must have apart from the server management platform is Docker itself, otherwise, how will we manage it using Cockpit, remotely using the browser.
Thus, run the below command to download and install Docker’s latest version on the Ubuntu server.
sudo apt install docker.io
Yes, we don’t need to add any third-party repo because the packages to install Docker are available in the official repository of Ubuntu.
Next, once this Container platform is installed, add your current user into Docker’s group so that you won’t need to use sudo to run its commands.
sudo usermod -aG docker $USER
Now, reload the Shell using the below command or alternatively you can log out and log in to your current session, as well.
newgrp docker
Install Cockpit Docker module
——————————————-Optional/decrepit method using Docker————————————
Error: package cockpit docker has no installation candidate if you try to install it using APT.
This is the main part of the tutorial because without Cockpit’s Docker package you will not be able to access your containers from the Web interface. You can download the latest stable version from the Launchpad repository. Either download it from a directory or copy the link of the deb file and use it with wget command tool, as we have done here.
Note– It is a single command, hence, copy whole and then paste it into your terminal.
wget https://launchpad.net/ubuntu/+source/cockpit/215-1~ubuntu19.10.1/+build/18889196/+files/cockpit-docker_215-1~ubuntu19.10.1_all.deb
And then install the downloaded Cockpit-Docker Debian package-
sudo apt install ./cockpit-docker_215-1~ubuntu19.10.1_all.deb
——————————————————————————————
Use Podman
——————————————–Update & Latest one—————————————
Docker is not available to use in Cockpit because it has been replaced by Podman, a lightweight tool to create Containers using Docker Images.
Hence, to enable and use it run:
sudo apt install cockpit-podman -y
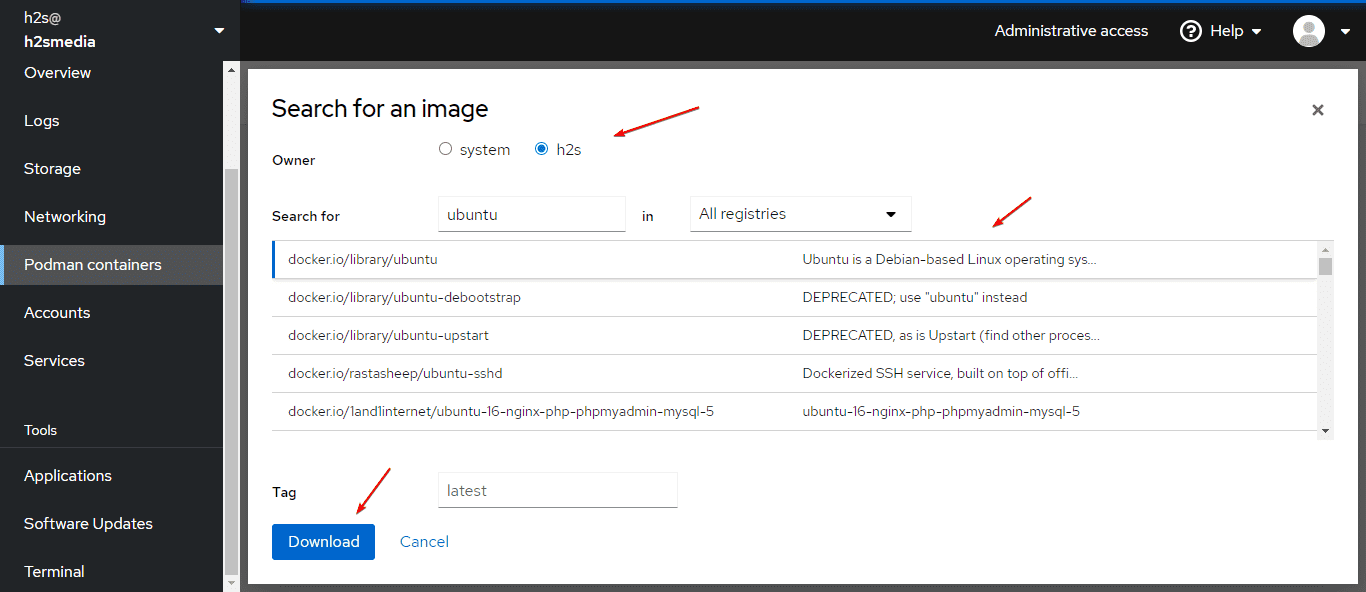
If you are won’t be able to search Images then see our tutorial- Unable to search for images in Cockpit Podman Container
———————————————————————————————
Open Cockpit Web Interface to Manage Docker container
Use any system that can access your Ubuntu 20.04 LTS server or desktop IP address. And open web browser – type server-IP-address with cockpit port that is 9090.
For example– 192.168.0.11:9090
A Login page will appear, enter your Ubuntu username and password.
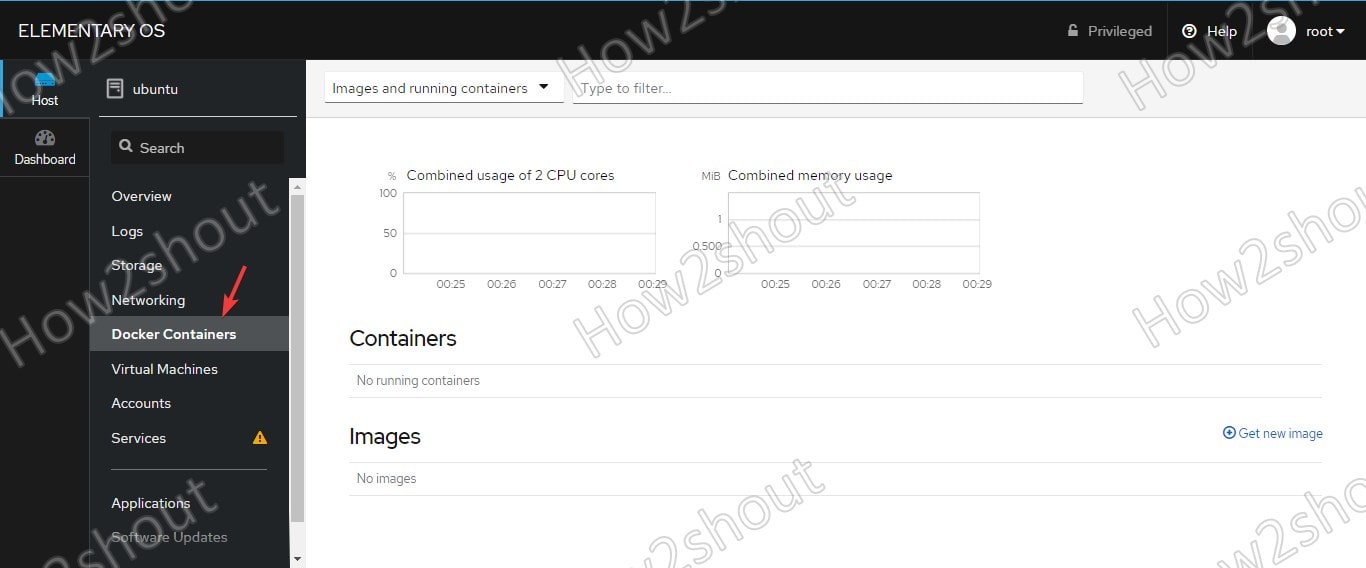
Docker Containers
After that, select the Docker Containers option is given on the Cockpit’s Dashboard Menu.
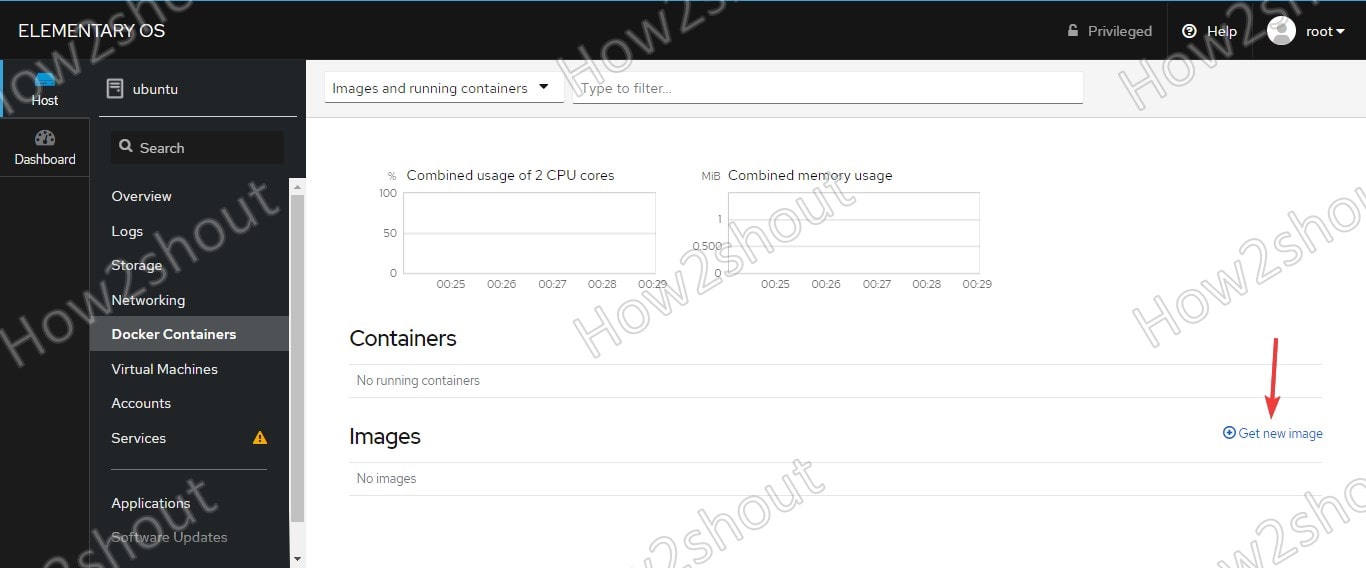
Download Image
To download any Docker app image from Hub, click on the “Get New Image” option.
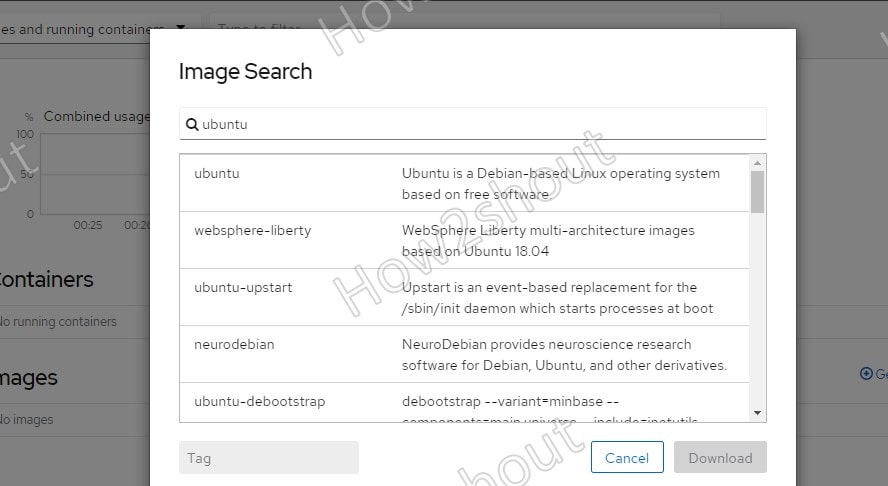
Image Search
Type the name of the App Image that you want to download for creating a new container. Here we are using Ubuntu image.
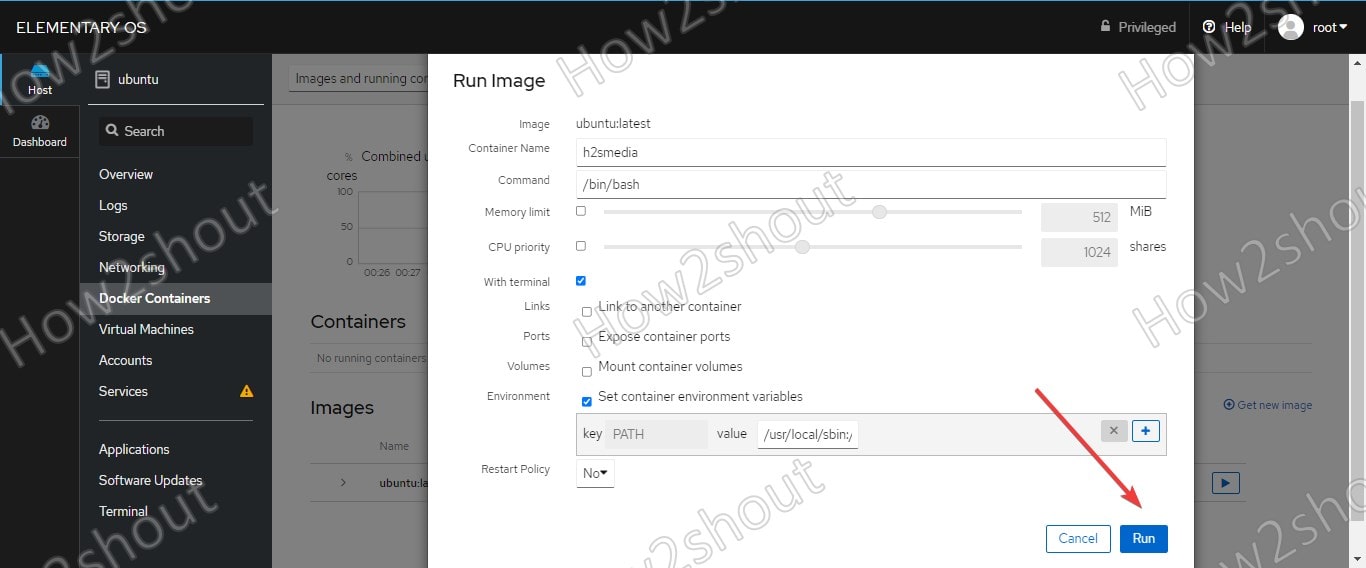
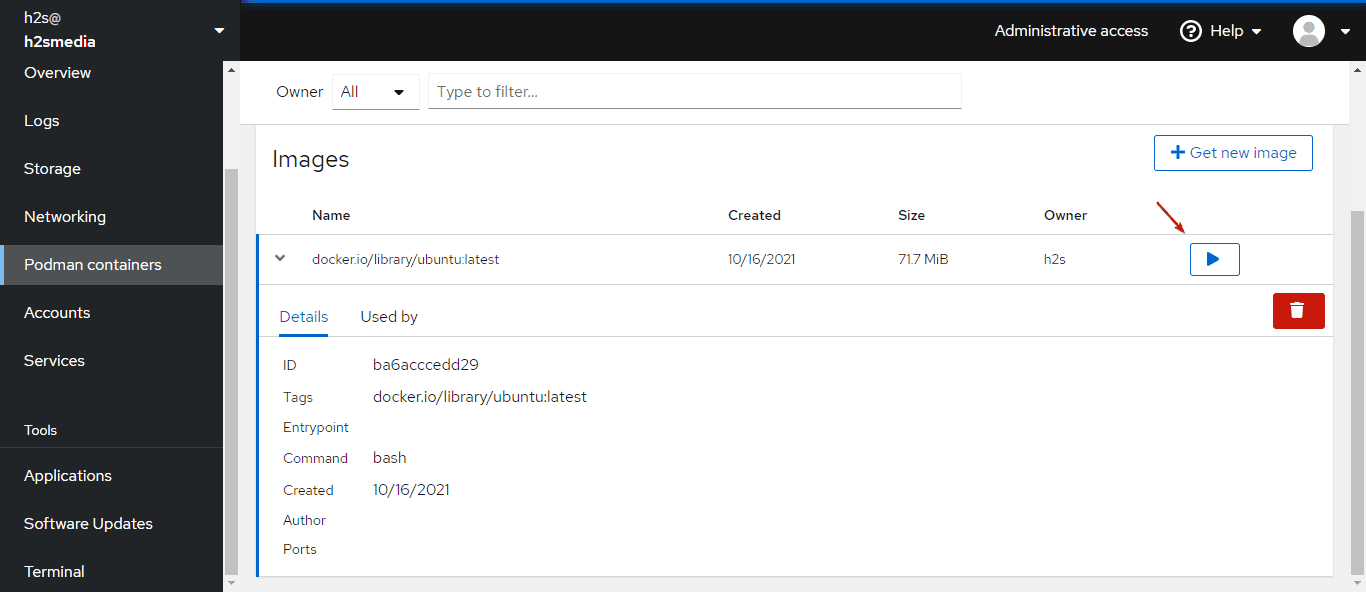
Run Image
Once the image is downloaded and extracted by the system, click on the Run icon and you will see a pop-up to customize container settings before actually starting it. You can change the Container Name, increase or decrease Memory and CPU capacity, mount container volume, link to another container, and manage ports. If you are new to this, then simply click on the RUN button to start it.
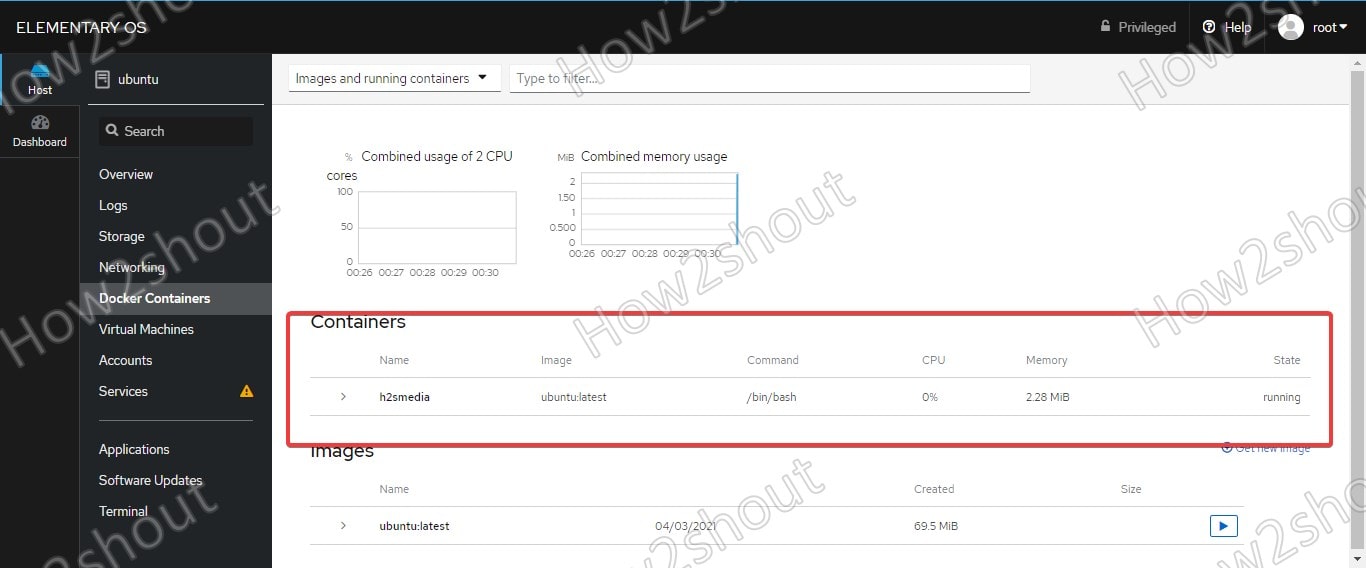
The running container will appear on the dashboard.
Access conainter shell
Once the installed Docker container service has been started you can either access it from the Container area or via SSH or directly from the Terminal of Cockpit.
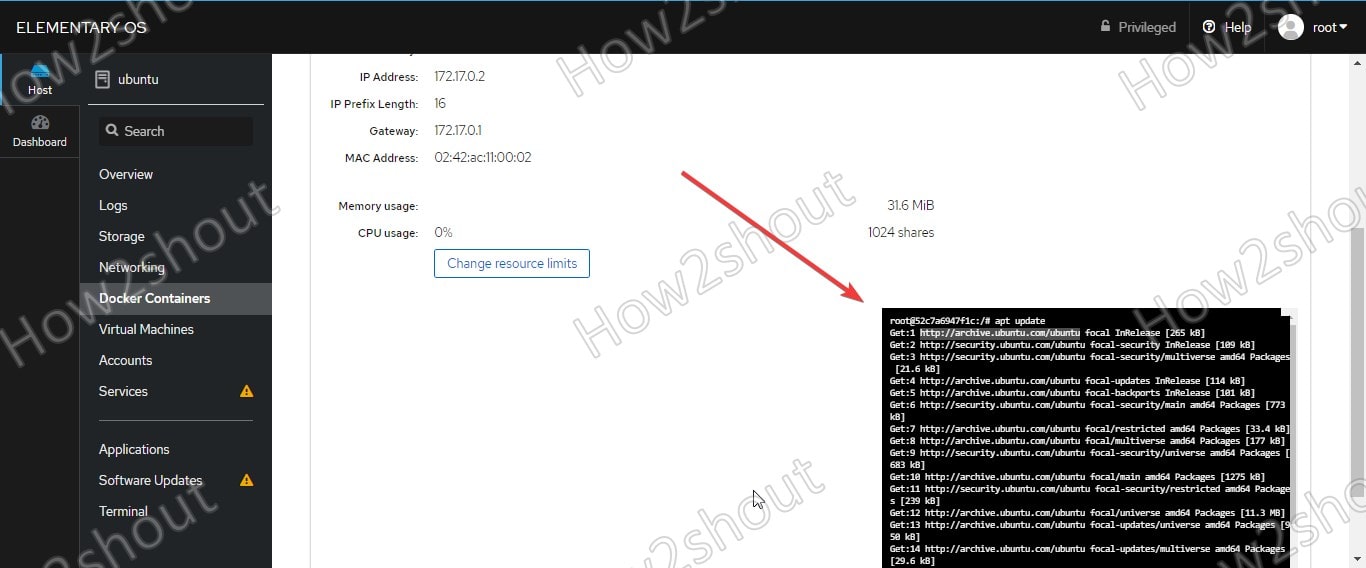
Click on the running Container Name.
You will see complete information along with a small Command line terminal window. You can run all commands to your docker machine directly from here. If you want to change the size, simply Increase the size of your current browser tab, by pressing the Ctrl button on the keyboard and rolling the scroller button on the mouse.
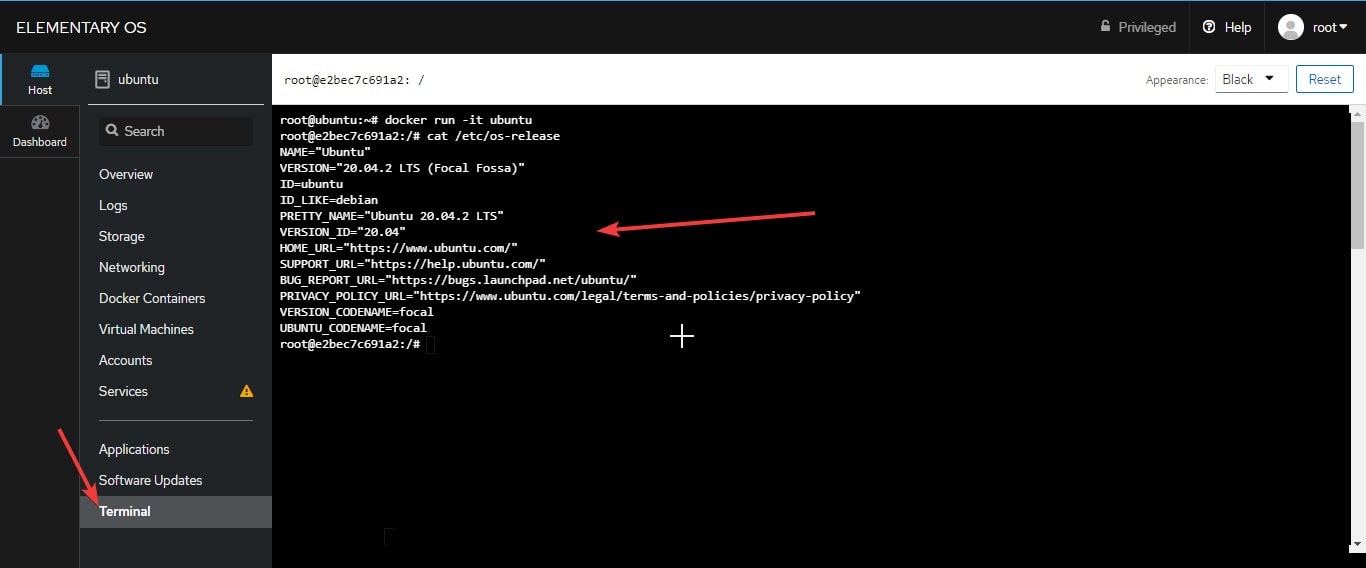
Alternatively, click on the Terminal option given in the menu and manually connect to the running container. For example,
docker run -it container-name
Here we have ubuntu container then the above command will be-
docker run -it ubuntu
