Install CUDA 11 on your Ubuntu 20.04 LTS Focal Fossa to start using GPU to power your programming languages for developing various applications…
CUDA stands for “Compute Unified Device Architecture“, open-source technology and programming interface developed by Nvidia to empower developers for utilizing the extra power of their GPUs. Yes, as compared to the system’s CPU, GPU comes with a larger number of cores that can be used in parallel and can perform a variety of calculations simultaneously.
Hence, due to the high computing power and parallel operation of the GPUs, enormous performance gains can be achieved for certain applications. Therefore, with the help of CUDA, we can use our system GPU with programming languages such as Python, Fortran, C, and C++ or with software such as MATLAB. CUDA consists of libraries, development tools, a runtime environment, and a compiler.
CUDA technology is supported by NVIDIA GPUs from various series such as Tesla, GeForce, Quadro, and others. Hence, to get the benefits of this technology we can install the CUDA toolkit easily available to download for Linux, Windows, and macOS.
In contrast to APIs such as DirectX and OpenGL, CUDA does not specialize in pure multimedia applications but can be used for applications of all kinds.
Steps to install CUDA Toolkit on Ubuntu 20.04 LTS
The commands given here to configure NVIDIA CUDA can be used for other Linux systems based on Focal Fossa, such as Linux Mint, Elementary OS, POP_OS, and more…
Note: The package to install CUDA is already available to install using the standard system repository of Ubuntu. However, here we are adding the official one manually to make sure we always get the latest version, as it was released by the Nvidia developers.
1. Add GPG Key on Ubuntu 20.04
The authenticity of the packages we get from the repository needs to be verified by the system. Hence, before adding the official repository of CUDA on Ubuntu 20.04, add the GPG key used to sign its packages by the developers.
sudo apt-key adv --fetch-keys https://developer.download.nvidia.com/compute/cuda/repos/ubuntu2004/x86_64/3bf863cc.pub
2. Add CUDA Toolkit Repository
After integrating the GPG key, we can add the repository to get the latest packages of the CUDA toolkit using the APT package manager. Here is the command to follow:
Decrease the priority of CUDA packages getting from Ubuntu standard repo and increase the one we get from the repo we are going to add here. This means when we run the APT command to install the CUDA toolkit, our system first gives preference to the newly added repository.
wget https://developer.download.nvidia.com/compute/cuda/repos/ubuntu2004/x86_64/cuda-ubuntu2004.pin
sudo mv cuda-ubuntu2004.pin /etc/apt/preferences.d/cuda-repository-pin-600
Add the repository
sudo add-apt-repository "deb https://developer.download.nvidia.com/compute/cuda/repos/ubuntu2004/x86_64/ /"
3. Run APT Update
Although the system will automatically perform the system update after adding the repository, yet, once run the system update command. This will make sure the system has successfully rebuilt its APT cache and can recognize the newly added repository.
sudo apt-get update
4. Install Nvidia CUDA on Ubuntu 20.04
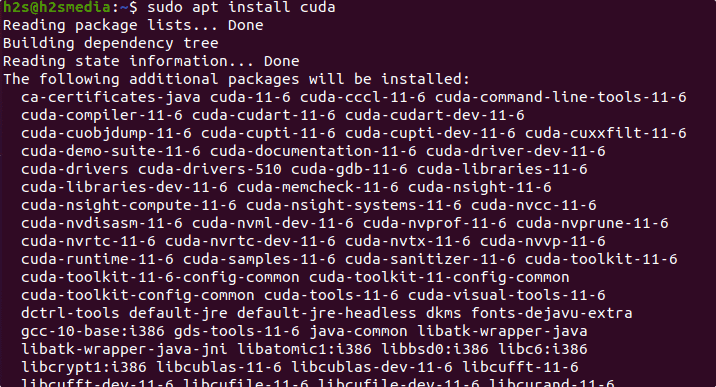
Finally, we can install the latest available CUDA version for Ubuntu Linux using APT. Follow the given command for that:
sudo apt install cuda

Add the CUDA installed folder in your system path:
echo 'export PATH=/usr/local/cuda/bin${PATH:+:${PATH}}' >> ~/.bashrc
source ~/.bashrc
To check version
nvcc --version
5. Your First CUDA C Program
Here is the sample of CUDA C code to create your first program:
nano helloworld.cu
Paste the following code in the file:
#include <stdio.h>

__global__
void saxpy(int n, float a, float *x, float *y)
{
int i = blockIdx.x*blockDim.x + threadIdx.x;
if (i < n) y[i] = a*x[i] + y[i];
}

int main(void)
{
int N = 1<<20;
float *x, *y, *d_x, *d_y;
x = (float*)malloc(N*sizeof(float));
y = (float*)malloc(N*sizeof(float));

cudaMalloc(&d_x, N*sizeof(float));
cudaMalloc(&d_y, N*sizeof(float));

for (int i = 0; i < N; i++) {
x[i] = 1.0f;
y[i] = 2.0f;
}

cudaMemcpy(d_x, x, N*sizeof(float), cudaMemcpyHostToDevice);
cudaMemcpy(d_y, y, N*sizeof(float), cudaMemcpyHostToDevice);

// Perform SAXPY on 1M elements
saxpy<<<(N+255)/256, 256>>>(N, 2.0f, d_x, d_y);

cudaMemcpy(y, d_y, N*sizeof(float), cudaMemcpyDeviceToHost);

float maxError = 0.0f;
for (int i = 0; i < N; i++)
maxError = max(maxError, abs(y[i]-4.0f));
printf("Max error: %f\n", maxError);

cudaFree(d_x);
cudaFree(d_y);
free(x);
free(y);
}
Save the file using Ctrl+O, hit the Enter key, and exit the file using Ctrl+X.
6. Compile Program
After creating your first program file in CUDA, let’s compile it using the NVCC compiler.
nvcc -o myapp helloworld.cu
myapp is the name of the app we have given by compiling our code save in helloworld.cu
After compiling the code, you will have the app in the same directory. To run it use:
./myapp
For more information visit the official documentation page.
Other Articles:
• How to install Basemark GPU Benchmark on Ubuntu 20.04 Linux
• Different ways to shutdown Ubuntu Linux using the command line
• How to create, compile & run a C Program in a Linux terminal
• Install build-essential tools on Ubuntu 22.04 or 20.04 LTS Linux


It worked.. thank you.
Thank you so much. worked perfectly the first attempt.