In this tutorial, we will discuss some of the steps and commands to install the Asterisk VoIP server on Debian 11 Bullseye or 10 Buster using the terminal to call over Android or iPhone using a local network.
What is Asterisk software for Linux?
Asterisk is an open-source software-based telephone system available to install and work on Linux distros. It offers a wide range of features, so one can easily implement its VoIP telephone system. Asterisk also supports all currently used protocols such as SIP, IAX2, GSM, G.711, or ISDN. It is highly flexible and due to the huge range of functions and the support of many protocols, it becomes a future-proof solution with which almost any telephone infrastructure can be set up.
The software is incorporated with four main modules such as the PBX Switching or Switching Core module- it is responsible for incoming and outgoing calls and technologies working between VoIP and hardware. Once the calls are accepted they are forwarded to the Application Manager module to perform various actions such as the ringing of connected telephones or a forwarding function. The Schedule and I / O Manager modules manage the various applications and voice channels, such as VoIP channels.
Asterisk is ideal for building BX (Private Branch Exchange) system often used synonymously for the local telephone systems. The advantage of such a system is the calls are free for the owner because they are via the internet without adding any extra stress on all external lines.
Steps to Install Asterisk VoIP Server on Debian 11 Bullseye
The given steps will work on Debian 10 Buster or 11 Bullseye including Ubuntu 18.04/20.04/22.04, Linux Mint, and other Debian-based systems.
Perform System Update
Run the system update command to prepare your system before proceeding with the installation steps. This will refresh the system APT cache and also install if any updates available for our Debian system.
sudo apt update
Command to install Asterisk on Debian 11 or 10
The best thing is we don’t need to look for any other repository to get the packages of Asterisk to install. They are already in Debian’s official repository. Hence, we just need to use the APT package manager to install the same.
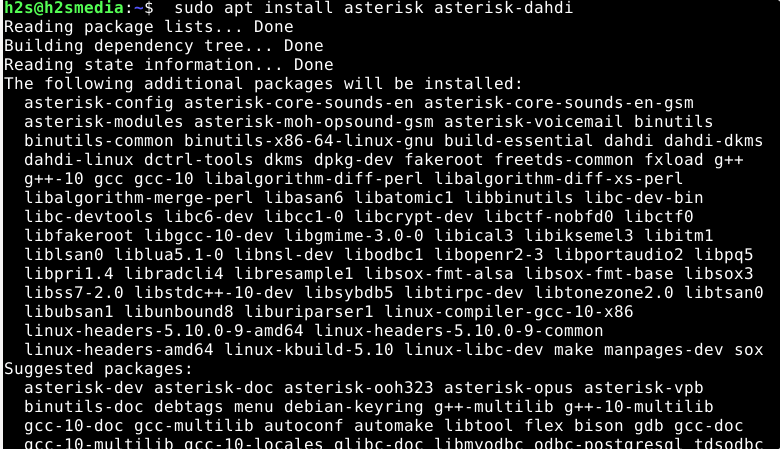
sudo apt install asterisk asterisk-dahdi
Start, Enable and Check Asterisk Service
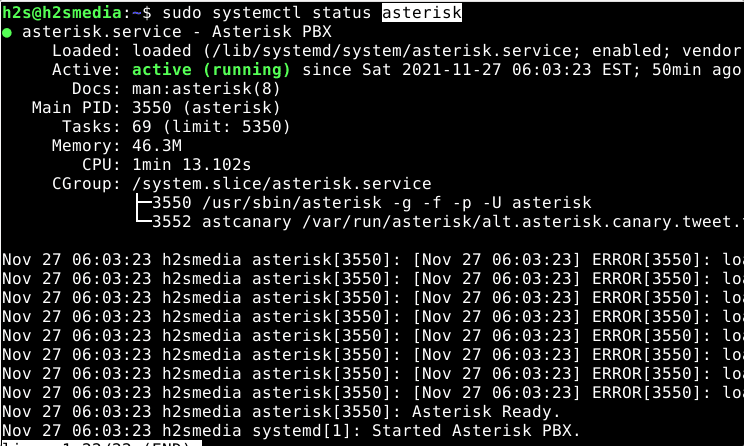
Well, after the installation, the service of Asterisk will automatically get started, to confirm it we can use the status command:
systemctl status asterisk
Output
In case it is not running then use this one:
sudo systemctl enable --now asterisk
Additional info:
To start or stop:
sudo systemctl start asterisk
sudo systemctl stop --now asterisk
Asterisk Command line:
To check the version of asterisk run:
asterisk -V
for help
asterisk -h
In case you are getting command not found then run:
echo 'export PATH="$PATH:/user/sbin"' >> ~/.bashrc
newgrp
That’s it, you have successfully installed Asterisk on your Debian 11 or 10 Linux, although there are lots of things a user can configure using it, for that one can refer to the official documentation. Here to give you an idea, let’s create some configuration files to make a phone call using Asterisk and Session Initiation Protocol (SIP).
Use Asterisk VoIP server to make calls locally with Android or iOS phones
To perform the given demo of phone calls using Asterisk, the following things should be with you
• A phone or another system apart from the Asterisk installed server
• All the devices should be on the same LAN Network where Asterisk is.
We need an asterisk.conf, modules.conf, extensions.conf and sip.conf or pjsip.conf files to perform this tutorial of creating a local VIOP calling system.
Backup files
We already have extension and SIP configuration files under /etc/asterisk. However as we are going to make some changes to use them as per our choice, hence it is better to first create a backup of them. If anything goes wrong we can replace the files with created backup.
Hence, we are just renaming Pjsip or SIP and Extension Configuration files and creating new ones for setting up our local VoIP calling network. B
cd /etc/asterisk
sudo mv extensions.conf extensions.sample
sudo mv sip.conf sip.conf.sample
In this way, we have saved our original copies of the configuration files unharmed for any future use.
Create SIP configuration on Debian 11 or 10
Now, we create our SIP configuration file to use with the local network.
sudo nano /etc/asterisk/sip.conf
Add the following lines:
[general]
context=default

[1001]
type=friend
context=from-internal
host=dynamic
secret=password
disallow=all
allow=ulaw

[1002]
type=friend
context=from-internal
host=dynamic
secret=password
disallow=all
allow=ulaw
In the file, we are creating two user accounts/extensions – 1001 and 1002 and the secret value is the password for them.
Save the file by pressing CTRL+O, hit the Enter key, and then use CTRL+X to exit.
Configure Extension
Next is the configuration of the extension file that will tell Asterisk what to do with calls when it receives for some particular user.
sudo nano /etc/asterisk/extensions.conf
Add the following text:
[from-internal]

exten=>1001,1,Dial(SIP/1001,20)
exten=>1002,1,Dial(SIP/1002,20)

exten = 1000,1,Answer()
same = n,Wait(1)
same = n,Playback(hello-world)
same = n,Hangup()
In the above file, we are instructing Asterisk that when someone calls to 1001 where it should forward it, in the same way for 1002. In addition to that, we have also created an automated answer call extension/user 1000. When someone calls to 1000 extension an automated answer will be played to i.e Hello-World. You can also replace it with an audio file path that you want to play.
Save the file Ctrl+O, hit Enter, and then Ctrl+X.
Restart the Asterisk Server
sudo systemctl restart asterisk
Get your server IP address:
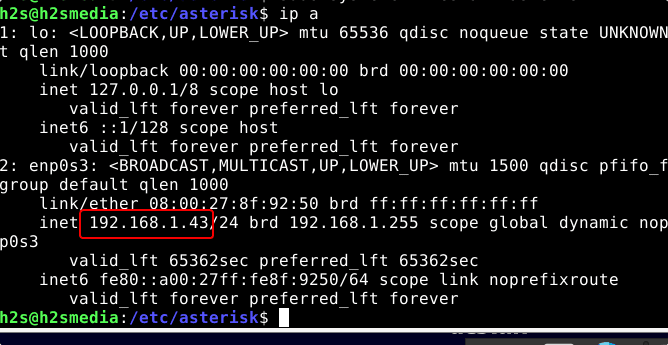
The server Ip-address or domain will use to connect VoIP using the SIP calling App. To find the IP of your Debian run:
ip a
Example:
Install SIP calling app
Now, we have our VoIP server ready with two users/extensions and where to forward them when someone calls.
We are using two devices one is an Android phone and the other is Windows 11 OS. For making calls, we use an open-source app called LinePhone. Download it and install it on your Mobile or Desktop operating system. The Linux users can use the command sudo apt install linephone
Once you have installed the app on the devices you are using, for example for the tutorial we have one Android and Windows.
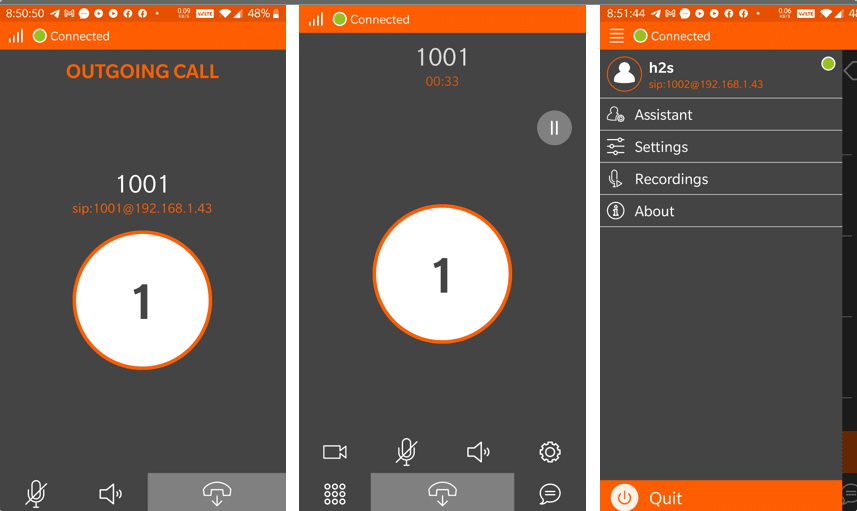
Login Android with one of the created users let’s say 1002:
• Open your LinePhone app
• Select Use SIP account
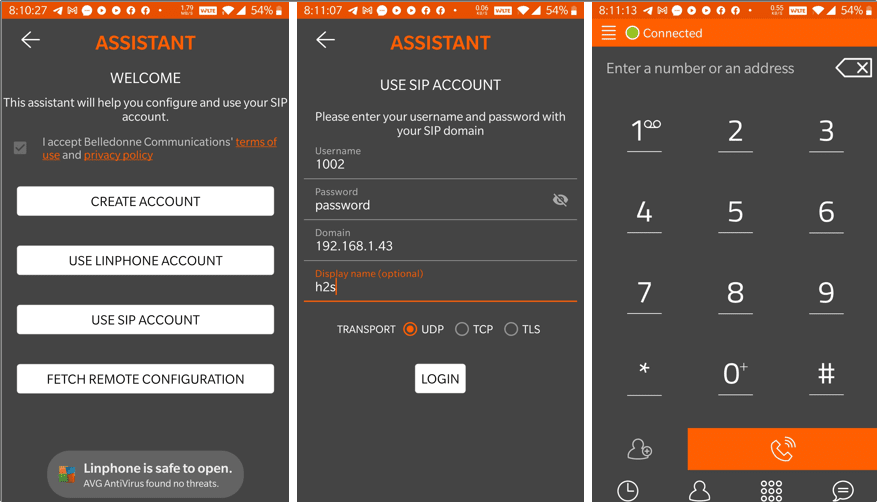
• Enter Username- 1002
• Password you set for it, here in this tutorial we user- password
• For Domain- Add the Ip-address of your Asterisk Server
• Display Name- Whatever you want to use.
• Transport- UDP
• Hit the Login button.
Open Linephone app on Windows or Linux
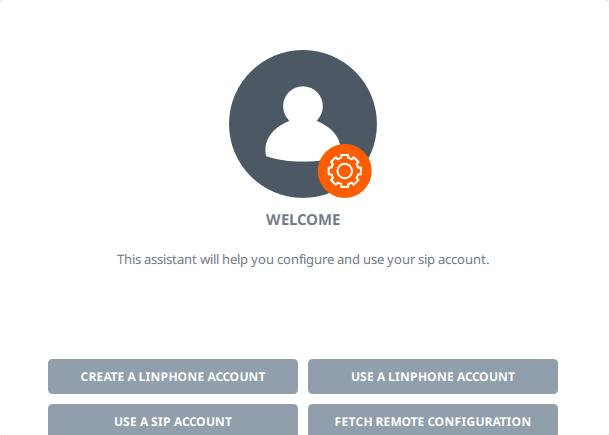
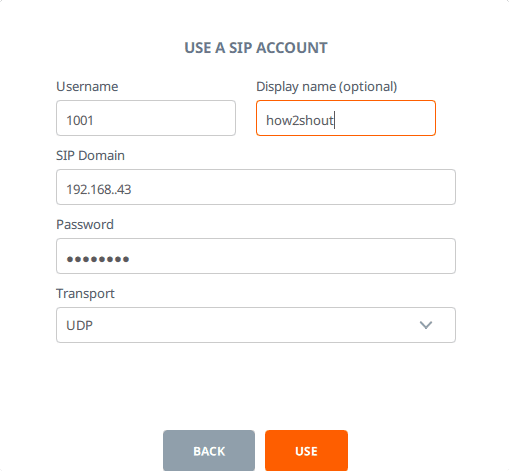
Now, we configure the second device with user 1001.
• Run LinePhone
• Select SIP Account
• Add the details- username- 1001 and its password,
• Then Domain – the IP-address of your Asterisk server
• After that hit the USE button.
After that make a call to 1002 and you will get a ring on your Android device LinePhone app logged in with 1002 users or vice versa.
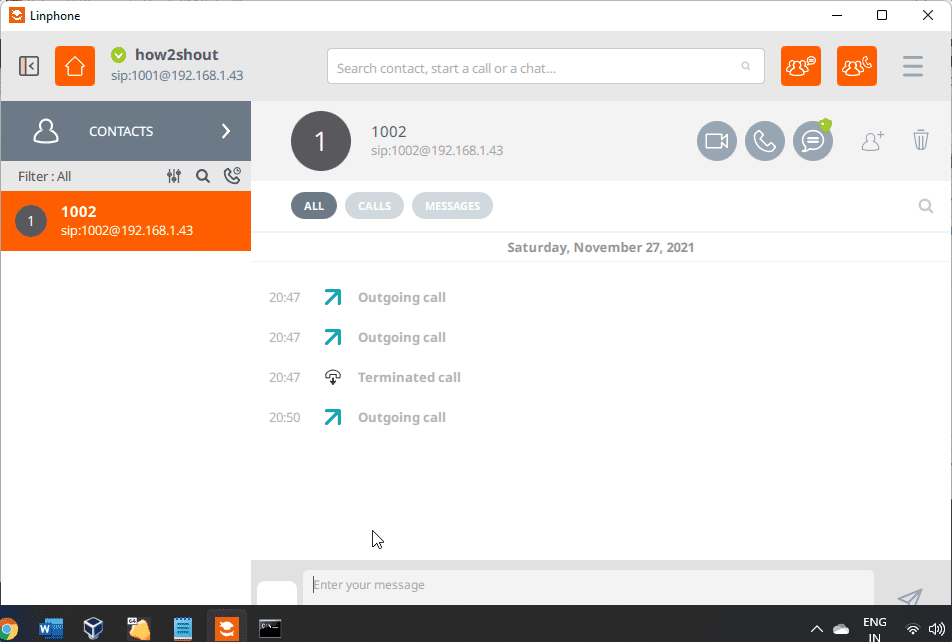
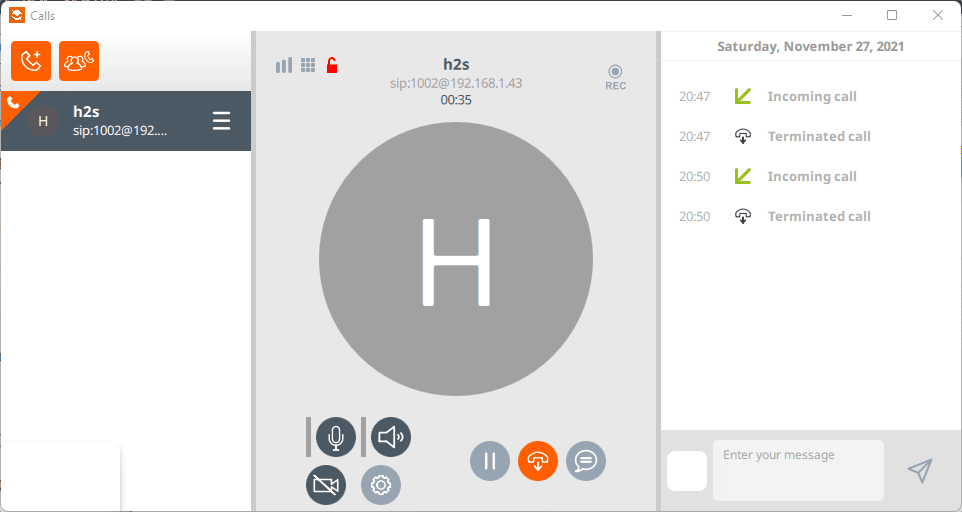
In this way, we can create our VoIP server using Asterisk and call using Local or internet network free of cost.
Other Tutorials:
• 3 Ways to Install Skype in Ubuntu 20.04 LTS
• How to install MySQL 8.0 Server on Debian 11
• Install Stremio app on Debian 11 Bullseye
• How to Install phpMyAdmin on Debian 11 Bullseye


Hiya folks
ectropia@ip012:~$ sudo apt install asterisk asterisk-dahdi
Reading package lists… Done
Building dependency tree… Done
Reading state information… Done
Some packages could not be installed. This may mean that you have
requested an impossible situation or if you are using the unstable
distribution that some required packages have not yet been created
or been moved out of Incoming.
The following information may help to resolve the situation:
The following packages have unmet dependencies:
asterisk : Depends: asterisk-core-sounds-en but it is not installable
Depends: asterisk-modules (= 1:16.16.1~dfsg-1+deb11u1) but it is not going to be installed
Depends: liburiparser1 (>= 0.6.0) but it is not installable
Recommends: asterisk-moh-opsound-gsm but it is not installable
Recommends: asterisk-voicemail but it is not going to be installed or
asterisk-voicemail-storage
Recommends: sox but it is not installable
asterisk-dahdi : Depends: dahdi but it is not installable
Depends: libopenr2-3 (>= 1.3.2) but it is not installable
Depends: libpri1.4 (>= 1.4.15) but it is not installable
Depends: libss7-2.0 (>= 2.0.0) but it is not installable
Depends: libtonezone2.0 (>= 1:2.2.1.1) but it is not installable
E: Unable to correct problems, you have held broken packages.
Help! 🙂
please once run once the upgrade command
Perfect! Simple and clear. Everything works fine. Thanks!