Apache is the most widely used and popular open-source web server on the Internet. It can be flexibly configured and expanded using a large number of modules. Here we learn how to install Apache webserver on AlmaLinux or Rocky Linux 8 using the command line.
Most of the time we use Apache web server in combination with MySQL and PHP or Perl or Python to create a LAMP server ( Linux, Apache, MySQL, and P such as PHP, Perl, or Python) for running various CMS and other web applications.
Steps to install Apache web server on Rocky Linux or AlmaLinux 8
If you are looking to set up a complete LAMP server on your Linux then go for our article • Install Apache, MySQL, and PHP on AlmaLinux 8/Rocky
1. Perform a system update
Although it is not necessary, yet it will be a good idea to make sure our system is up to date before installing Apache. Hence, run use DNF to run the update command:
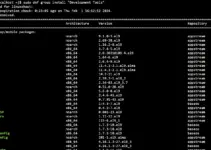
sudo dnf update -y
2. Install Apache HTTPd on Rocky or AlmaLinux 8
Well, like most of the Linux operating systems, we don’t have to add any third-party Repos to install Apache- HTTPd server. Just use the DNF package manager to fetch packages available in the AppStream & BaseOS repo of the system to install Apache.
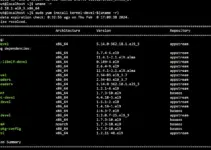
sudo dnf install httpd

3. Start and enable HTTPd service
Once the installation is completed let’s start and enable the Apache webserver service so that it can automatically get started if suddenly stopped or on system reboot.
Start service
sudo systemctl start httpd
Enable
sudo systemctl enable httpd
Check status
systemctl status httpd

To stop, if you want, use:
sudo systemctl stop httpd
4. Allow port 80 in Firewall on AlmaLinux/Rocky 8
To access the web server outside our system we have to open ports 80 (HTTP) and 443 (HTTPS) in the firewall.
sudo firewall-cmd --zone=public --permanent --add-port=80/tcp
sudo firewall-cmd --zone=public --permanent --add-port=443/tcp
sudo firewall-cmd --reload
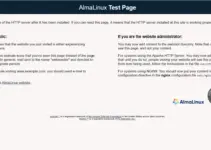
5. Use- HTTP Server Test Page
After the installation, the Apache server is immediately ready for use and runs on localhost on port 80 (the standard port of the HTTP protocol). To check out that, in your browser type the address of the Linux server where you have installed the Apache webserver.

6. Store and access websites
The contents for the server are saved in a directory called “document root“. This means that the Apache webserver looks there for the (HTML) files to be delivered. In Apache the directory is:
/var/www/html/
If you save files there, you can access them using the server-IP address:
http://localhost/ or http://SERVER-IP_Address/
can be called up in the browser. During the installation of the server, the page index.html is stored there, an HTML test page which should now be visible in the browser, like here under Firefox.
If you want to deliver several different websites via the server – which is possible without any problems – then you usually configure different “virtual hosts“.
Other Articles:
• How to install & configure Lighttpd web server on Ubuntu
• How to connect Rocky or AlmaLinux 8 via Windows
• How to install phpMyAdmin on Rocky or AlmaLinux 8


Hi, there is a mistake in firewall-cmd lines. You need to add –permanent to these commands, otherwise ports will be closed again after reload.
Thanks !!!