Start your Ubuntu Linux server virtual machine on the AWS Ec2 Instance of Amazon Cloud using the easy steps given in this tutorial.
Amazon Elastic Compute Cloud (EC2) is a popular computing service that allows users to create a virtual machine using various available Linux and applications Images. It is provided by Amazon Cloud with a complete infrastructure to host commercial applications on Linux virtual machines. In short, it is a Cloud service to create virtual servers.
The interface of AWS is easy to manage that’s why even a new user with some technical knowledge can easily create an EC2 instance and configure it with prefer an operating system, hardware configuration, and required software packages. Depending upon the needs users can launch, terminate, and manage instances and even can scale up or down as demand changes.
Users will charge on an hourly basis for an Ec2 Instance which further depends upon the instance type, usage duration, and data transfer. To cater to different kinds of users’ requirements Amazon Cloud offers a variety of instance types each optimized for different types of workloads and hardware configurations, such as compute-intensive or memory-intensive applications.
Step by Step create Ubuntu Ec2 Instance on Amazon Cloud (AWS)
1. login or Sign up for an AWS account
If you already have the AWS account, log in to it, or else if you are a new user then visit the AWS signup page and create a new Aws account. Once you have created a new account or logged in successfully moved to the next step.
2. Go to AWS ec2 Dashboard
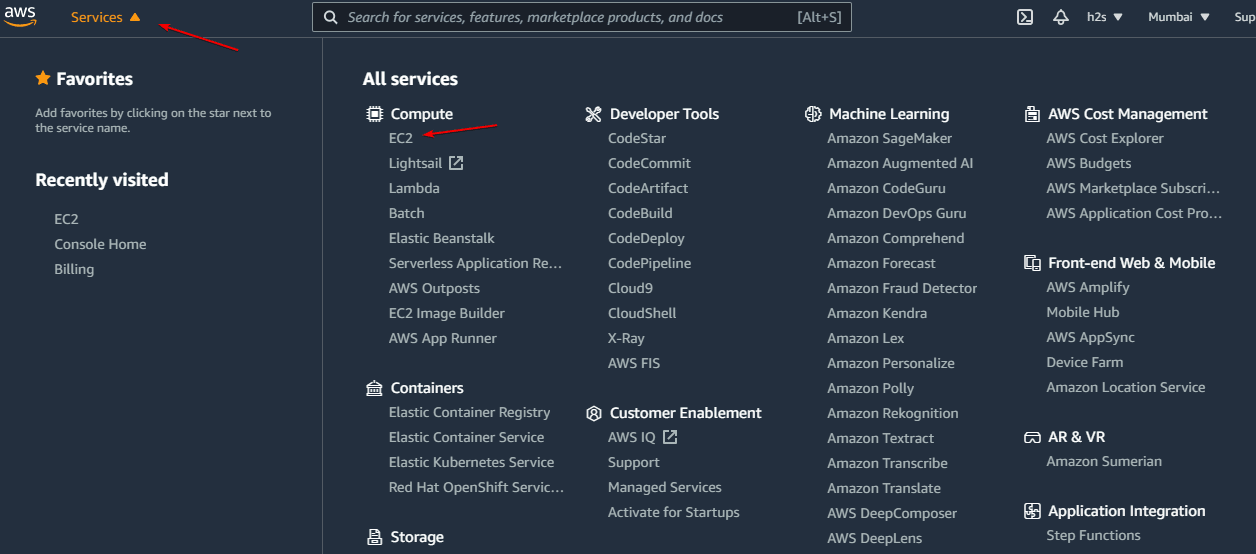
After logging in to your AWS account you will see the AWS Management Console. On the left top side, click on the Service drop Menu to select EC2. Or else use this link
3. Launch Ec2 Instance for Ubuntu
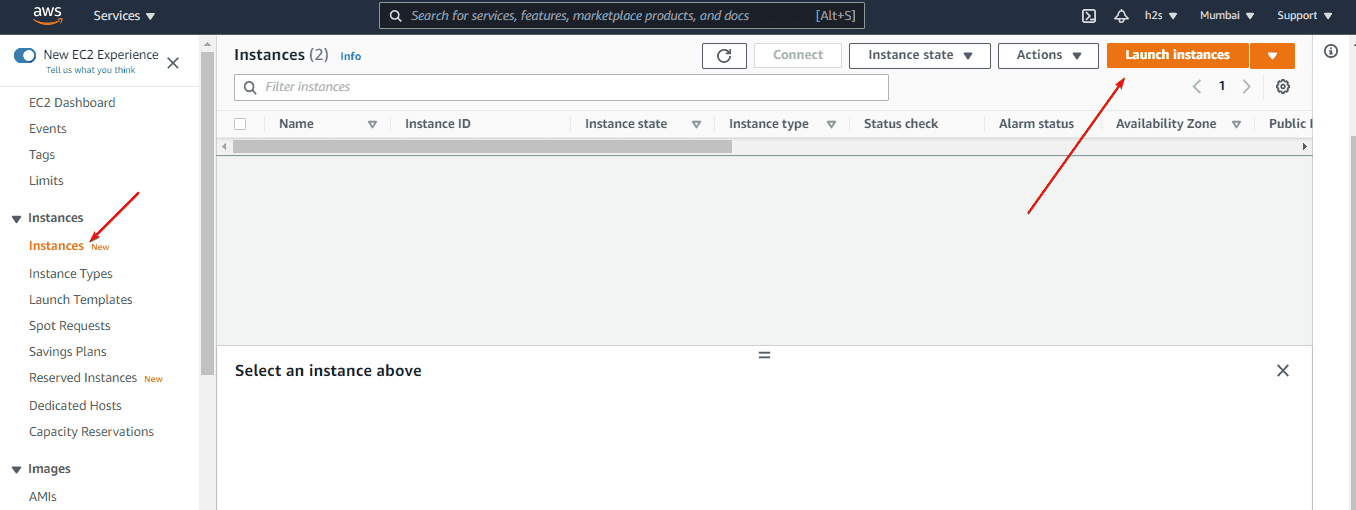
Once you are on the AWS ec2 Dashboard, click on the “Instances” option given on the left side. And then hit the “Launch Instances” button given on the top right side.
4. Choose Ubuntu Linux Image
On the next page, you will see a list of Virtual Images available to launch on Amazon ec2. Select one of your choices such as Amazon Linux, Ubuntu, Red Hat, OpenSUSE, Windows, and more… Here we are selecting “Ubuntu” .
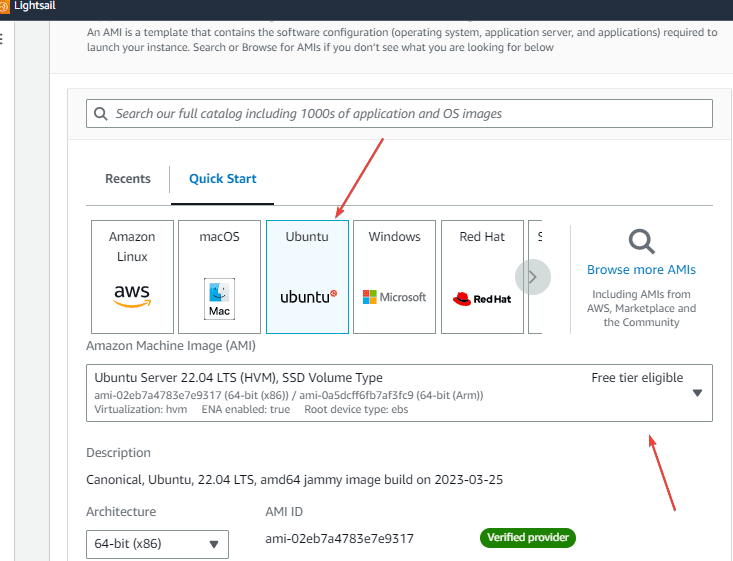
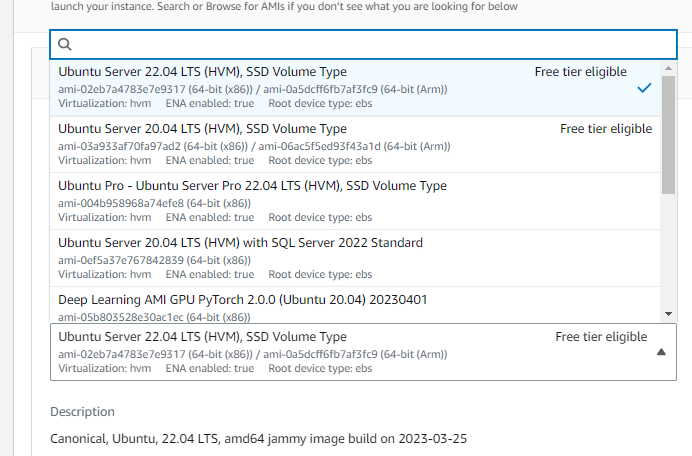
After that, select which Ubuntu Version Image you want to start with. For example, by default Ubuntu 22.04 was set but you can use Ubuntu 20.04, Ubuntu Pro, and other pre-installed images of Apps on Ubuntu.
 .
.
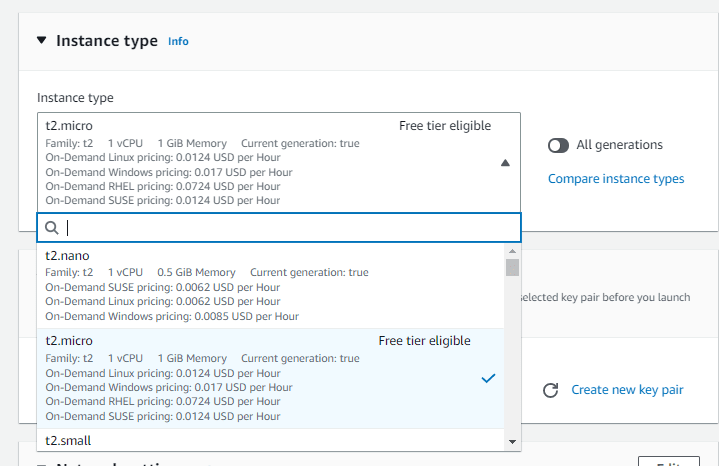
5. Choose the Instance Type
Once you choose the Ubuntu Linux version, scroll down and you will see Amazon the Ec2 service offers a wide range of virtual hardware or Instances to run the selected Machine Image. If you want are using the Free tier then let the default one be selected. Or else go for the one (CPU & Memory) that suits the application you are planning to install on your Ubuntu Ec2 Instance.
6. Create a new Key Pair (important)
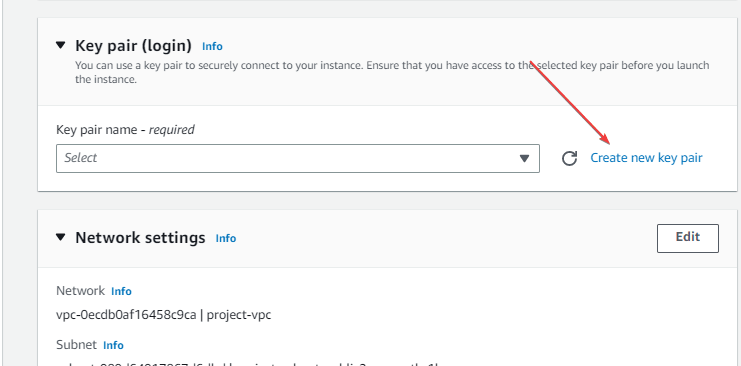
With the completion of the Instance type selection, scroll further to create a Key pair (login) that we need, if you want to connect your Instance remotely using any PC or laptop via SSH protocol. So, don’t skip this step
Click the “Create a new key pair” link.
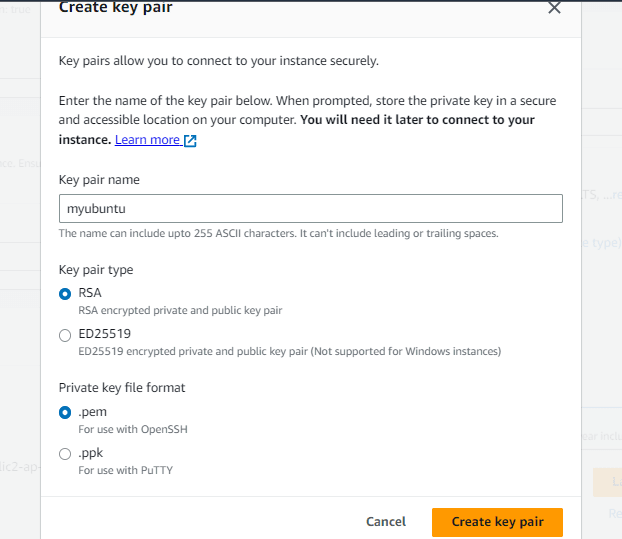
Give some name to your KEY and then leave the default settings and just hit the “Create Key Pair” button. Those who want to use Putty instead SSH can select the PPK instead of PEM.
After this, the key will be downloaded to your system, save it securely because you need it when you want to use some local SSH or Putty app to connect the remote Ubuntu EC2 Instance running on AWS.
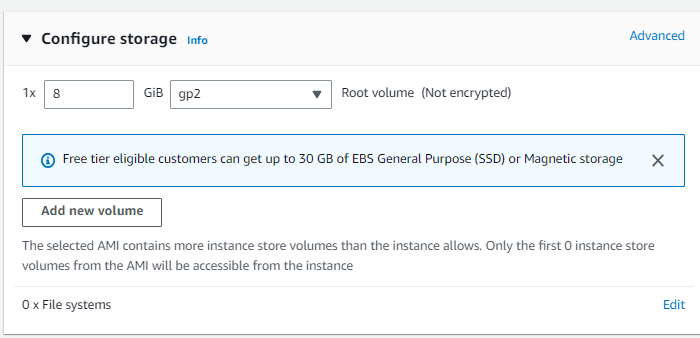
7. Configure Storage for Instance
As per the requirement for the application you need to configure in the Amazon Ec2 Ubuntu Instance, select the storage value. Up to 30GB is free in AWS free tier.
8. Assign Public Ip address to Ec2 Instance
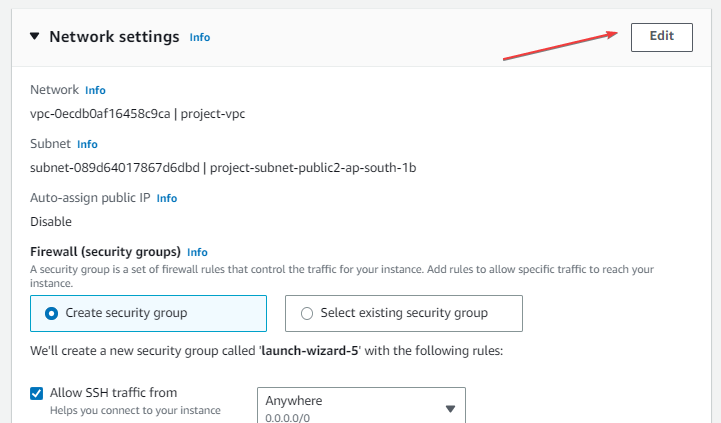
To access the Ubuntu Ec2 instance from the outside world using the Internet connection, we need to assign a public Ip-address to it. So, click on the Edit button given in the Network Settings area.
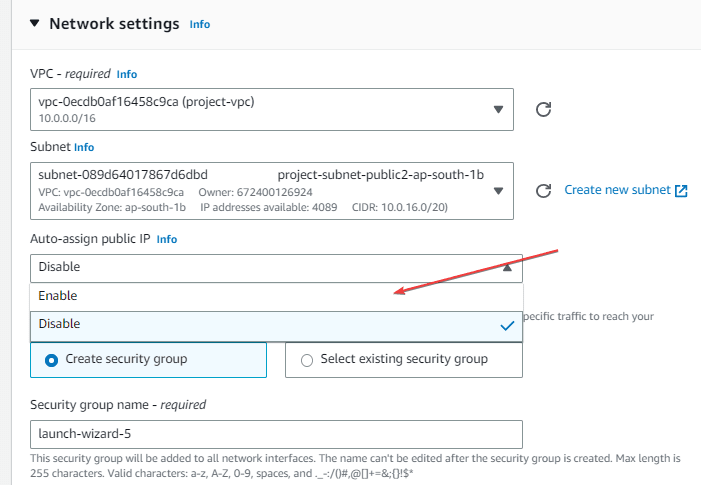
Scroll down to find the “Auto-assign public IP” drop-down box. By default, it will be set to disable, change that to enable.
9. Review Instance Launch
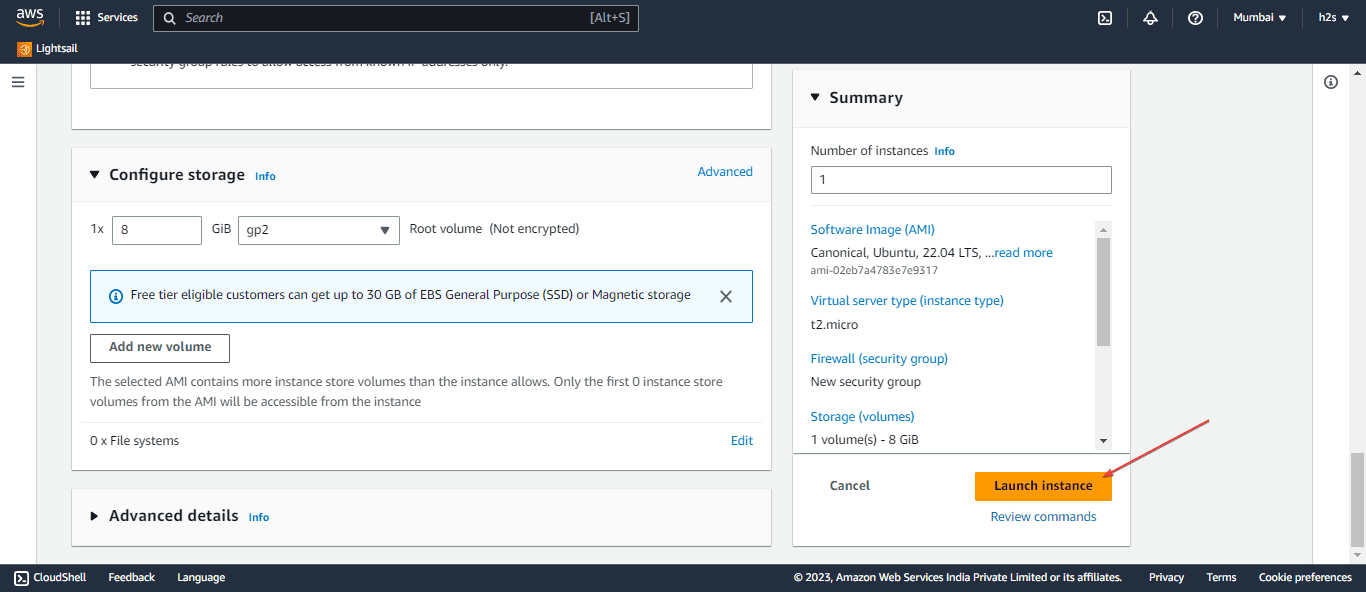
Finally, once all the necessary settings are configured, on the right of the EC2 Instance configuration web page you will see all the details along with storage and security attached to your Ec2 Instance. Those who would like to change anything can simply click that and the page will jump you to that section of settings.
Well, you can go with the performed settings because we can change them later. Hence, simply click on the “Launch Instance” button.
Once done, get back to the Instances Area.

10. Open HTTPS and HTTP ports (optional)
By default, you will see that only Port 22 for SSH is allowed to connect and access remotely using any IP address. However, those who want to install some web applications or web servers on their AWS Ubuntu Ec2 Instance need to allow HTTP and HTTPS traffic in the Network firewall.
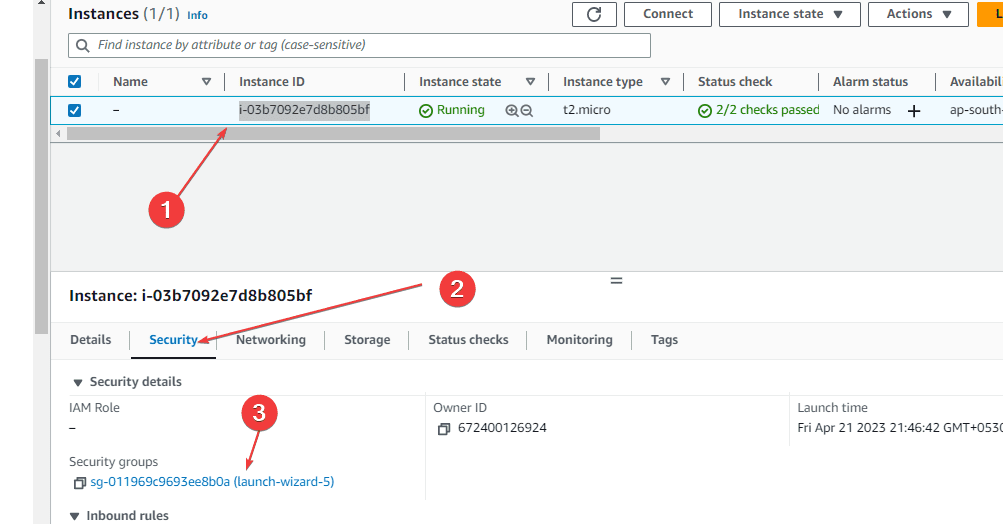
For that, select the Ubuntu Instance ID that you have just created and then select the security TAB. After that click on the Security Group ID associated with your Instance.
Now, click on the “Edit inbound rules” button.
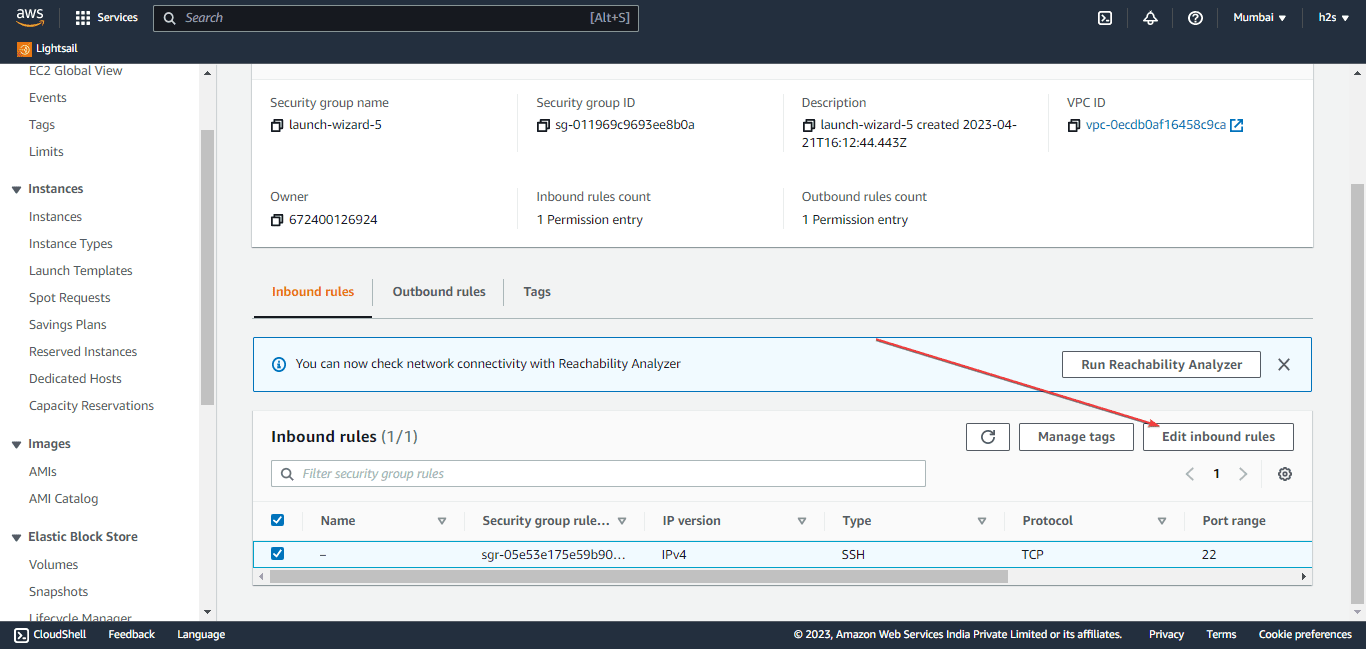
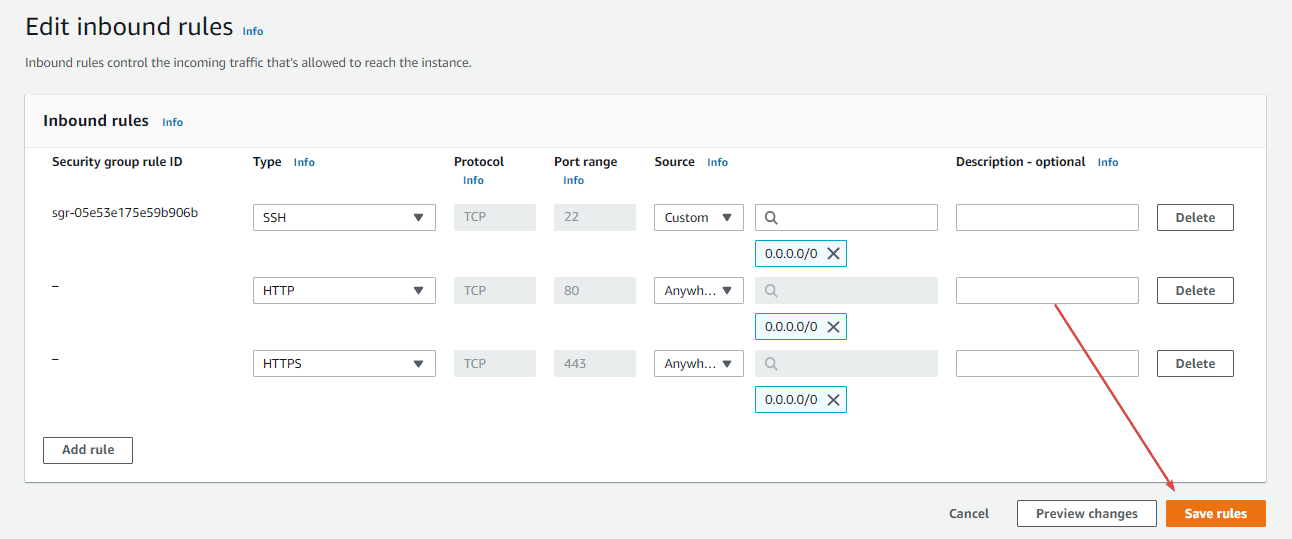
Click on the Add rule button and select the HTTPS and then allow it access from all IP-address 0.0.0.0/0, similarly do for HTTP.
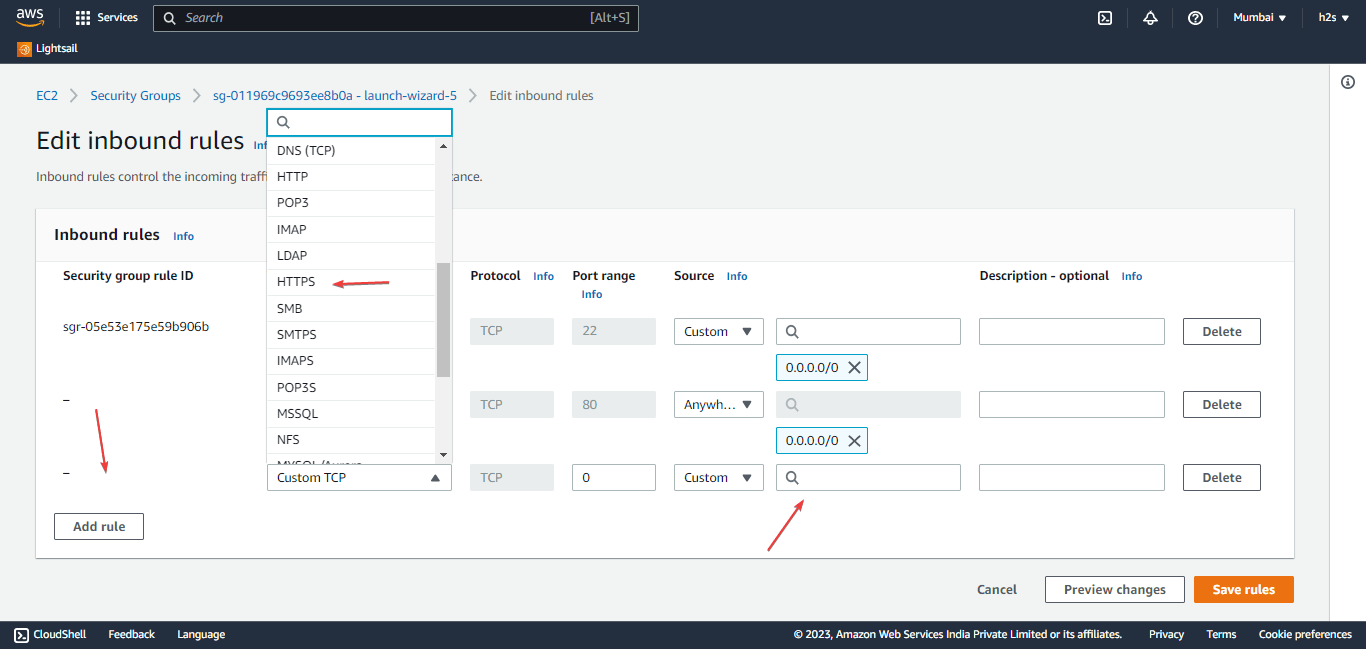
Once done, click on the “Save rules” button and then get back to the Instance area.
11. Connect to your Amazon Ec2 Instance
There are two ways to connect the command-line interface with the sudo access of your created Instance. One is via using the inbuilt Web console of Ec2 and the other is using your local machine via SSH.
Well, here we show how to use the web console; and how to connect it using the local PC command terminal or SSH client via SSh protocol see: How to SSH AWS ec2 Linux Instances remotely
Whereas to access it using the Web Console,
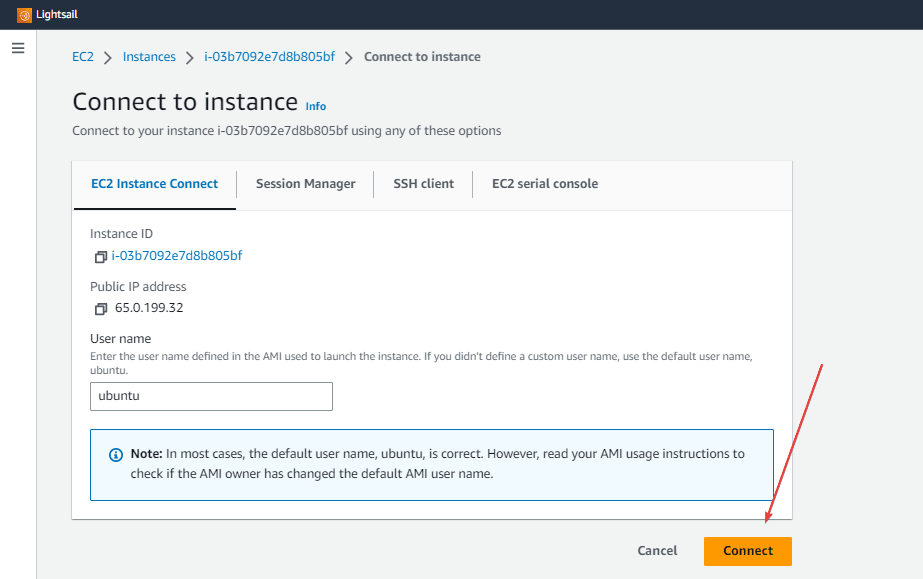
- Select the Created Instance
- Click on the “Connect” button.
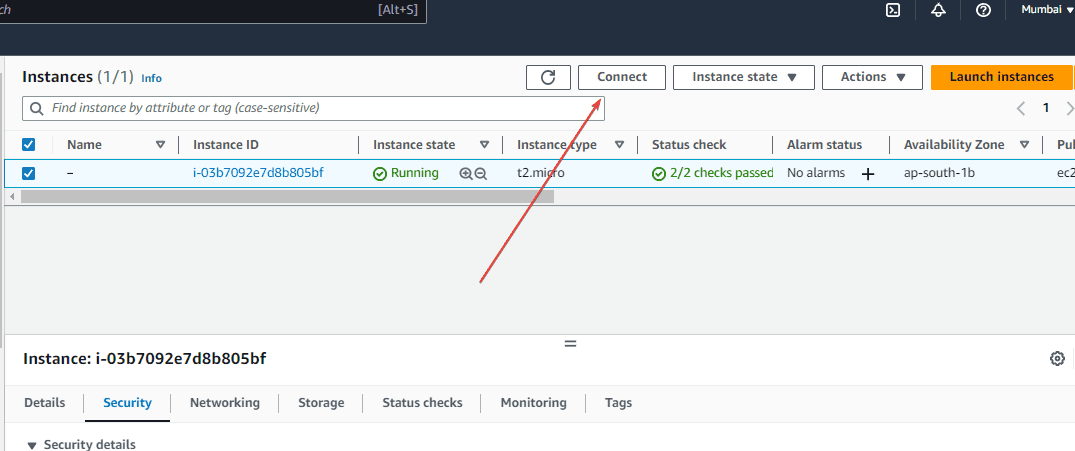
- Under “Ec2 Instance Connect” click the “Connect” button.
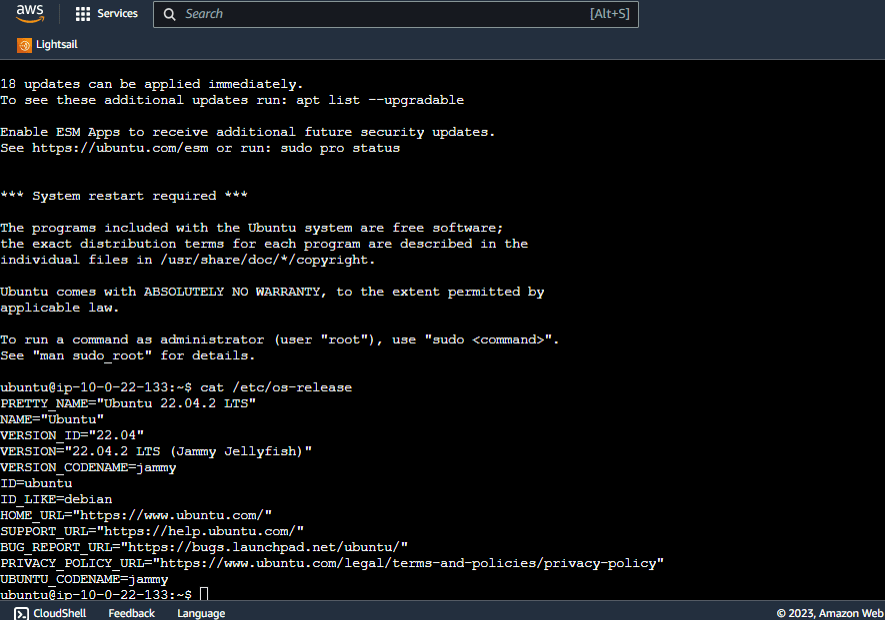
You will now have the web-based terminal to issue commands to your created Instance. In this way, we can create and connect as many Ubuntu Linux Ec2 instances as we want.
Other Articles:


