We already have RHEL-based operating systems to install on a virtual machine, such as CetnOS, Rocky Linux, and AlmaLinux. However, if you are an Amazon cloud User, then you would like to use Amazon Machine Linux Image (AMI) on your local virtual machine created on VirtualBox, Vmware, and Hyper-V. As Amazon Linux is based on RedHat codes, we can use the same YUM package manager and other commands of RHEL to install and handle various tools and software. Here we will learn the steps to set up and run Amazon Linux 2 on Virtualbox.
How to Install Amazon Linux 2 on VirtualBox
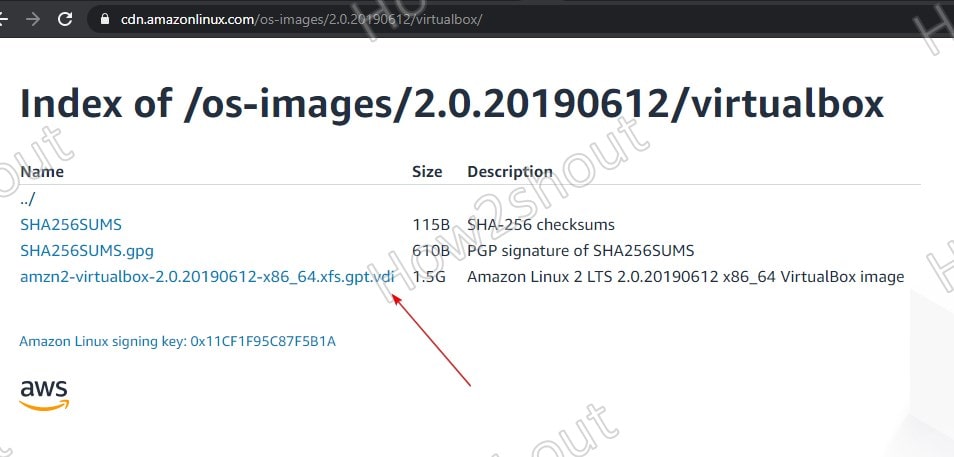
1. Download Amazon Linux VDI Image
The AMI image to install on Virtualbox is not available in ISO format; instead directly in the form of a Virtual Image as per what kind of virtual machine platform you are using. Amazon Machine Image is currently available for Hyper-V, KVM, VMware, and VirtualBox. While writing this article, the latest image was Amazon Linux 2.0. with Long term support. However, users can go for the latest Amazon Linux 2022, when available at – the link.
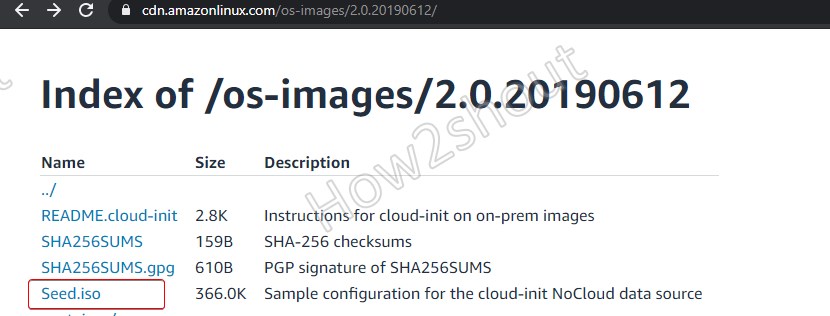
2. Seed.ISO file- for root user password
By default, you won’t be able to access or log in to your Amazon Linux 2 root user; we have to download one more file called Seed.ISO. On the page, click- Seed.ISO, and you will have it on your system. Here is the link.
3. Get VirtualBox
If you already have VirtualBox on your system, you can move to the next, whereas those who have not can visit virtualbox.org and download the setup.
For Ubuntu – you can use the following.
sudo apt install virtualbox
4. Create Amazon Linux Virtual Machine
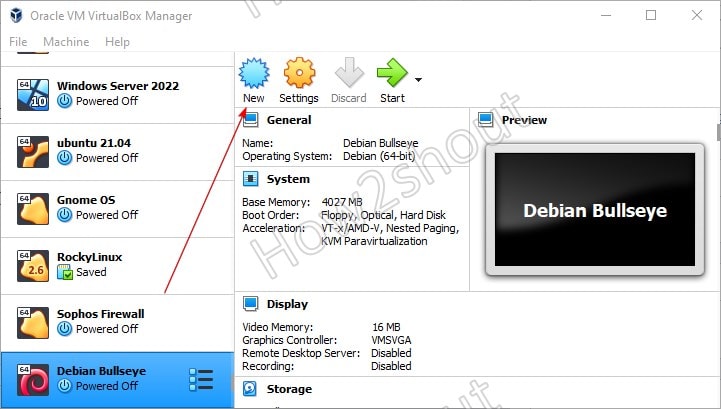
Step 1: Click VirtualBox’s NEW button to create a new virtual machine.
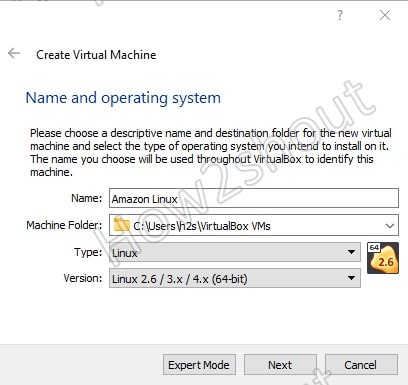
Step 2: Name your operating system on Virtualbox; you can go for – Amazon Linux, and the rest of the things, such as Type and Version, will automatically get selected.
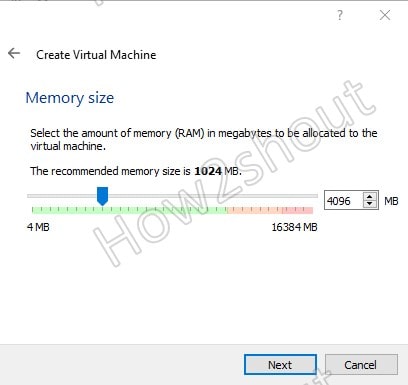
Step 3: Set RAM- Select the amount of memory you want to assign – a minimum of 1 GB or more should be selected for good performance.
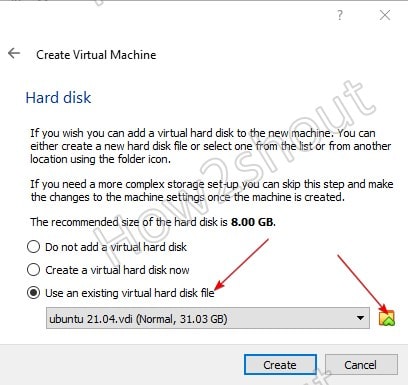
Step 4: As we already have downloaded the Amazon Linux VDI Image, thus we don’t need to create a new one. Instead, we use the one we have on our system. Select “User an existing Virtual hard disk file” and click on the Folder icon.
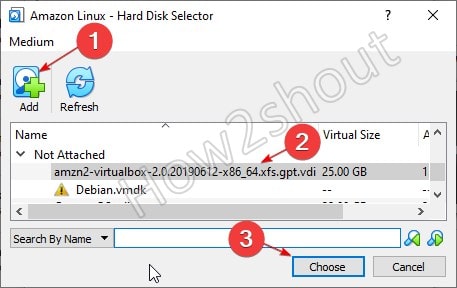
Step 5: Click on the Add button and select the download Amazon Linux 2 VDI machine image. After that, it will appear in the display area along with other hard disk images. Just like that and hit the Choose button. Then click on Create to finish the process.
5. Add Seed.ISO file to VirtualBox VM
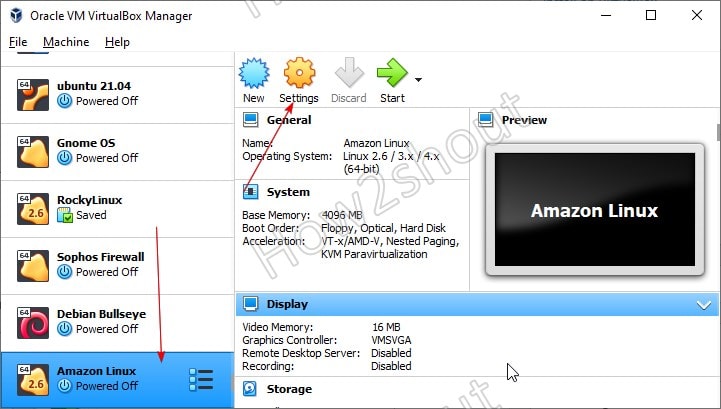
Step 1: Select the created VM from the left side and hit the Settings button given in the Menu.
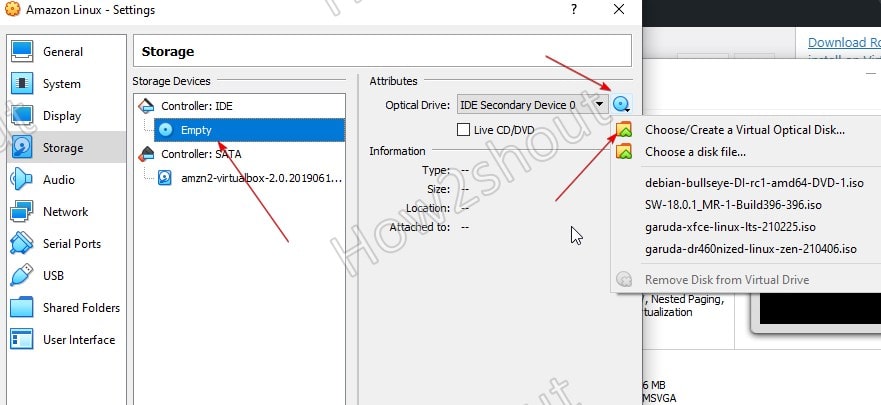
Step 2: From Settings – Click on Storage and select the Empty CD icon under Controller: IDE. Then click on the Attributes CD icon and Choose/Create a Virtual Optical Disk.
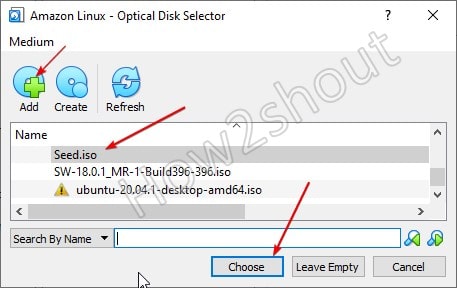
Step 3: Click the Add button; file explorer will open, and select the downloaded Seed ISO file. After that, it will appear in the display area. Select it from there as well and hit the Choose button.
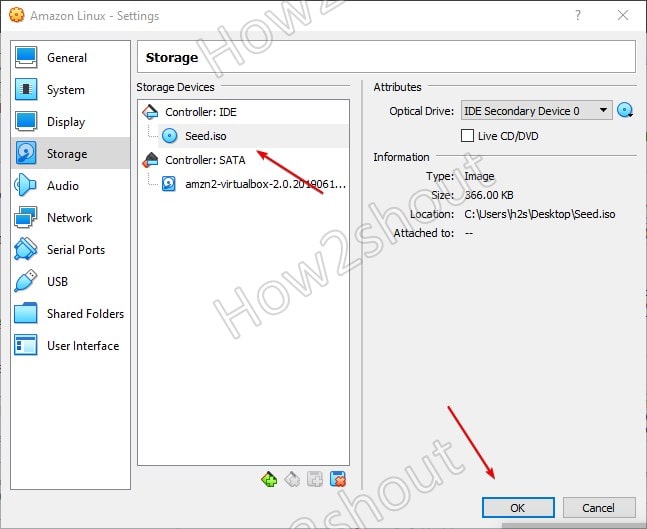
Step 4: Press the OK button.
6. Start AMI Virtual Machine
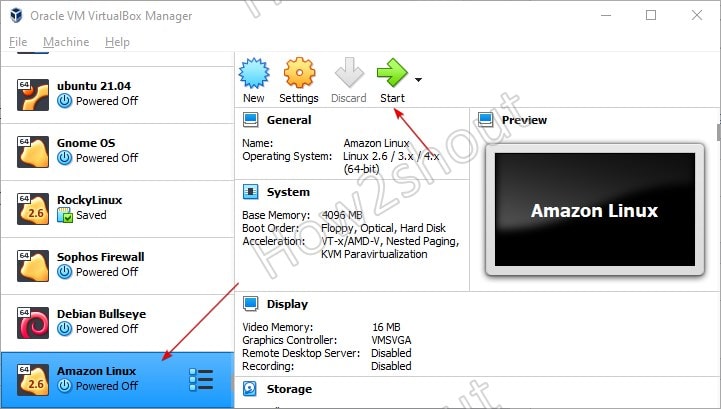
Now, select AmazonLinux 2 VM from the left side of VirtualBox and hit the Start button.
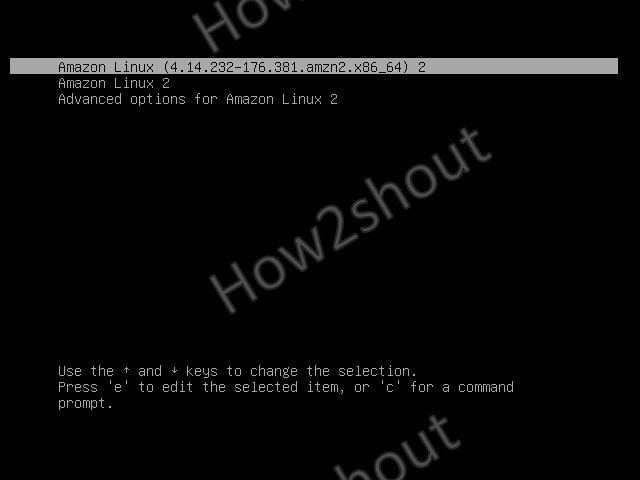
7. Boot Screen
Let the default option be selected and hit the Enter key.
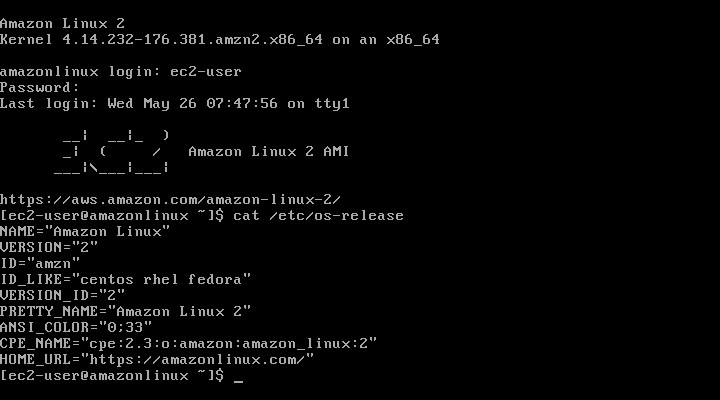
8. Amazon Machine Image Login as root
As Amazon Linux 2 is meant for server usage, there will be no graphical user interface on it by default, instead of a command line. However, you can install GUI manually as per your choice.
To login to the system, type username – ec2-user and password – amazon
9. Set the Root user password
We don’t want to use the seed.iso file to log in to our AWS Linux on Virtualbox every time; thus, let’s set the root user password so that you can easily remove the Seed.ISO file.
sudo passwd root
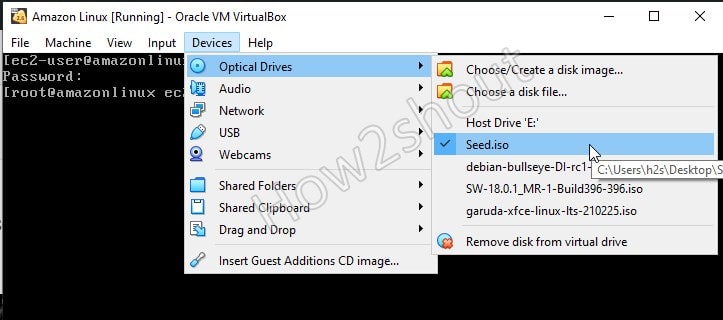
After that, you can remove the Attached Seed.ISO in the virtual CD ROM; we don’t need it anymore. Devices >> Optical Devices >> click Seed.iso and then Force unmount.
Learn how to install KDE GUI on Amazon Linux- and if you want some other tutorial on AWS Linux, let us know. The comment section is all yours.
Other Articles:
- How to install and use Amazonlinux on Docker Container
- Download Rocky Linux 8 ISO to install on VirtualBox
- Install Virtualbox on Manjaro Linux’s latest version


Thanks for the Tutorial, It’s really good. I’ll check the link for the GUI. I think it is possible use LXDE, right? It is lighter.
Is possible the same process for the AL 2023 or it is too soon?