If you are using Windows 7, 10, or 11 and want to create an Elementary OS 6 Linux bootable USB drive using Rufus then here is the tutorial for you.
Creating a bootable USB drive is not a Sisyphean task, we can easily do that using any suitable software; that can transfer your ISO files to a USB stick and with which it can also be booted at the same time. Well for Windows OS, there is a couple of good software for creating a bootable pen drive, however, Rufus is the simple and popular one. The best thing, it is portable hence doesn’t need to be installed on the OS at all.
Although we already have done a tutorial on how to create a bootable USB drive of Elementary OS 6 using open source BalenaEtcher. If you want, can look at it. Whereas, existing Rufus users can refer to this article.
Create Elementary OS 6 bootable USB drive on Windows using Rufus
- Download Rufus bootable USB maker from its official website.
- Run the software by double-clicking on its setup.
- Ge the Elementary ISO file from its official website.
- Plugged-in USB drive that you want to make bootable on your PC or laptop.
- Go to Rufus and from the “Device” drop-down box select the attached USB drive.
- Now, click on the “SELECT” button and choose the downloaded Elementary ISO file.
- Next, leave the rest of the settings as it is and hit the “START“.
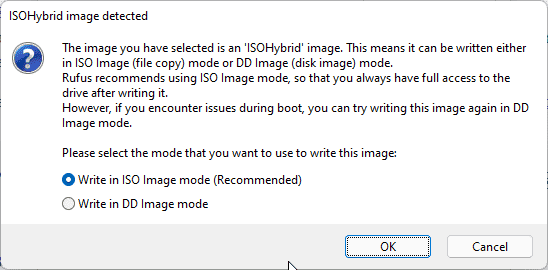
- Let the “Write in ISO image mode (recommended)” be selected.
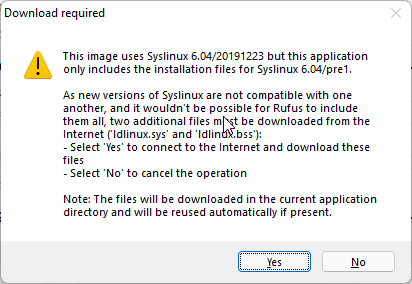
- The setup will also ask to download
Idlinux.sysandIdlinux.bssfiles, just give your permission to download these files. - After that wait for few minutes, once the Image writing to the USB process is completed; you will have the bootable Elementary OS 6 Odin USB drive to install on a PC or Laptop.

