Determining the disk space in Linux is necessary to manage the health of your system. Linux offers various commands and GUI utilities by which you can check the disk space and resolve the errors quickly. However, as beginners, many users don’t know how to check the disk space and mess up the system. Don’t worry; we have gathered and listed all the possible ways to check the disk space in Linux with no hassles.
Checking disk space ensures that storage is available for application usage and system operations. Linux has some built-in commands that provide information related to disk space. Some of them are as follows:
List of Commands to check disk Space in Linux systems:
Using df Command
The df command i.e. disk free, is the most common command to check the disk space in Linux and displays the occupied space in different drives. This command displays the available space and your system’s occupied disk space.

Here we execute the command combined with the ‘-h’ option. It shows the result in the human-readable format. By default, the df command gives output in 1 kilobyte. There are different columns which have show different details:
- Filesystem→ Name of the file
- Size → Total size of the file
- Used → Used space in a specific filesystem
- Avail → Unused space of the filesystem
- Use% → Shows the free disk space in terms of percentage
- Mounted on → Displays the specific file system’s mount point
Through the df command, you can also check the space in a particular filesystem. To check the space in the primary hard drive use the below command:
df -h/
You can get more details or options related to the df command with its help page. For this use the below command:
df --helpNote: The df command can’t determine the disk space for a specific directory, it targets only a full filesystem.

Using du Command
The du i.e. disk usage is used to check the disk space for individual directories and files. To use this command you have to mention the file or folder and the general command is as follows:
du [option] [file or folder location]
For example, here we find the disk usage in the downloads directory, and we run the following command:
du -h /home/prateek/DownloadsAs you can see from the above output, the home directory occupied 8.0K space.

Using fdisk -l Command
Through this command, users can view the disk space with disk partitioning details. It displays the partitions of your system with their sizes and types.
Note: Sudo privileges are needed to run this command.
sudo fdisk -l
Using pydf Command
The pydf is a Python-based command which is not pre-installed. First, install this utility by running the below command:
sudo apt install pydf
After installing this command, you can use this command by simply type ‘pydf’ in the terminal as follows:
pydfThis command provides disk space usage in a human-readable and colorful format.

Using ncdu Command
This command is commonly known as the disk usage analyzer. This utility is not pre-installed and to use it, the users need to install it separately. For this run the following command:
sudo apt install ncdu
Now, you can run the ncdu command to analyze the disk space:
ncdu
By default, this command shows the details for the current directory. Meanwhile, to check information for the other directory, you can mention that directory name followed by the command.
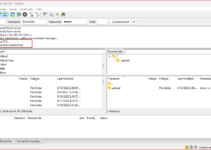
Using ls -al Command
Through this command, users can view all the detailed information of a particular directory along with their sizes, permissions, timestamps, and owners.
ls -alh
Using stat Command
Like the ls command, the stat command also prints details like file owner, modification dates, sizes, access permission, and so on. To use this command, simply just write the directory name following the command name. For example, here we check the details of the ‘Downloads’ directory and run the below command:
stat Downloads
Using GUI Method: GNOME Disks
For Linux users, GNOME is a free and open-source pre-installed utility for Linux or Unix-like operating systems. Users can use it for each drive to check the disk space. To do this:
First type ‘GNOME‘ in the search bar to open the GNOME Utility.

Open the application and you can see the list of connections. Now select the disk on which you want to check the disk space.

Note: Apart from the GNOME disk utility, various desktop environments are also available for disk management like a disk usage analyzer.
Conclusion
Users can prevent so many things by knowing the disk space in Linux like potential data loss, application failures, and performance issues. Here we described commands like du, df, stat, ls, and many more to check disk space in Linux. In all these commands you can use different flags to modify the output or details.
Users who prefer a graphical method rather than a command line then you can go with the disk-checking utility, like GNOME.