Are you looking for a free Cloud hosting for your WordPress blog or website? Then start with the Always free plan of Oracle Cloud.
WordPress is one of the most popular PHP based content management systems. Thus, lots of newbies who want to start blogging are looking for a way to start without investing a penny. Yes, you can go for WordPress.com to start a blog but the free plan of its is limited in features. Therefore, to get full freedom and control over the website one should go for third party hosting. However, that is also a problem because free shared hostings are not that reliable, and also a risk of data or account get deleted by the provider is always dangling on the head.
Well, don’t be get worried much because Oracle which is known for its software products and other IT services offers forever free plan on its own cloud infrastructure. Thus, speed, reliability, full control, and freedom all are there to set up a WordPress website. But one thing which could be a problem for some of us is the availability of a credit card. Just like any other Cloud service, Oracle cloud also needs credit to ensure the authenticity of the customer and make sure, in future the person would be able to pay. However, don’t worry the company is not going to charge anything unless and until you’ll not upgrade the free to get the paid computing and storage resources for your website.
Pre-requisite
- Oracle account (requires a credit card to sign up)
- Knowledge to work with the command line and terminal
Steps to install WordPress CMS on free Oracle Cloud VPS
Here we will not only let you know how to create a free-forever Oracle cloud instance and installation of WordPress over that but also the setting of free CentOS web control panel to easily manage everything like you are doing on paid hosting with WHH/Cpanel. In short everything at $0 cost.
Setup Oracle Cloud free Account
The setting up of the cloud account is not a cumbersome task, as I mentioned above you just need a credit card that’s it. For more information on that please see our tutorial on creating a free Oracle Cloud Account in “Always free tier“.
Create Linux based server Instance
By default, there would not be any instance on the Oracle Cloud, so, we need to install the server by using the Linux images such as Ubuntu, CentOS, Oracle Linux, and more…
1. Create VM Instance
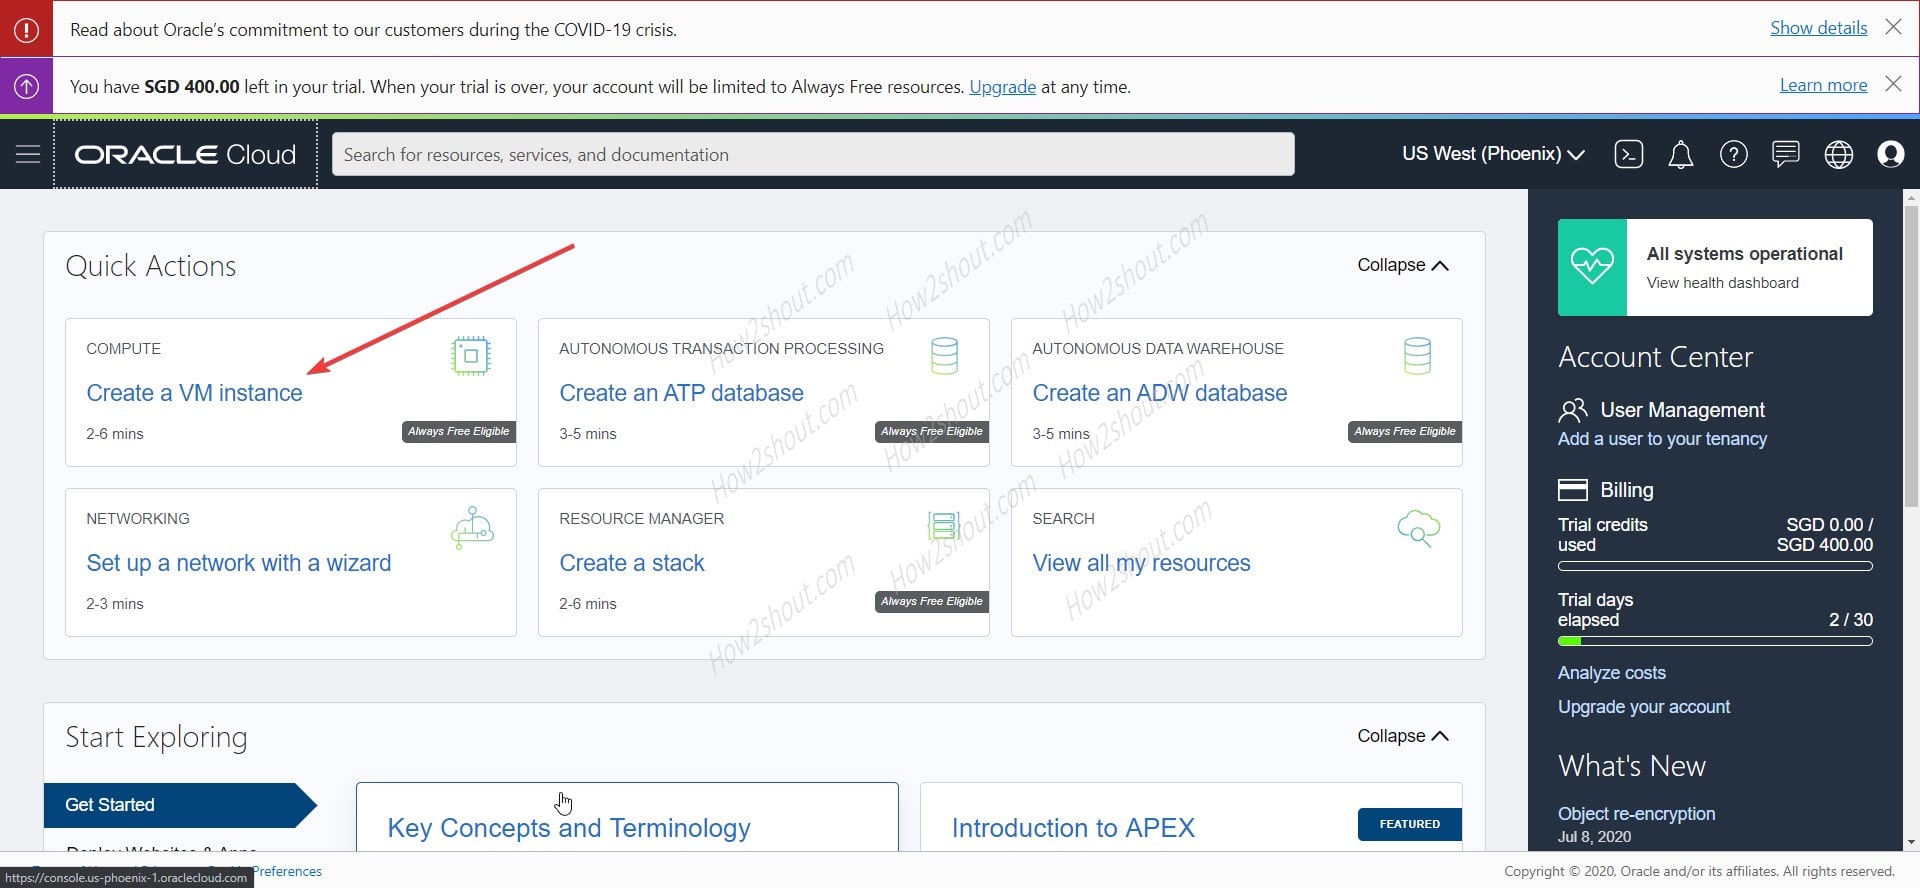
On the main screen of Cloud after login, you will see multiple options out of them one will be “Create VM Instance” click on that.
2. Select Linux VM image
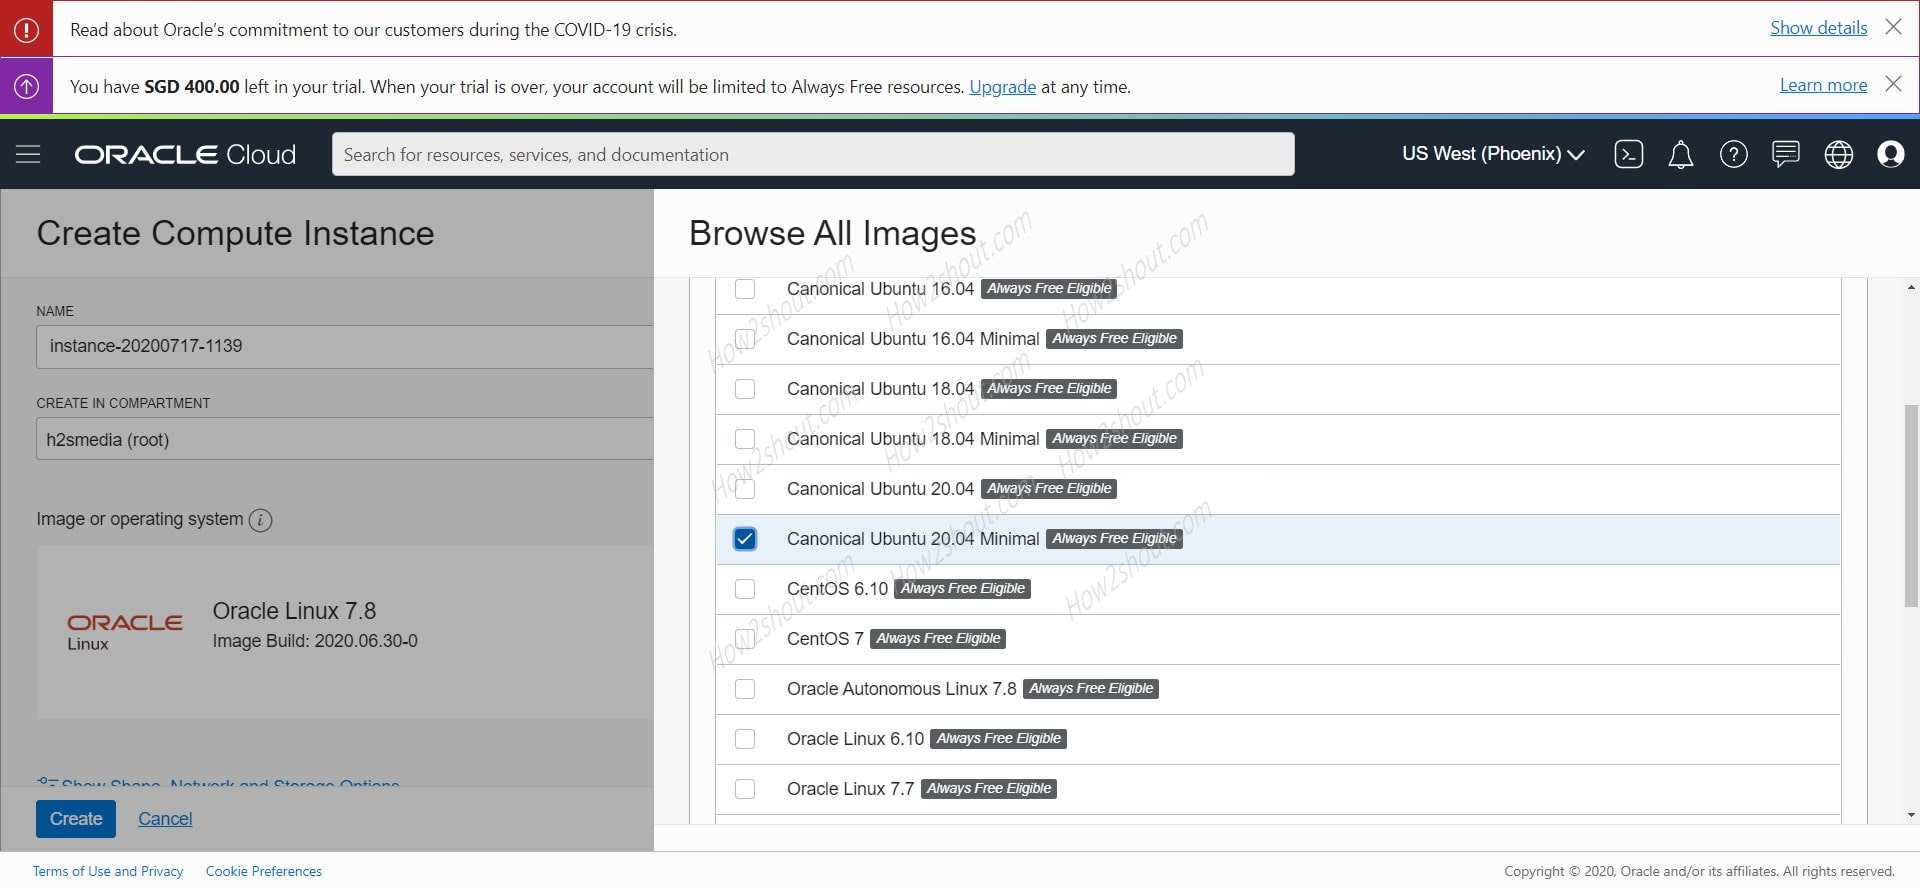
You can change the default instance name if you want otherwise leave it as default. One the same windows, by default the Oracle Linux image will get chosen by the system, however, we recommend CetnOS or Ubuntu. For that click on the “Select Image” button and opt the VM image, you want to install on the cloud server.
3. Download SSH Private Key
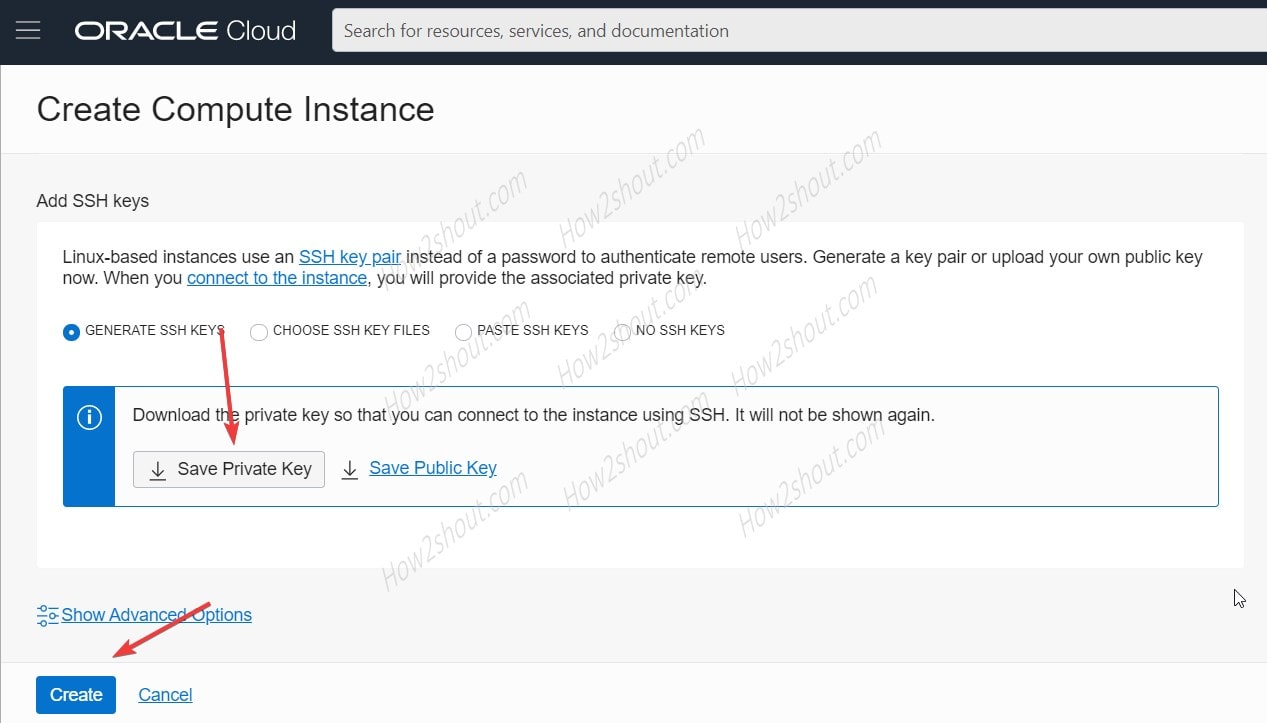
This is a very important step because after that you will not get an option to download pre-defined SSH key of your server instance. However, we can create it manually but that would be a lengthy process of a newbie. Therefore, it’s recommended to download for that simply click on the “Save Private key” button.
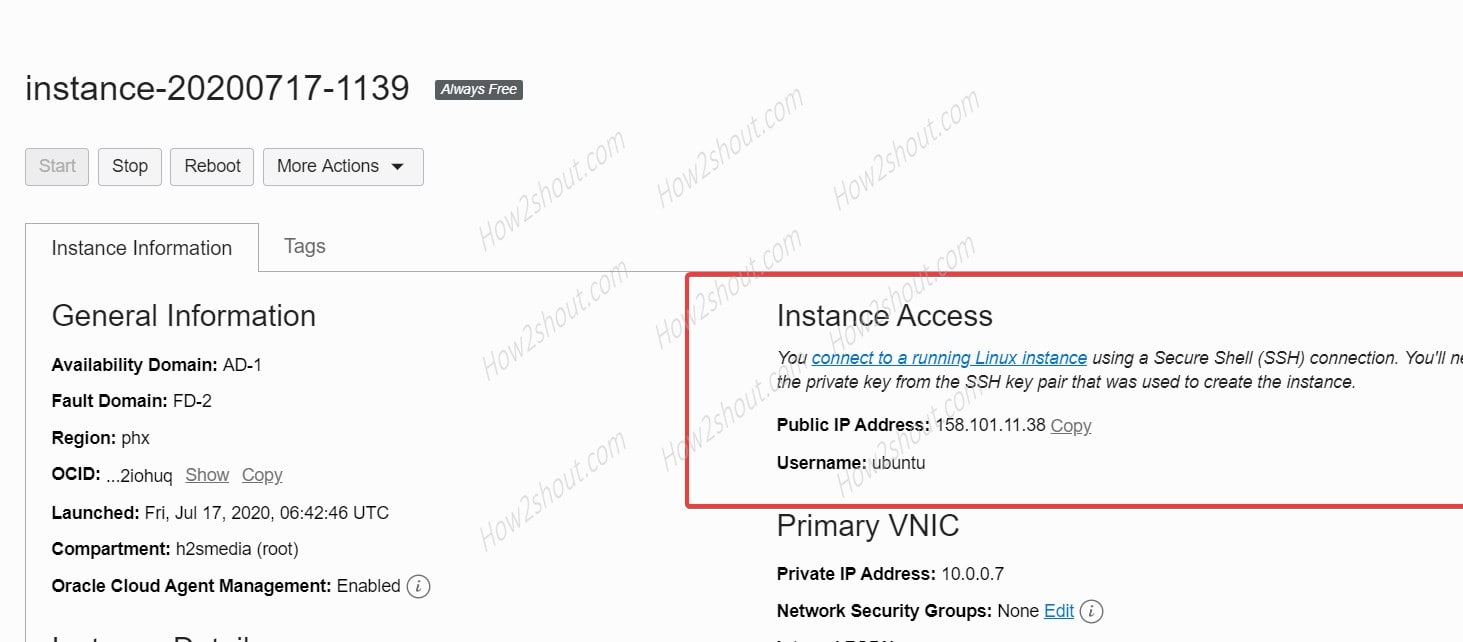
Finally, click on the “Create” button. Wait for a few minutes, once the set up of VM instance is done it will show that along with configuration details such as publish IP address.
Connect to instance via SSH
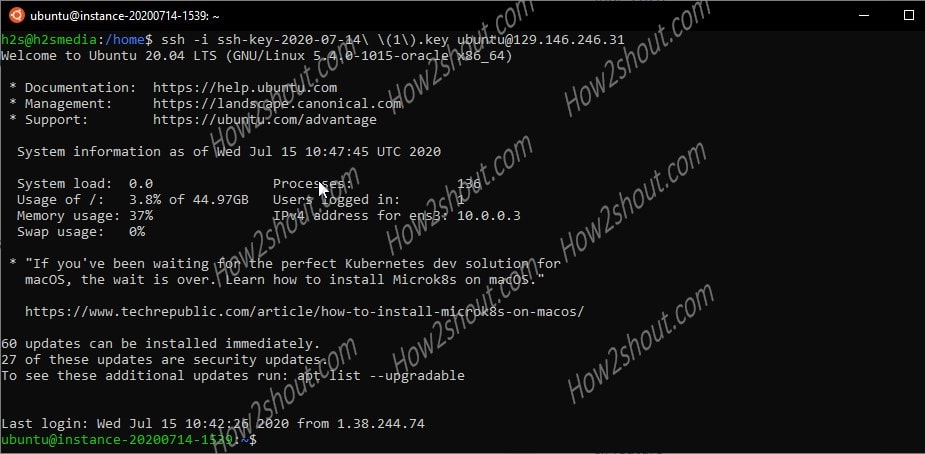
Now, we need to connect our instance using the private SSH you downloaded. If you are on Linux then simply open command terminal and type:
sudo ssh -i <downloaded-ssh-key-path> instance-username@ipaddress
The username and IP address both are available on the Instance page:
You can also connect using the same command in Command Terminal of Windows 10/8/7.
In case you get an error of too open SSH key then see this tutorial: Connect Oracle Cloud Instance via SSH.
Install webserver & WordPress
From here onwards, once you get to connect to your cloud instance of Ubuntu or CentOS everything thing will be the same and we can install whatever we want as we do on the local setup of the CLI Linux server. However, will show the steps of setting up Apache webserver and WordPress over it to make things easier for you. Apart from Apache, you can go for OpenLiteSpeed or Nginx as per your requirement. And for GUI web management, you can opt CentOS Web Panel or other open-source control panels.
Because of limitation of 1GB RAM on the forever free plan of Oracle Cloud, if you don’t want to use any web server control panel then simply install the Apache, PHP, MySQL (LAMP) webserver manually, and then WordPress over it.
The CPU used for the Oracle Cloud free plan is AMD EPYC 7551 32-Core Processor with 1 core availability.
See:
How to install CentOS Web Panel alternative to paid WHM CPanel

After doing all this, how will I map my domain to Oracle Cloud?
Please explain.
Go to the service from where you have bought the domain and open the DNS records page. Now create A record and in the Ipaddress box type the public IP address of your Oracle cloud WordPress instance. Whereas in the Name box simply type the domain name or @
Wait for few minutes to get the records updated.
All good and well, but …
The MySQL database is NOT part of the Always Free Tier, but of the 30-day Trial Credits. After that, if you don’t upgrade to a paid plan, Free Trial service instances and data will be deleted. Effectively, that means that you will not be running WordPress for free. You’ll be indeed installing for free, but not running it for free.