Do you want to create virtual machines with high performance on Ubuntu 20.04 or 18.04 LTS Linux? Then try out the VMware Workstation Player Virtualization software platform- free for personal usage.
Although Oracle VirtualBox is already available for Windows, Linux, FreeBSD, and macOS with lots of options, the performance of the Vmware Player are much better. Yes, if you go through VirtualBox, its interface and options with various features are much better than VMware Player, however, when it comes to the performance of the Virtual Machines installed over it the VMware Payer sweeps the ground. I am saying this after using both, the Windows 10 VM on VirtualBox runs with lags and sluggishness, and the same on Workstation works quite smoothly and lag-free. Moreover, the VMware Tools installation makes it very easy to drag and drop files and copy past texts between host and guest.
Here in this tutorial, we will learn the process of installing VMware Player not only on Ubuntu 20.04 Focal fossa but also for the Linux Mint, elementary OS, Zorin OS, and other similar Linux distros.
Download VMware Workstation player Linux edition
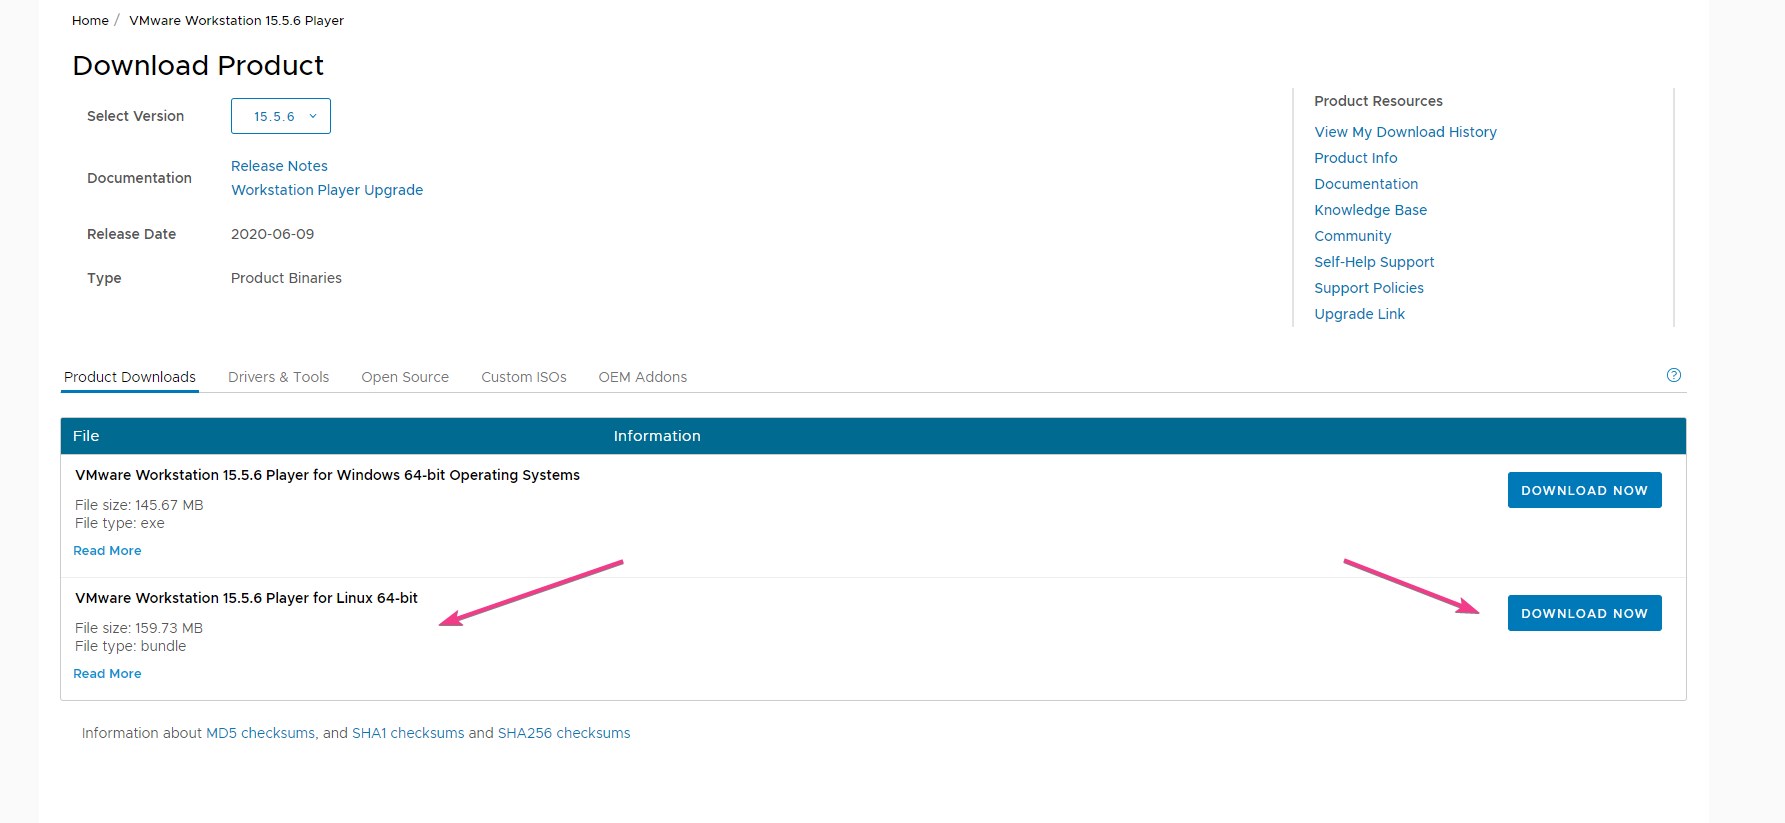
Open the browser on your Ubuntu Linux and visit Vmware’s official website to download the workstation player, here is the link to make things a little way. On the download page click on the button given in front of “VMware Workstation x.x.x Player for Linux 64-bit”.
Open command terminal
Once the downloading of the Vmware Linux bundle is completed, open the command terminal on Ubuntu Linux or the one you are using. Go to Applications and search terminal, as it appears, click to run the same.
Switch to the Downloads directory
By default whatever we download from the internet using the browser goes to the Downloads directory, thus first switch to that. The command for the same is given below.
cd Downloads
ls
Run Vmware Workstation Player Script to install
You will see your downloaded Player file there, simply run the script installation command with sudo access, here is the that.
sudo sh VMware-Player-*-*.x86_64.bundle
Wait until the installation gets completed.
Run VMware Player
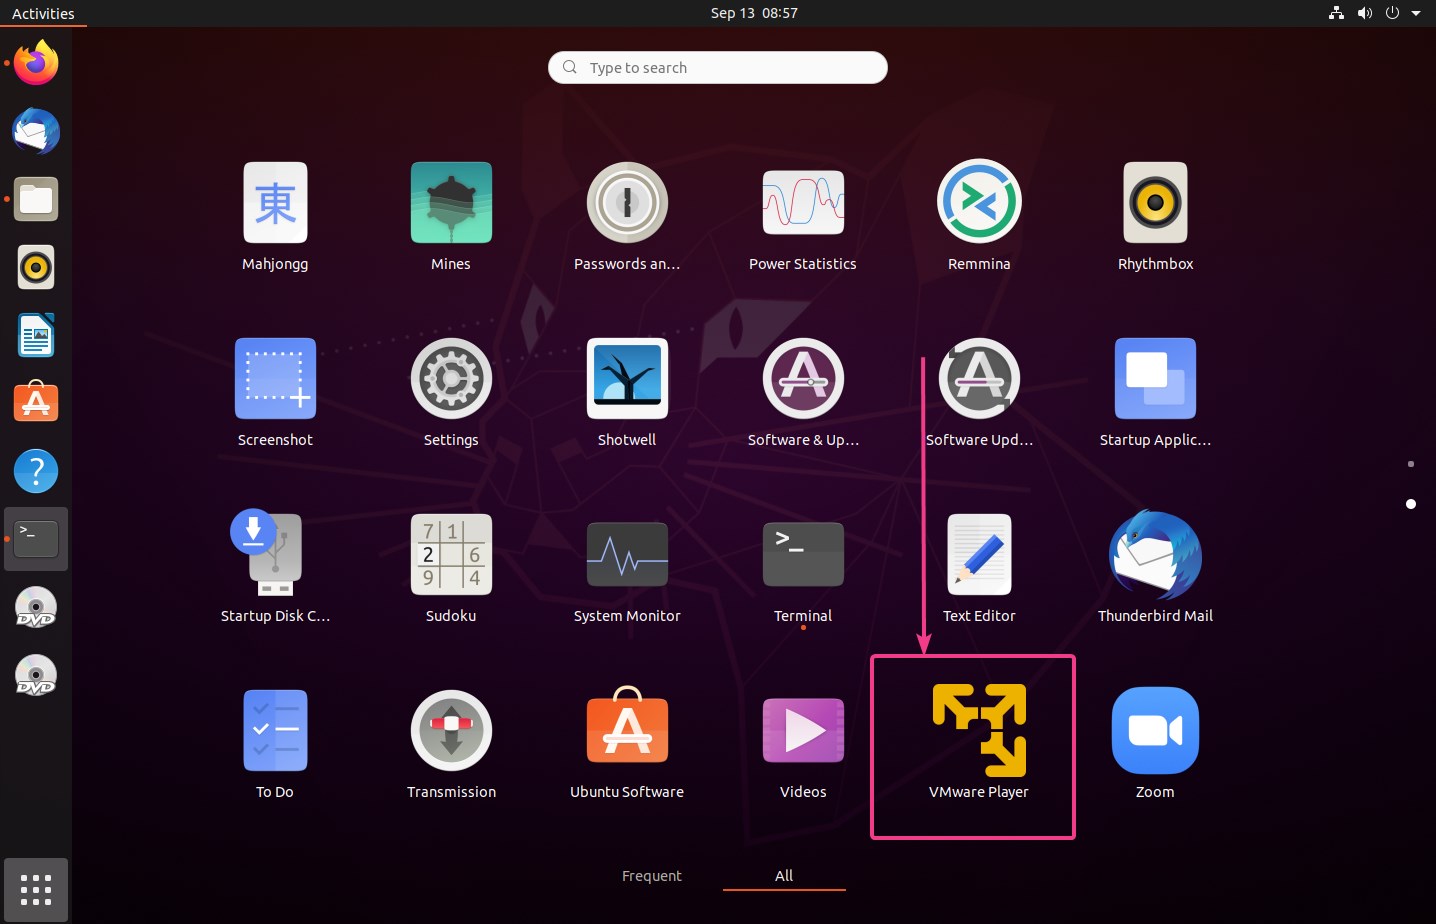
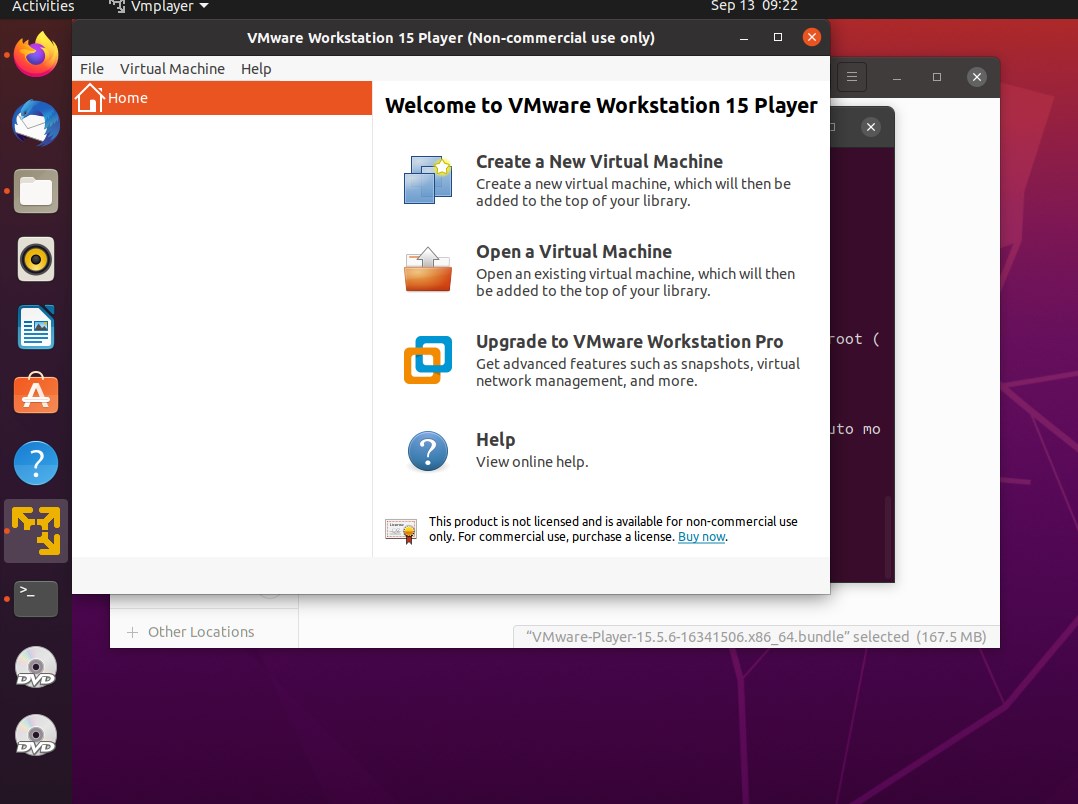
Go to Applications and search for it, as the icon for the Workstation appears, click to run it.
Errors- vmware unable to install all modules vmmon vmnet
In case you get Gcc not found and Kernel modules compiling error upon starting the Vmware, then you have to install them. For that, first, close the Vmware Player window and then run the below two commands:
sudo apt install gcc
sudo apt-get install build-essential
After that start the Vmware player again and start installing the modules. If you still have the error then follow the further steps.
Download the latest vmware-host-modules – VMMON and VMNET
Visit: https://github.com/mkubecek/vmware-host-modules
There as per your Vmware Player station, download the module file. For example– while doing this article the version of Workstation was 16.2.3, hence we download the same module file in zip format.
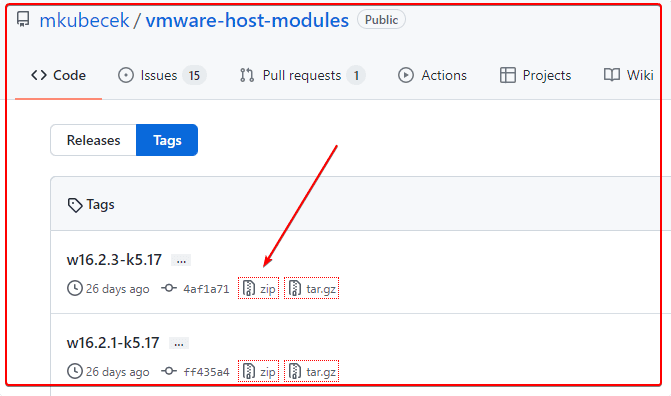
The file we download using the browser goes to the Downloads directory. Hence, switch to that.
cd Downloads
Unzip the file:
If you don’t have Unzip then install the sane:
sudo apt install unzip
Extract the downloaded file:
unzip file-name
Replace the file-name with the one you have downloaded. For example, in our case it was w16.2.3-k5.17.zip, hence the command to extract it will be:
unzip w16.2.3-k5.17.zip
Check and Switch to extracted module folder:
To know, what is the extracted file name, type:
ls
Now, switch to that:
cd extracted-folder-name
Note: Replace extracted-folder-name with the folder name on your system. For example:
cd vmware-host-modules-w16.2.3-k5.17
Create tar files of the modules:
tar -cf vmmon.tar vmmon-only
tar -cf vmnet.tar vmnet-only
Copy files to /usr/lib/vmware.modules.source :
sudo cp -v vmmon.tar vmnet.tar /usr/lib/vmware/modules/source/
4. Install modules
sudo vmware-modconfig --console --install-all
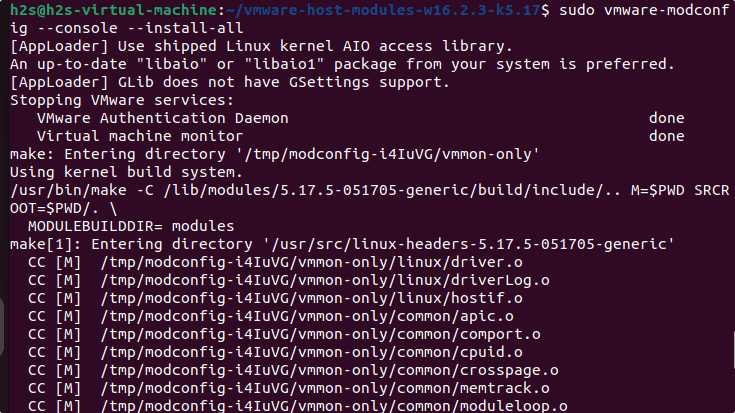
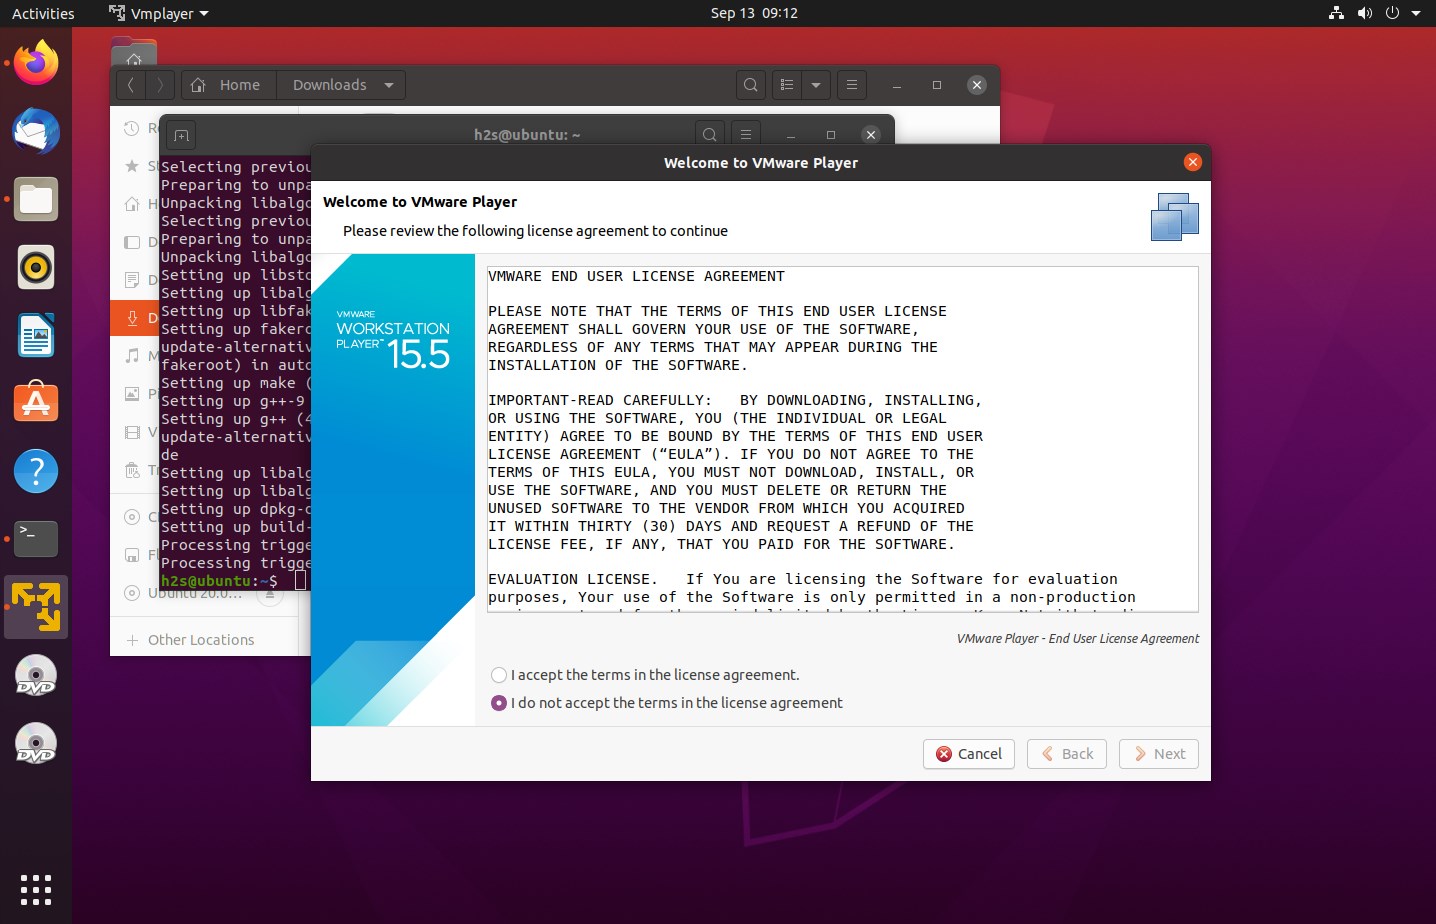
Once the installation gets completed, go to your Application launcher and run the Vmware Workstation player and you will see the window asking you to accept the Vmware License.
Start creating virtual machines finally.
Uninstall or Remove Vmware Linux
If something goes wrong and you don’t want the Vmware Workstation player on Ubuntu 22.04 Linux, then use the given commands to uninstall it.
cd /usr/bin
sudo vmware-installer -u vmware-player
Also Learn: How to install Vmware Tools on Ubuntu for Host to Guest clipboard and Apadtable VM guest resolution.


Not working for me, here are the errors I keep getting and for the life of me I can’t figure out why I keep getting these errors …
— Begin Copy & Paste —
make[1]: Entering directory ‘/usr/src/linux-headers-5.18.0-051800-generic’
warning: the compiler differs from the one used to build the kernel
The kernel was built by: gcc (Ubuntu 11.3.0-3ubuntu1) 11.3.0
You are using: gcc (Ubuntu 11.2.0-19ubuntu1) 11.2.0
CC [M] /tmp/modconfig-VbyFFp/vmmon-only/linux/driver.o
CC [M] /tmp/modconfig-VbyFFp/vmmon-only/linux/driverLog.o
CC [M] /tmp/modconfig-VbyFFp/vmmon-only/linux/hostif.o
CC [M] /tmp/modconfig-VbyFFp/vmmon-only/common/apic.o
In file included from /tmp/modconfig-VbyFFp/vmmon-only/common/apic.c:19:
/tmp/modconfig-VbyFFp/vmmon-only/./include/vm_basic_defs.h:54:12: fatal error: stddef.h: No such file or directory
54 | # include
| ^~~~~~~~~~
compilation terminated.
— End Copy & Paste —
I also have the latest version of gcc installed on my machine, per Ubuntu anyway:
leb@2700x:~$ gcc –version
gcc (Ubuntu 11.2.0-19ubuntu1) 11.2.0
Copyright (C) 2021 Free Software Foundation, Inc.
This is free software; see the source for copying conditions. There is NO
warranty; not even for MERCHANTABILITY or FITNESS FOR A PARTICULAR PURPOSE.
So I’m really not sure how the kernel was built by gcc 11.3.0 and I cannot find an update for 11.2.0 to 11.3.0
Suggestions anyone?