Ubuntu 22.04 LTS Linux is the upcoming Long term version from Canonical developers, set to be released in April 2022. Although while doing this tutorial to know the steps for the Ubuntu 22.04 LTS installation on VirtualBox, this Linux was in the beta stage. However, that doesn’t matter even the process will be the same for stable or any old versions of Ubuntu.
Most of the users would already be familiar with VirtualBox, if not, then it is an open-source project from Oracle to run virtual machines on all popular operating systems such as Windows, Linux, macOS, and FreeBSD.
Steps to install Ubuntu 22.04 LTS Virtual machine in VirtualBox
1. Download Ubuntu 22.04 LTS ISO
First, we must have a bootable ISO file of Ubuntu 22.04 Linux. For that, we can visit the official Image download page of Ubuntu. While performing this tutorial the Daily build ISO image of this Ubuntu version was available. Hence, we use the same. You can use the linked text to get it.
2. Get VirtualBox
Of course, to install Ubuntu 22.04 Virtual machine on VBox, we also need to have VirtualBox installed on our existing host operating system. For Windows users, the installation of VirtualBox is just like any other software once you have the setup from its official website. Whereas Debian, Ubuntu, and its based Linux users can use the command –
sudo apt install virtualbox
3. Run VBox and Create Virtual Machine
Once you have installed the VirtualBox or if you already have then simply run it.
Create New VM
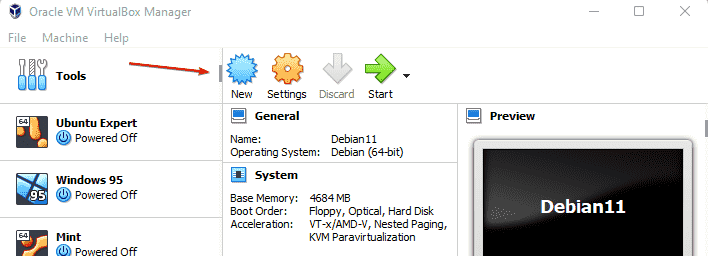
After that click on the “New” button to create a fresh Virtual machine.
Name Virtual Machine
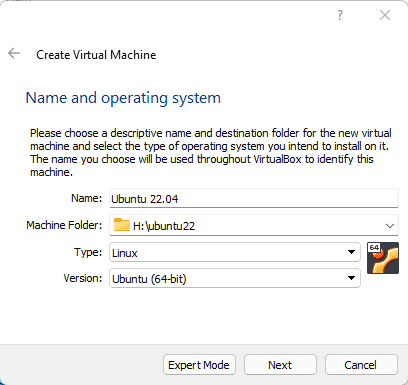
Give some name to your virtual machine such as “Ubuntu 22.04” where select Type- Linux and version to Ubuntu.
Set RAM for VM
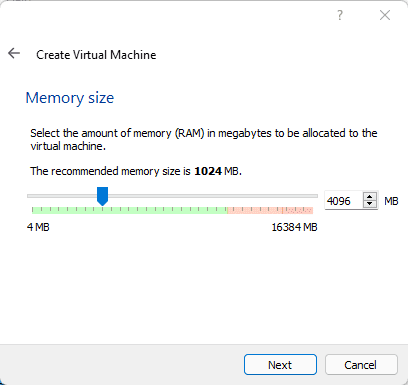
For good performance and if your host system allows, then set the RAM to 4GB or less as per your system configuration.
Create Virtual Hard disk
Let the “Create a virtual hard disk now” option be selected and move to the next step.
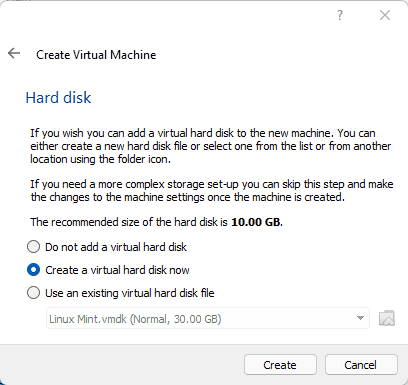
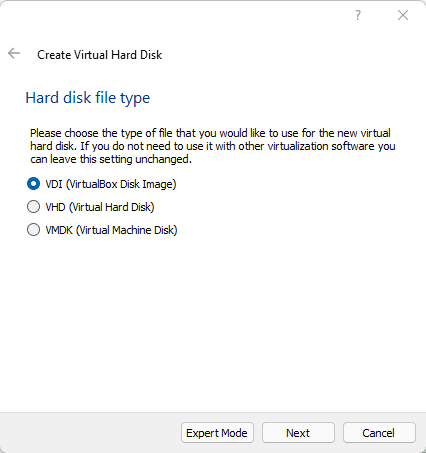
If you have any plan to use the Virtual hard disk later in VMware then go for VMDK otherwise let the default option VDI be selected.
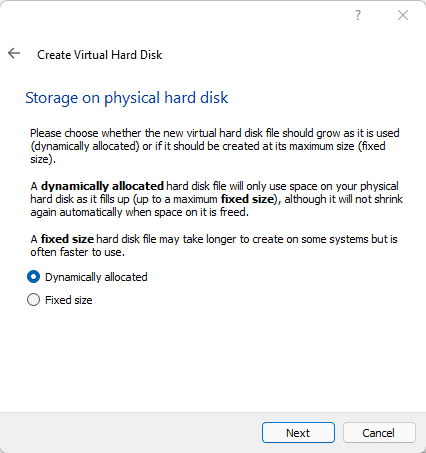
Also, let the default “Dynamic Allocated” option be selected as it is. Allocate around 30GB of virtual space.
4. Start Ubuntu 22.04 Virtual Machine
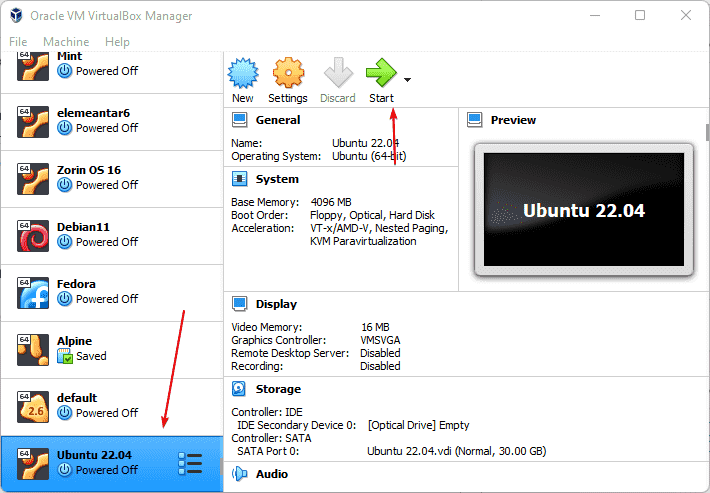
Finally, once all the above steps are done, you will see a newly created virtual machine on your VirtualBox. Select that from the left side panel and hit the Start button.
5. Add Ubuntu 22.04 ISO to VirtualBox
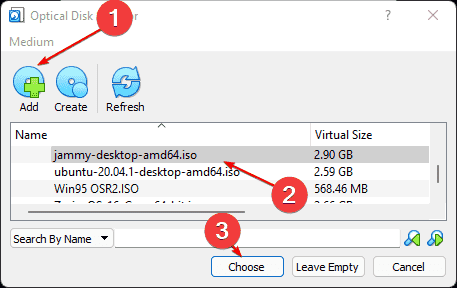
Now, we need to select the downloaded Ubuntu 22.04 ISO file as a Start-up disk to boot our Virtual machine with that. For that click on the “Folder” icon.
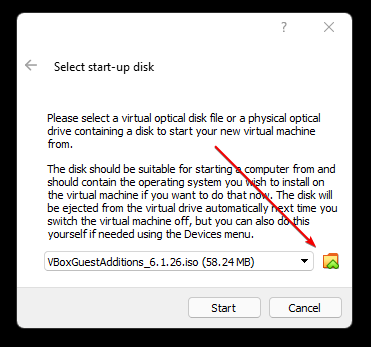
After clicking on the Folder icon, a pop-up window will open to add the ISO image file. Click on the “Add” button and then select your downloaded ISO file. As you have done that, the same ISO image will show in the “ISO Image selection ” area. Scroll to your added Ubuntu 22.04 LTS image and hit the Choose button.
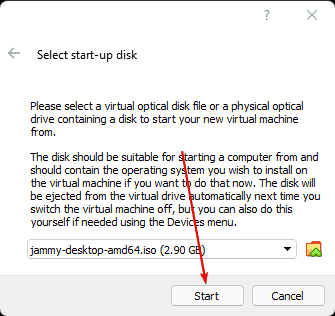
Finally, click on the Start button.
6. Grub Menu to select and boot the OS
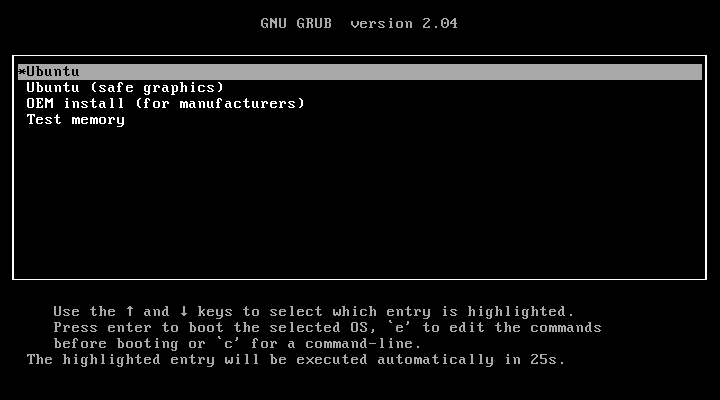
Once the virtual machine is started, you will see the Grub menu as the first screen to select “Ubuntu” to boot with it.
7. Install Ubuntu 22.04 on VirtualBox
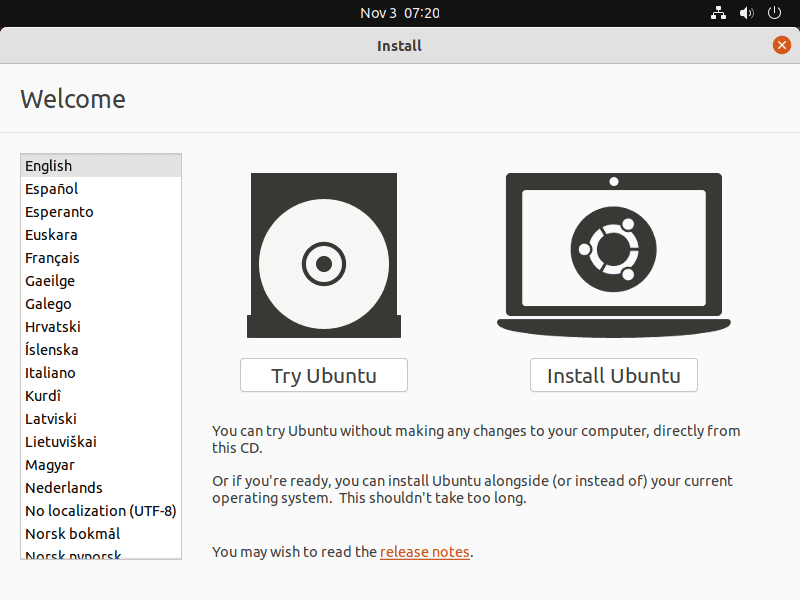
Finally, from the installation wizard, click on the “Install Ubuntu” button. Whereas those who just want to try it in a Live environment can go for the “Try Ubuntu“.
8. Normal Installation or Minimal Installation
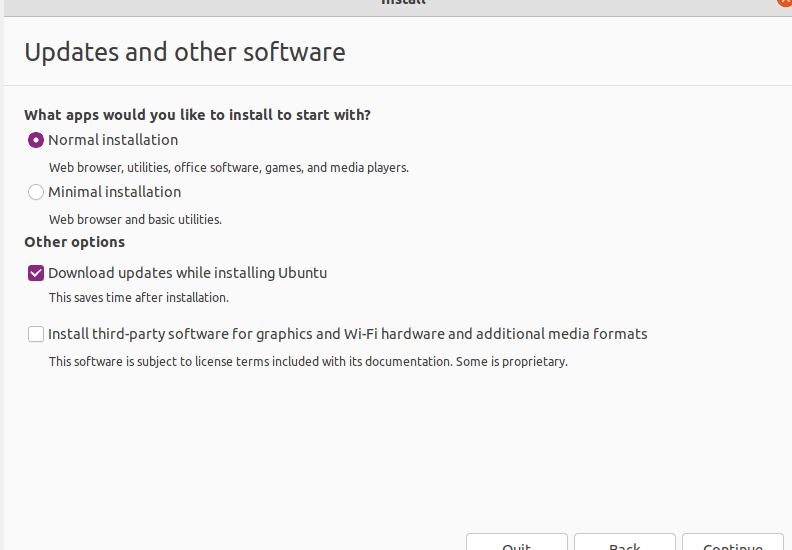
Follow the wizard, set languages, and other things. When you reach to “Updates and Other Software” window, select between “Normal Installation” and “Minimal Installation“, and Continue further. If you are using GPU then select the last option as well.
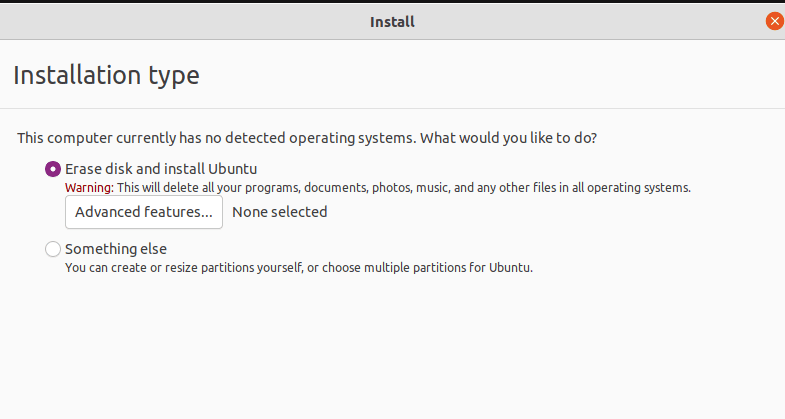
9. Erase disk and Install Ubuntu
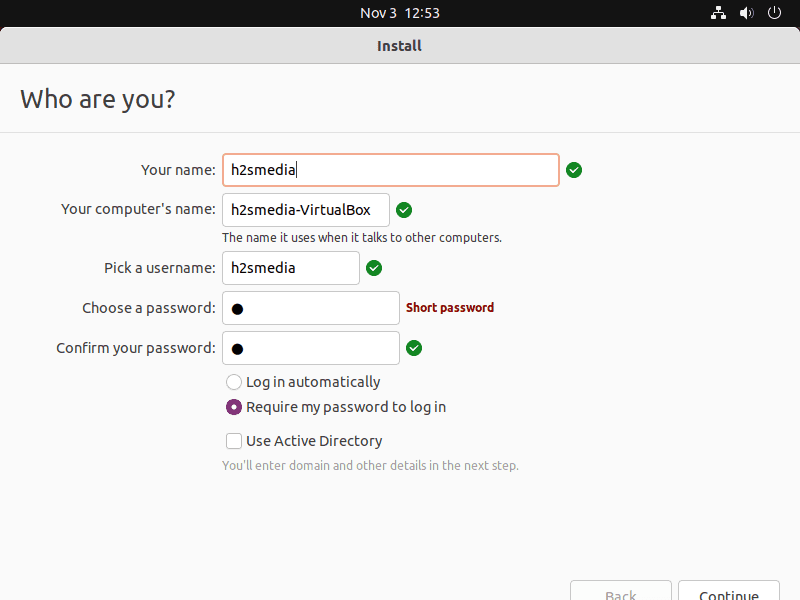
10. Set Username and password
As the installation gets completed, hit the Restart button and then press the Enter key when you are asked to remove the inserted ISO disk image.
11. Install VirtualBox Guest Additions
Offline Method: Using In-built Guest Additions ISO Image
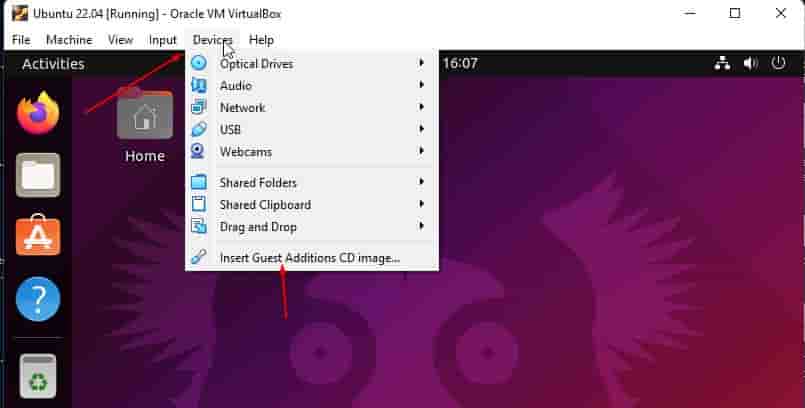
Click on the Devices menu given on VirtualBox and select the “Insert Guest Additions CD Image…” option.
Open Command terminal, the shortcut is – Ctrl+ALt+T.
After that switch to Inserted ISO directory, using the given command:
cd /media/$USER/VBox_GAs_*
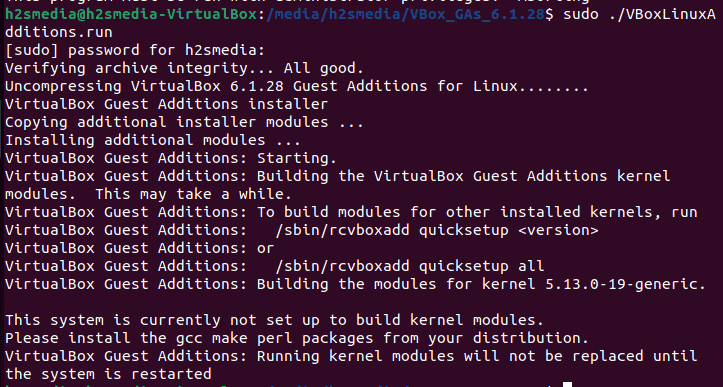
Run the script to install guest additions:
sudo bash ./VBoxLinuxAdditions.run
Restart the system once done…
reboot
Online Method: Using the Internet
If you have an internet connection on your virtual machine then simply run the given command:
Of course, open the terminal and then use APT package manager:
sudo apt install virtualbox-guest-additions-iso virtualbox-guest-utils virtualbox-dkms
for Extension pack:
sudo apt install virtualbox-ext-pack
Restart the system…
reboot
- Again go to VirtualBox Menu, select Devices.
- From the drop menu select “Shared Clip ⇒ Bidirectional“
- Once more, click Devices, select Drag & Drop then Bidirectional.


