Have a look at the commands in this tutorial for the installation of PhpMyAdmin on Debian 11 Bullseye using Apache webserver.
PhpMyAdmin is an open-source web-based application that offers a web interface to directly manage and access MySQL or MariaDB databases from anywhere/remotely using a web browser. The user can use the web graphical user interface provided by it to interact with databases without having extensive knowledge of the commands. Hence, even a newbie with some knowledge of computers can manage database tables for querying data and manipulating individual parameters.
Well, like any other popular CMS platform such as WordPress, PhpMyAdmin is also written in PHP programming language used to create dynamic websites by calling up various scripts. This allows the users to not only easily install PhpMyAdmin but also access it locally and remotely. The web interface uses the combination of user and password to authenticate the user – two-factor authentication can increase security.
With this tool, numerous procedures can be carried out using a convenient interface that would otherwise have to be carried out by an administrator using a command line with text input.
Steps to install phpMyAdmin on Debian 11 Bullseye
1. Update your server/desktop
If your Debian 11 server is already up to date then leave this step; otherwise, it is recommended to run one of the system update commands to not only get the latest version of the already installed packages but also refresh the system repository cache along with some needed tools.
sudo apt udpatesudo apt install nano wget2. Install Apache, PHP & MariaDB
Well, phpMyAdmin requires an Apache web server to get served over a web browser using the local or internet network. Hence, we need to install the same on your Debian 11 server.
sudo apt install apache2Start and enable and check the status of the web server.
sudo systemctl enable --now apache2to check the status:
systemctl status apache2Install PHP
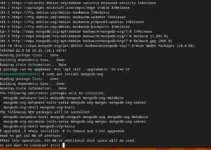
As phpMyAdmin is based on PHP, hence we need to install it along with common extensions.
sudo apt -y install wget php php-cgi php-mysqli php-pear php-mbstring libapache2-mod-php php-common php-phpseclib php-mysqlInstall Database
If you already have a database installed on your Debian 11 server where you are installing phpMyAdmin or you have a Database on any other server which you want to manage using phpMyAdmin then leave these steps otherwise install MariaDB/MySQL.
sudo apt install mariadb-serverStart and enable:
sudo systemctl enable --now mariadbCheck Status:
systemctl status mariadbSecure Database server:
Once the installation is completed, run the given command to secure your database server.
sudo mysql_secure_installationGo through the guided text-based wizard to secure the MariaDB/MySQL.
3. Create Database User for phpMyAdmin on Debian 11
Although it is not necessary to create a separate user to access with phpMyAdmin, however, it is recommended to improve the overall security, moreover, after disabling the remote root login, we have to create a new user to access all databases.
sudo mysqlCREATE USER 'user'@localhost IDENTIFIED BY 'password';GRANT ALL PRIVILEGES ON *.* TO 'user'@localhost IDENTIFIED BY 'password';FLUSH PRIVILEGES;exit;Note: Replace the user and password with whatever you want to set.
4. Download the latest phpMyAdmin package
Although we can install PHPMyAdmin directly using the default repository of Debian 11 Bullseye, however, the version will be old. Hence to get the latest one, download its archive file manually using the given command:
wget https://www.phpmyadmin.net/downloads/phpMyAdmin-latest-all-languages.tar.gz5. Configure phpMyAdmin on Debian 11 Bullseye
Once you have the zipped phpMyAdmin file on your server or system, create some required directories and move the file to an appropriate location for accessing it through the Apache webserver.
sudo tar xvf phpMyAdmin-latest-all-languages.tar.gz
sudo mv phpMyAdmin-*-all-languages/ /var/www/html/phpmyadmin
Now, create a configuration file by copying the one already present in the phpMyAdmin folder;
cd /var/www/html

sudo cp phpmyadmin/config.sample.inc.php phpmyadmin/config.inc.php
Also create a Temporary folder for storage, if not exist.
sudo mkdir /var/www/html/phpmyadmin/tmpGenerate a secret key to use with phpMyadmin:
openssl rand -base64 32Copy the generated key for cookie authentication.
Now, edit the phpMyAdmin configuration file
sudo nano /var/www/html/phpmyadmin/config.inc.phpand past it in the front of the line :
$cfg[‘blowfish_secret’] = ‘your-key‘; /* YOU MUST FILL IN THIS FOR COOKIE AUTH! */
Replace your key with the generated one.

Also, scroll down and add this line.
$cfg['TempDir'] = '/var/www/html/phpmyadmin/tmp';
After all, this, Save the file by pressing Ctrl+O, hitting the Enter key, and then Ctrl+X to exit.
Change file permissions:
Given access to Apache user to read the files:
sudo chown -R www-data:www-data /var/www/html/phpmyadminCreate an Apache configuration file
sudo nano /etc/apache2/conf-available/phpmyadmin.confCopy Paste the following lines:
Alias /phpmyadmin /var/www/html/phpmyadmin

<Directory /var/www/html/phpmyadmin/>
   AddDefaultCharset UTF-8
   <IfModule mod_authz_core.c>
          <RequireAny>
      Require all granted
     </RequireAny>
   </IfModule>
</Directory>

<Directory /var/www/html/phpmyadmin/setup/>
   <IfModule mod_authz_core.c>
     <RequireAny>
       Require all granted
     </RequireAny>
   </IfModule>
</Directory>
Activate new configuration:
sudo a2enconf phpmyadmin.confRestart the Apache Webserver
To make the changes apply successfully, restart the Apache webserver.
sudo systemctl restart apache26. Access web interface
Enter the server IP address or domain name along with /phpmyadmin folder in the browser URL to access this web database management platform.
For example:
https://server-ipaddress/phpmyadminor
http://your-comain.com/phpmyadminNote: If you get this notification- The phpMyAdmin configuration storage is not completely configured, some extended features have been deactivated. Find out why. Or Alternatively, go to the ‘Operations’ tab of any database to set it up there.
Then simply click on the Find out why link and click the “Create” link to automatically create phpmyadmin database.


Dear Sir,
I have followed accurately your method how to install apache2, php, mysql and phpmyadmin however at the end of it apache2 would not load with various errors. the culprit seemed to be the file phpmyadmin.conf . Doing a hexdump of the copied file you suggested there are two instances where extraneous hex characters are present which apache2 did not like . These where in line (extra c2 before a0) and line 9. I retyped again the files instead of copying and now apache started without error.
Copied version from your site:-
pi@raspberrypi:/etc/apache2/conf-available $ hexdump -C your_phpmyadmin.conf
00000000 41 6c 69 61 73 20 2f 70 68 70 6d 79 61 64 6d 69 |Alias /phpmyadmi|
00000010 6e 20 2f 76 61 72 2f 77 77 77 2f 68 74 6d 6c 2f |n /var/www/html/|
00000020 70 68 70 6d 79 61 64 6d 69 6e 0a 3c 44 69 72 65 |phpmyadmin.|
00000050 0a 20 c2 a0 20 41 64 64 44 65 66 61 75 6c 74 43 |. .. AddDefaultC|
00000060 68 61 72 73 65 74 20 55 54 46 2d 38 0a 20 c2 a0 |harset UTF-8. ..|
00000070 20 3c 49 66 4d 6f 64 75 6c 65 20 6d 6f 64 5f 61 | . ..|
00000090 c2 a0 20 c2 a0 20 c2 a0 c2 a0 c2 a0 20 3c 52 65 |.. .. …… . …..|
000000b0 a0 c2 a0 c2 a0 52 65 71 75 69 72 65 20 61 6c 6c |…..Require all|
000000c0 20 67 72 61 6e 74 65 64 0a 20 c2 a0 c2 a0 c2 a0 | granted. ……|
000000d0 20 3c 2f 52 65 71 75 69 72 65 41 6e 79 3e 0a 20 | . |
000000e0 c2 a0 20 3c 2f 49 66 4d 6f 64 75 6c 65 3e 0a 3c |.. …. .. . ……|
00000150 20 3c 52 65 71 75 69 72 65 41 6e 79 3e 0a 20 c2 | . .|
00000160 a0 c2 a0 c2 a0 c2 a0 c2 a0 20 52 65 71 75 69 72 |……… Requir|
00000170 65 20 61 6c 6c 20 67 72 61 6e 74 65 64 0a 20 c2 |e all granted. .|
00000180 a0 c2 a0 c2 a0 20 3c 2f 52 65 71 75 69 72 65 41 |….. . .. .|
000001b0 0a |.|
000001b1
pi@raspberrypi:/etc/apache2/conf-available $
The correct version
pi@raspberrypi:/etc/apache2/conf-available $ hexdump -C phpmyadmin.conf 00000000 41 6c 69 61 73 20 2f 70 68 70 6d 79 61 64 6d 69 |Alias /phpmyadmi|
00000010 6e 20 2f 76 61 72 2f 77 77 77 2f 68 74 6d 6c 2f |n /var/www/html/|
00000020 70 68 70 6d 79 61 64 6d 69 6e 0a 3c 44 69 72 65 |phpmyadmin.|
00000050 0a 20 41 64 64 44 65 66 61 75 6c 74 43 68 61 72 |. AddDefaultChar|
00000060 73 65 74 20 55 54 46 2d 38 0a 20 3c 49 66 4d 6f |set UTF-8. c|
00000080 6f 72 65 2e 63 3e 0a 20 20 3c 52 65 71 75 69 72 |ore.c>. . Requir|
000000a0 65 20 41 6c 6c 20 67 72 61 6e 74 65 64 0a 20 20 |e All granted. |
000000b0 3c 2f 52 65 71 75 69 72 65 41 6e 79 3e 0a 20 3c |. …. . . Requir|
00000140 65 20 61 6c 6c 20 67 72 61 6e 74 65 64 0a 20 20 |e all granted. |
00000150 20 20 3c 2f 52 65 71 75 69 72 65 41 6e 79 3e 0a | .|
00000160 20 20 3c 2f 49 66 4d 6f 64 75 6c 65 3e 0a 3c 2f | . .|
0000017c
pi@raspberrypi:/etc/apache2/conf-available $
Thanks and regards
Hi,
i followed your guide – everything worked finde for me but when i call my ip/phpmyadmin i only get a blank white site. Do you know why?
sudo apt install wget php php-cgi php-mysqli php-pear php-mbstring libapache2-mod-php php-common php-phpseclib php-mysql
thank you very much it works 🙂
openssl rand -base64 32
generates a key that is longer than 32 characters, resulting in a warning/error in phpmysql:
“The secret passphrase in configuration (blowfish_secret) is not the correct length. It should be 32 bytes long.”
/**
* This is needed for cookie based authentication to encrypt password in
* cookie. Needs to be 32 chars long.
*/
$cfg[‘blowfish_secret’] = ”;
Thank you very much for the how-to. I managed to configure on a Debian 11, following step by step. I’ve been trying other tutorials, but this is the definitive one! Thanks again.
Thanks sir, very straight forward. I only had to change the systemctl command to service
Thanks fellow!. Very well explained, simple and concise. Was very helpfull for me. Congratalutations!!