LAMP is a stack of open-source software to provide a fully functional web server environment for various PHP and other web applications. LAMP stands for Linux, Apache, MySQL, PHP/Perl/Python, and here we learn how to install them on CentOS alternative AmlaLinux 8.x server.
The basic function of a web server is to deliver HTML and image content via the HTTP or HTTPS protocol. Whenever we type some web address in our browser, it requests the webserver for the delivery of called web page available on Web server suing either port 80 (“HTTP: //”) or port 443 (“HTTPS: //”).
The Apache HTTP server is one of the most widely used web servers. It has been around for a good 20 years and powering millions of web servers. However, there are a couple of good alternatives such as the Nginx Web server that uses PC resources more sparingly and is often better suited for less powerful hardware and servers with a large number of accesses. In some cases, the combination of Apache with Nginx as a reverse proxy can also be useful.
Steps to Install LAMP Server on AlmaLinux 8
The steps are given here to install and set up a Lamp server on AlmaLinux 8 can also be used for CentOS 8 Stream and RHEL 8 Linux server or desktop systems.
1. Run system update
As most of the time before starting any tutorial, I recommend readers to run a system update command, that will not 0nly make sure all the installed packages are in their latest state but also rebuild the system repository cache. This helps in the process of any software or services installation run smoothly.
sudo dnf update
2. Install Apache web server on AlmaLinux 8
The next step is to install the Apache webserver on AlmaLinux along with some other tools to run httpd on this free RHEL based on Linux operating system. Simply run the below command:
sudo dnf install httpd httpd-tools

3. Enable and start Apache
Once the webserver is installed, let’s start its service and also make it automatically fire up with the system boot. This will ensure whenever you boot AlmaLinux you won’t need to start Apache manually.
Start it:
sudo systemctl start httpd
Enable it:
sudo systemctl enable httpd
Check the status of the webs Server service to ensure everything is running without any error.
sudo systemctl status httpd

4. Update FireWall rules
If you want to access the Apache webserver outside your local machine using some browser, then first we have to open ports 80 and 443 on our AlmaLinux server.
To open port 80 or HTTP:
sudo firewall-cmd --permanent --zone=public --add-service=http
For allowing port 443 or HTTPS:
sudo firewall-cmd --permanent --zone=public --add-service=https
Reload firewall to make changes into effect
sudo firewall-cmd --reload
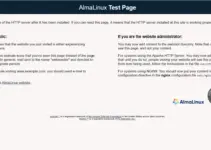
Now, we can connect to our AlmaLinux Apache web server by calling it in the browser. For that, open your browser and type the IP address of the server where you have installed the Apache.
http://your-server-ipadress

5. Install MySQL or MariaDB on AlmaLinux8
MySQL is an open-source database developed by Oracle whereas MariaDB is a fork that works similarly and uses the same command line as MySQL. You can install any of them as per your choice.
Command for MySQL
sudo dnf install mysql-server mysql
or
For MariaDB
sudo dnf install mariadb-server mariadb -y


Command to Start & Enable MySQL and MariaDB services
For MySQL:
sudo systemctl start mysqld

sudo systemctl enable mysqld
To check status:
sudo systemctl status mysqld
For MariaDB
sudo systemctl start mariadb

sudo systemctl enable mariadb
sudo systemctl status mariadb

6. Secure MySQL installation
This step will be the same whether you are using MySQL or MariaDB, it will give some options to follow and set some settings so that we can secure of Database from any common future threats.
mysql_secure_installation
You can set a root password for MySQL or MariaDB along with removing empty databases, restricting remote access except for localhost, removing anonymous users, and more…

7. Install PHP 7.2/7.3/7.4 or 8.0 on AlmaLinux 8
PHP is a popular scripting language that powers the dynamic content of millions of websites and apps, therefore, if you are planning to install web CMS like WordPress, then you have to set up PHP on your AlmaLinux server.
First, check what are PHP versions available to install:
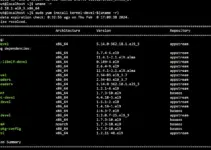
sudo dnf module list php

As you can see while writing the article the latest version of PHP in the default system’s AppStream repo was 7.4, although PHP 8 is already there, however, because lots of web applications still support PHP 7.x thus to provide wide compatibility and stability one should go for PHP 7.4…
Also by default, it will install PHP 7.2, to change that we need to configure and set 7.4 as the default/enable in the repo. For that run:
sudo dnf module reset php
sudo dnf module enable php:7.4
The above command changes the default version on the system repo to install.

—————————————————————————————————————
(Optional Step): Those who want the latest PHP 8.0 or any other version on their AlamLinux 8, can follow these steps:
1. Add Remi Repository
sudo dnf install http://rpms.remirepo.net/enterprise/remi-release-8.rpm
2. Run system update
sudo dnf update
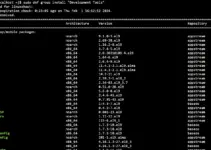
3. Check available Latest PHP versions
sudo dnf module list php

To install it first you have to set Remi’s PHP 8.0 as the default version to install on AlmaLinux 8, for that run:
sudo dnf module reset php
sudo dnf module enable php:remi-8.0
—————————————————————————–
Finally, run the command to install PHP and common extensions we require to use it with Apache and Mysql on our system:
sudo dnf install php php-common php-opcache php-cli php-gd php-curl php-mysqlnd

To get better performance for various applications using PHP, we can start (if not already) and enable PHP-FPM (FastCGI Process Manager) using the below commands:
sudo systemctl start php-fpm
sudo systemctl enable php-fpm
8. Test PHP
We have already installed Apache, MySQL, and PHP on our system, let’s check whether the PHP is working absolutely fine by calling its configuration detail in the browser.
sudo nano /var/www/html/info.php
If you don’t have a nano text editor then use vi and the above command will be: sudo vi /var/www/html/info.php
Add the following line in the info.php file we have created using the above command:
<?php
phpinfo ();
?>
To save the file type: Ctrl+X, press the Y key, and then Enter key.
Whereas, the users using VI editor- first to copy-past the above line they have to press
Insertbutton and thenEsconce editing is done followed by:qwto save and exit it.
Now, open your browser and type your server IP address along with file name info.php, we have created above:
http://your-server-ipaddress/info.php

To remove this file type:
sudo rm /var/www/html/info.php
9. Install phpMyAdmin
If you also want to manage your MySQL or MariaDB database using web graphical user interface then see our article: Install phpMyAdmin on AlmaLinux 8 with Apache
Conclusion:
So, these were some simple but detailed steps for installing and configuring Apache, MySQL, and PHP on AlamLinux 8 Server. In case you want to know something else related to this Linux or topic, the comment section is all yours…


I needed to restart apache after installing php for my phpinfo() script to show correctly in a browser, using: sudo service restart httpd