To create Android apps, the developers can download an official free-to-use platform called “Android Studio”. It is based on IntelliJ IDEA, a complete development environment, that bundles all the functions required for developing and debugging apps. This gives developers an alternative to the Android SDK, which essentially consists of Eclipse and the ADT plug-in. It is available to download and installs for Windows 10/8/7, macOS, Linux, and ChromeOS.
Android Studio comes with a development environment you can do the following things:
- Advanced build tools
- Powerful source code development (smart editing, advanced code refactoring, static code analysis)
- An improved GUI
- Easier access to Google services
- Open source development
Steps to install Android Studio on Ubuntu 20.04 LTS
Here we are using Ubuntu 20.04 LTS, however, the steps will be the same for Ubuntu 21.04/18.04 including Linux Mint, Debian, MX Linux, Elementary OS, and other similar derivatives Linux distros.
1. Run system update
To refresh the repositories of Ubuntu and to update the installed packages, let’s first run the system update command:
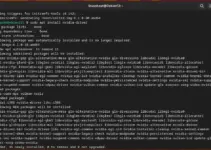
sudo apt update
2. Install Opensource Java
Android Studio requires JDK for proper working. While writing this tutorial, the latest version of Open JDK was available to install directly using the official repository of Ubuntu.
sudo apt install default-jdk
Once the installation is done, check the version by typing: java -version
3. Command to install Android Studio
There are two ways to install Android Studio on Ubuntu 20.04 LTS- one is using the SNAP package manager and another one is by downloading the Android Studio package manually. However, as SNAP is disabled on Linux Mint, by default, thus we will show both methods. Use the one which seems appropriate to you.
See– how to enable SNAP on Linux Mint
1st Method using SNAP:
It is the easiest method to install this developing platform on Linux. And while writing this tutorial, the latest version of Android Studio to install via Snapcraft was 4.1.3.0. It could be different in your case, however, the command to get it using SNAP will be the same.
sudo snap install android-studio --classic
Furthermore, if you don’t want to use the command-line interface, then directly open Ubuntu Software Center and install Studio using the graphical user interface.
- Go to All Applications
- Search for Ubuntu Software
- Open it and click on the Search icon given on the left top side.
- Type Android studio, wait for a few seconds, and as it appears in the results, click it.
- Finally, hit the Install button and it will automatically get installed on your Linux OS.


#2nd Method using manually downloaded package
4. Download Android Studio IDE packages
Now, for some reason you don’t want to use the SNAP package, then it is possible to get the Android Studio package meant to install on the Linux system directly from the official website. Here is the link, visit the page and download the latest IDE package available for Linux.
5. Unpack the Studio Tar file
Once you have downloaded the file, it’s time to unpack it. Follow the following commands:
cd Downloads

tar -xf android-studio-*.*-linux.tar.gz
6. Run the Android Studio configuration script
After extracting the package and moving it to the local folder, let’s run the script to configure this Android app development and emulator platform.
sh android-studio/bin/studio.sh
In case you already have some previous configuration or installation folder then you can select that otherwise let the default option be selected.


Select the way you want to set up the development environment for the Android studio. For installing selective components go for Custom otherwise let the Standard option be selected.

7. Select UI Theme -Dark or Light
Although we can set it later as well, if you want then do it here to make the dark or light theme default.

8. Create Android Studio Desktop Shortcut and Command-Line Entry
Once the installation is done. You will see the Android Studio, Create a new project and give some name to your project and you will be on the main screen of this app developing platform.
Click on the Tools and select Create Desktop Entry option to create a shortcut to easily access Android Studio from All Applications or Desktop.

Whereas to run Studio from the command line, select Create Command-Line launcher. Once that is done, you will be able to start the platform by simply typing
studio
in the terminal.