If you have a single network interface and want to bind several IP addresses to it then on Ubuntu Linux, it is very easy to perform and hand in multiple scenarios. For example, it is an efficient method when the system or a rented root server has only a single network card, and the user wants to host multiple websites under different IP addresses.
Well, with the concept of virtual network interfaces, Linux offers an elegant solution for binding many IP addresses to one network adapter.
When we have multiple physical network cards, then each one gets a unique name, e.g., eth0 for the first card or eth1 for the second network card. Although each of them will have its unique IP address, we can also configure each physical network card with several virtual interfaces with their IP address.
For this purpose, the physical interface ( eth0, eth1, eth2, etc.) followed by a colon and the number of the virtual interface to be created must be specified.
Let’s assume you have a single NIC (Network interface card) eth0 and want to create three virtual interfaces to assign multiple IP addresses to this NIC, thus it will be denoted as eth0:0, etho:1, eth0:2.
The virtual network interfaces can be configured with the same tools as their physical counterparts. To do this, we can use a Graphical user interface as well as a Command-line, here we will show both.
Add Multiple IP addresses to Ubuntu NIC using GUI
To manually bind multiple IP addresses using the graphical user interface, access the Wired or Wireless network settings of your Ubuntu 20.04 LTS Linux. The steps given here will be the same for other versions such as Ubuntu 18.04,19.04, 16.04…
Step 1: Open Ubuntu Network Manager Settings
Go to the top panel of Ubuntu and on the right side click on the Network icon. From the drop-down menu select Wired Connected then Wired Settings.
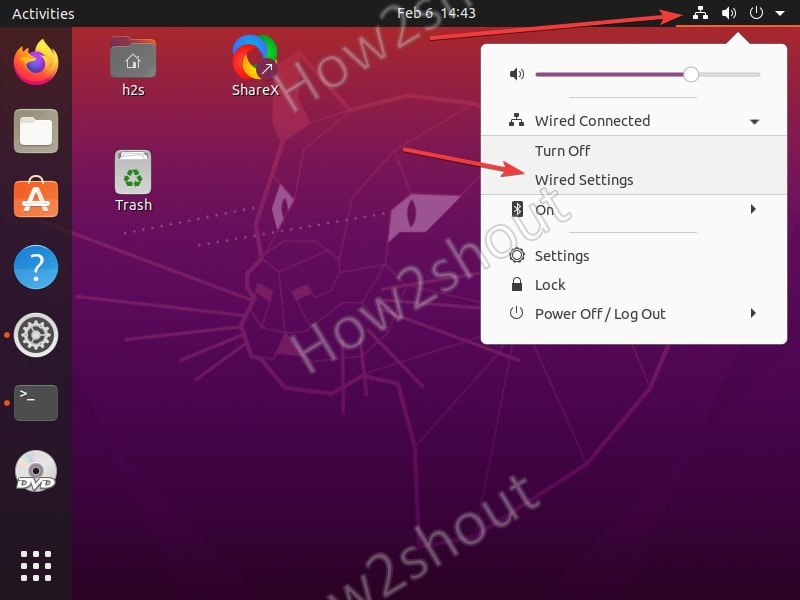
After that click on the Gear icon to open further settings related to a particular active connection on your system.
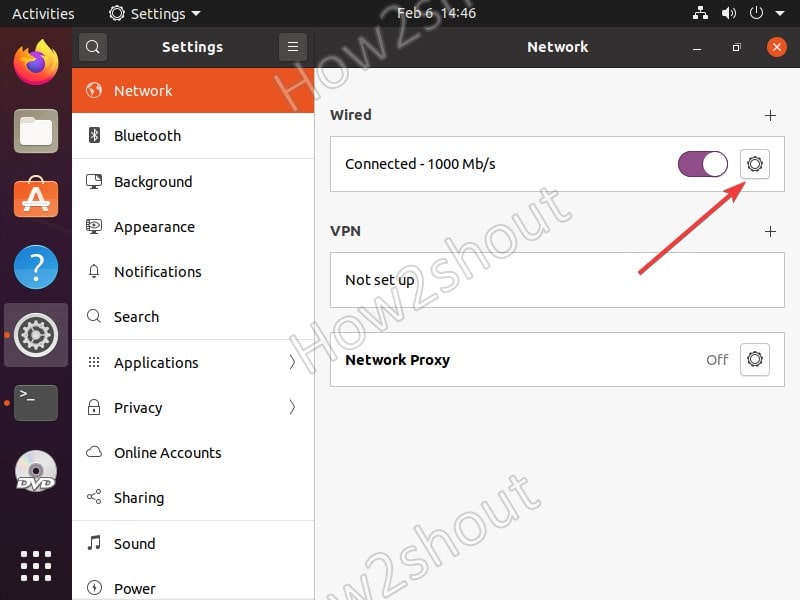
Step 2: Select Ipv4
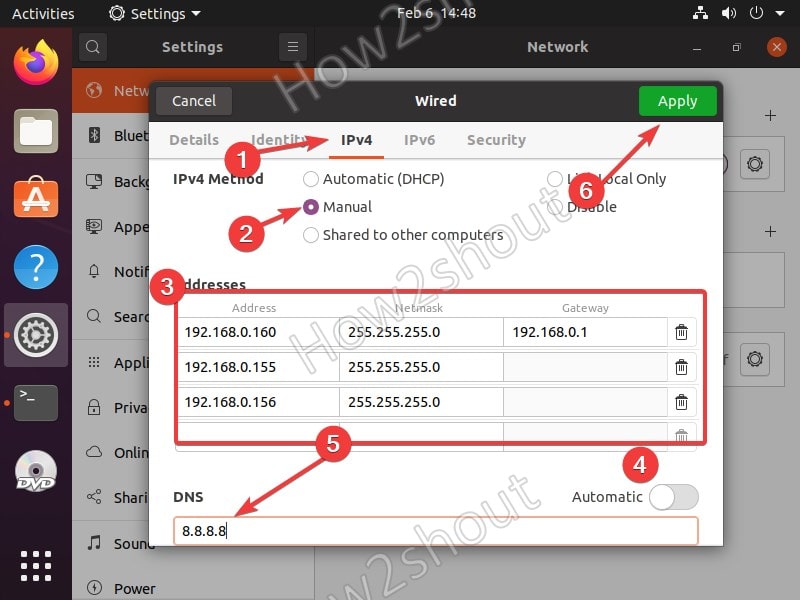
Click on the Ipv4 tab to access different methods for fetching IP addresses on your Linux system.
Step 3: Add multiple IP addresses manually
Now, select the manual method to provide the IP address on your Ubuntu Linux computer. After that you will see a section to add multiple IP addresses, so add the ones which you want to use as shown in the below screenshot.
In the DNS, we can either use the common 8.8.8.8 / 4.4.4.4 or else the one you have from your naming server. Once you are done save the settings by clicking on Apply button…
Step 4: Turn off and On network connection
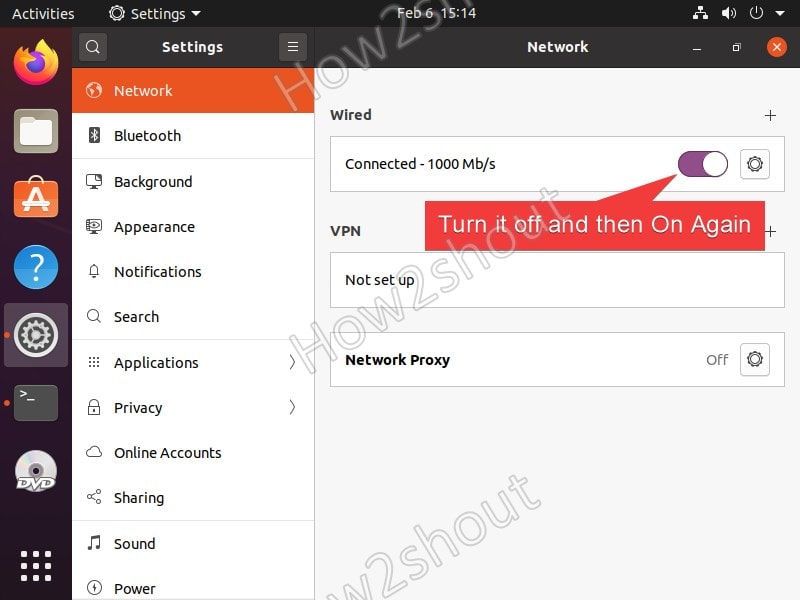
Now, to make changes into effect, click on the Toggle button available in Settings under the Network section to turn it off, and clicking again will turn it On again.
Step 5: Check the IP address in the Terminal
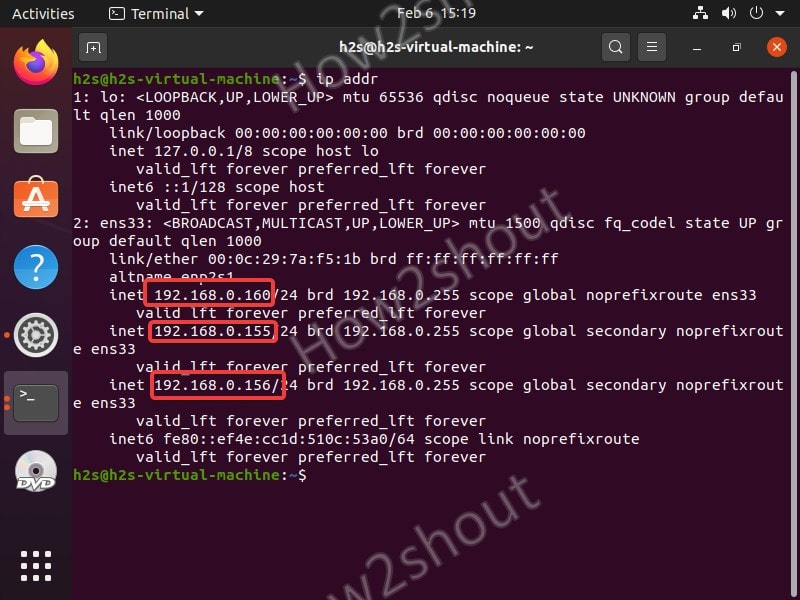
To confirm whether our Ubuntu’s system Network interface has binned successfully to the multiple IP addresses we have manually assigned, open Command Terminal and run the below command:
ip addrYou will see something like given in the screenshot. All the IP addresses which have been set by us manually are showing in the command terminal, this means we have multiple addresses to communicate to the same network interface.
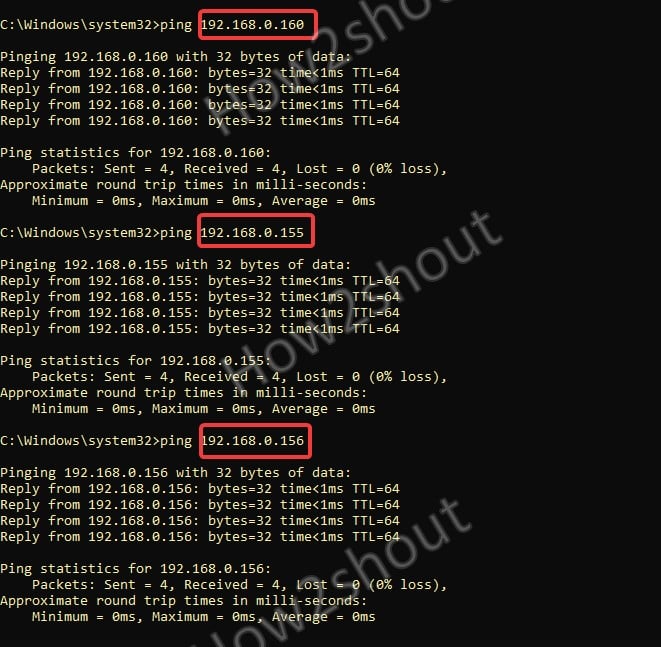
We can confirm this further by pinging each IP address we have set with some other computer or virtual machine available in the same network. Here we are using a Windows PC to ping the addresses of our Ubuntu 20.04 LTS machine. And all of them were communicated.
Add secondary IP- Temporary Multiple IP addresses using Terminal
We can also set multiple addresses temporarily using the command line, which means the moment we restart our Ubuntu PC or server, it again gets back to the original single DHCP address.
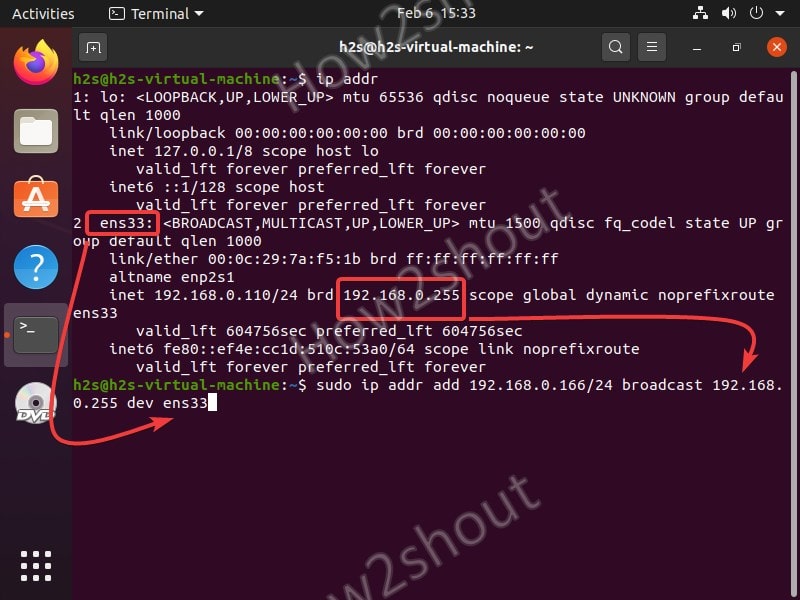
sudo ip addr add 192.168.0.166/24 broadcast 192.168.0.255 dev ens33Change the green color values, the first one is the IP address you want to set and then broadcast which is nothing but just the range of addresses, and in the last your Network interface name. If you don’t know about these, you can just type ip addr to see the existing address, brd, and interface name.
In case you also want to label it then the above command will be used in this way:
sudo ip addr add 192.168.0.166/24 broadcast 192.168.0.255 dev ens33 label ens33:1 The only thing you have to add is the label with the interface name followed by the number of the virtual interface that could be 1, 2, 3…..
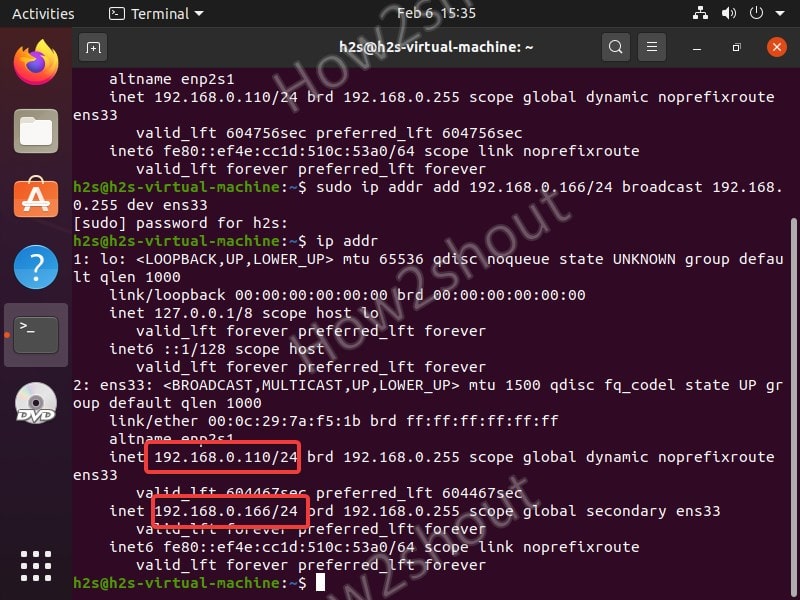
After the command, you will see one more address for your network interface to communicate.
Remove Secondary IP addresses
In case you want to remove the address without restarting your computer then in the command replace add with del
sudo ip addr add 192.168.0.166/24 broadcast 192.168.0.255 dev ens33Then the same command will be like this:
sudo ip addr del 192.168.0.166/24 broadcast 192.168.0.255 dev ens33Thus, in this way, we can bind multiple Ip addresses to our Ubuntu Server or Desktop permanently using a Graphical user interface and temporarily via a command line terminal.


